
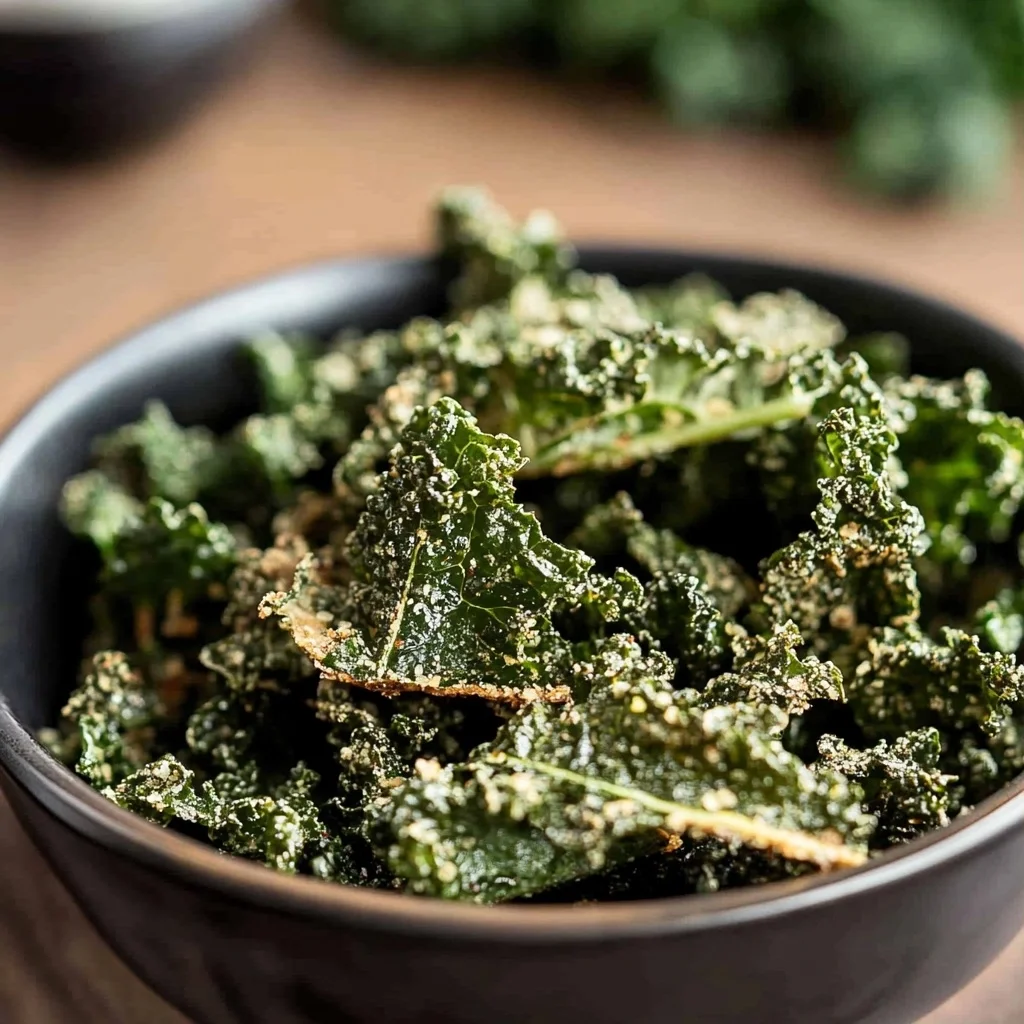
Imagine the satisfying crunch of kale chips, each bite exploding with a delightful blend of savory spices that dance on your taste buds. The earthy aroma wafts through the air, making it impossible to resist reaching for another handful, especially when you remember how effortlessly they transform a simple snack into a gourmet experience.
I still chuckle at the time I brought a batch of kale chips to a party, claiming they were “the ultimate snack” while watching friends skeptically nibble on them at first. But as laughter filled the room and crumbs flew, those crispy greens became the unexpected star of the evening, proving that even healthy treats can steal the show during game night or movie marathons.
Why Will You Keep Making kale chips?
Crispy perfection: Enjoy the delightful crunch of kale chips that satisfy your snack cravings without the guilt.
Quick prep: Ready in just 30 minutes, this recipe is perfect for busy days or last-minute gatherings.
Flavorful options: Customize with garlic powder or nutritional yeast for an irresistible cheesy twist.
Healthy snacking: Packed with nutrients, these chips are a wholesome alternative to traditional snacks.
Versatile treat: Great for dipping, topping salads, or simply enjoying on their own – they’ll be a hit with everyone!
kale chips Ingredient List
- 1 bunch Kale – Stems removed and leaves torn into bite-sized pieces ensure a crispy, flavorful crunch in your kale chips.
- 1 tablespoon Olive oil – Extra virgin olive oil is preferred for its rich flavor and health benefits.
- 1 teaspoon Salt – Adjust to taste; salt enhances the natural flavor of the kale chips.
- 1 teaspoon Garlic powder (Optional for flavor) – Adds a savory kick, making your kale chips even more delicious.
- 1 teaspoon Nutritional yeast (Optional for a cheesy flavor) – Provides a cheesy taste without dairy, perfect for those who love that flavor profile.
How to Make kale chips
1. Preheat the oven to 350°F (175°C).
This initial step ensures your kale chips bake evenly, achieving that delightful crispy texture.
2. Wash and dry the kale leaves thoroughly.
Rinse the kale under cool water, then pat it dry with a clean towel or salad spinner to remove excess moisture.
3. Remove the stems and tear the leaves into bite-sized pieces.
Discard those tough stems and create uniform pieces for even cooking — think of portions that fit perfectly in your hand!
4. Toss the kale with olive oil, salt, garlic powder, and nutritional yeast until evenly coated.
In a large bowl, mix everything together gently but thoroughly, ensuring each leaf is kissed by flavor.
5. Spread the kale leaves in a single layer on a baking sheet lined with parchment paper.
This allows for proper airflow and crisping; make sure they’re not overcrowded for best results.
6. Bake for 15-20 minutes, or until the edges are crispy but not burnt.
Keep an eye on them as they cook to achieve that perfect golden-brown crunch without any charred bits.
7. Remove from the oven and let cool before serving.
Allowing them to cool will enhance their crispiness — you’ll want to savor every crunchy bite!
Optional: Enjoy with your favorite dip for added flavor!
Exact quantities are listed in the recipe card below.
Tips for the Best kale chips
- Dry Thoroughly: Ensure kale leaves are completely dry before tossing with oil to prevent sogginess during baking.
- Don’t Overcrowd: Spread the kale in a single layer on the baking sheet; overcrowding can lead to uneven cooking and chewy chips.
- Watch the Time: Keep an eye on your kale chips as they bake; they can quickly go from perfectly crispy to burnt, so check around 15 minutes.
- Flavor Variations: Experiment with spices like smoked paprika or cayenne for an extra kick, but also remember that less is more!
- Cool Down: Allow the kale chips to cool on the baking sheet; this helps them crisp up even more before serving.
How to Store and Freeze kale chips
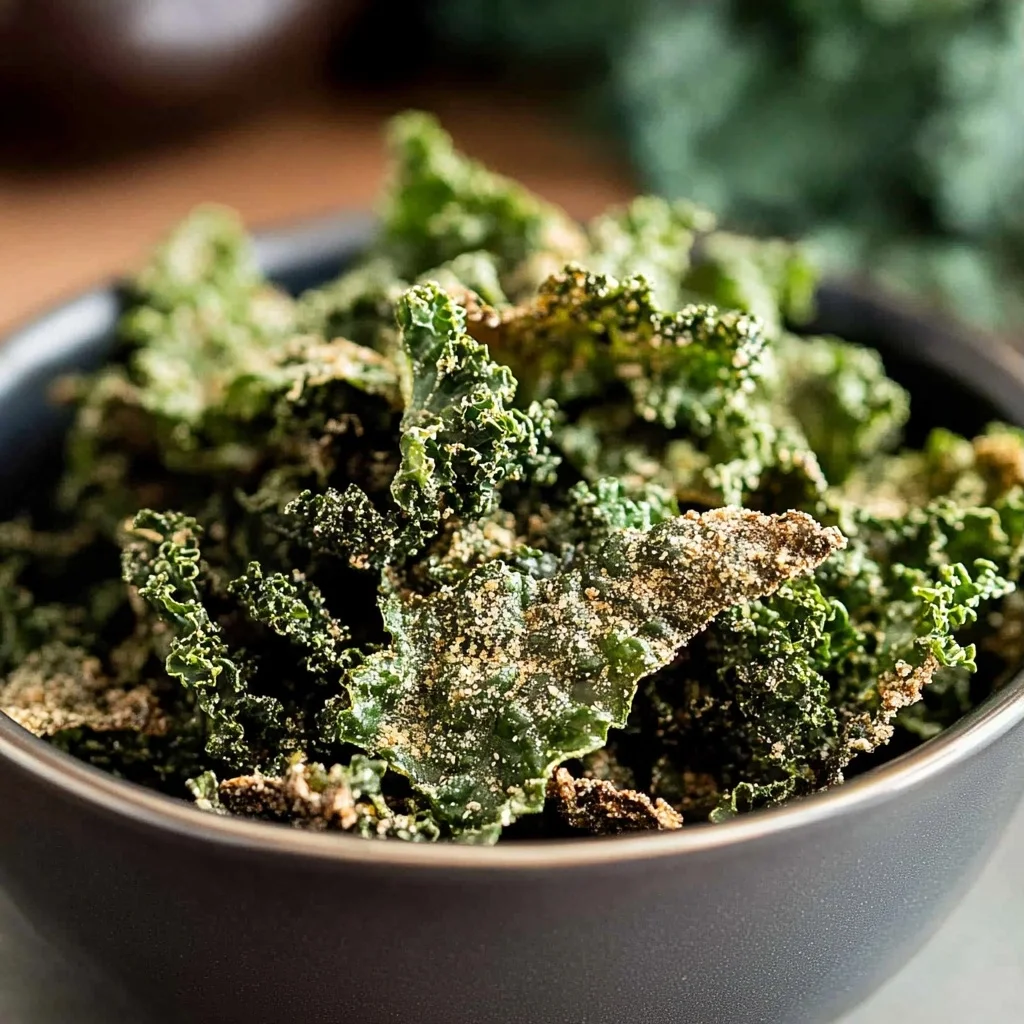
- Room Temperature: Enjoy your crispy kale chips fresh for up to 2 hours if left out, but they tend to lose their crunch quickly after that.
- Fridge: For longer storage, keep your kale chips in an airtight container in the fridge for up to 3 days. This helps maintain their crispiness.
- Freezer: If you want to save them for later, freeze your kale chips in a resealable bag for up to 1 month. Just be sure they’re completely cooled before sealing.
- Reheating: To restore some crunch, pop the kale chips back in the oven at 350°F (175°C) for about 5 minutes. Enjoy them warm!
kale chips Your Way
Feel free to let your creativity shine and customize these delightful snacks to suit your taste buds!
- Spicy Kick: Add a sprinkle of cayenne pepper for a fiery twist. The heat will dance on your palate, making every bite an adventure. If you enjoy bold flavors, this variation will certainly awaken your senses!
- Zesty Lemon: Squeeze fresh lemon juice over the kale before baking for a bright, tangy flavor. This refreshing addition elevates the overall taste and brings a cheerful burst to each crunchy piece.
- Cheesy Goodness: Use a tablespoon of grated Parmesan cheese instead of nutritional yeast for a rich flavor. This swap adds a savory depth that cheese lovers will adore; just remember to adjust the salt accordingly!
- Herb Infusion: Toss in dried herbs like oregano or thyme for an aromatic twist. These herbs not only enhance the flavor but also fill your kitchen with an inviting aroma that tempts everyone nearby.
- Sweet & Savory: Drizzle a bit of maple syrup before baking for a unique sweet touch. This unexpected pairing creates a delightful contrast that may surprise you and your family during snack time.
- Smoky Flavor: Incorporate smoked paprika for an enticing depth. The smoky notes will remind you of summer barbecues, adding warmth to this healthy treat.
- Nutty Crunch: Sprinkle sesame seeds on top before baking for extra texture and nuttiness. This tiny addition makes each chip even more satisfying, offering a delightful crunch with every bite!
Make Ahead Options
Kale chips are the ultimate snack for meal prep enthusiasts, offering a deliciously healthy crunch that’s easy to whip up. To get ahead, you can wash and dry the kale leaves, remove the stems, and tear them into bite-sized pieces up to 24 hours in advance. Simply store them in an airtight container in the fridge. You can also pre-mix the olive oil, salt, garlic powder, and nutritional yeast (if using) for an effortless flavor boost when you’re ready to bake. When it’s time to serve, just toss the kale with your prepped seasoning blend, spread them on a lined baking sheet, and bake at 350°F (175°C) for 15-20 minutes until crispy. This way, you’ll savor fresh kale chips without the last-minute rush!
kale chips Recipe FAQs
How do I choose the best kale for my chips?
Look for fresh, vibrant green kale with crisp leaves and no wilting or browning. Curly kale tends to be a bit more tender and crispy when baked, while Lacinato (or dinosaur) kale has a slightly heartier texture. Whichever variety you choose, make sure the leaves are free of dirt and any signs of decay.
Can I store leftover kale chips?
Absolutely! Store your cooled kale chips in an airtight container at room temperature. They can last up to 3 days, but they’re best enjoyed within the first day or two for optimal crispiness. If you notice them getting soft, a quick re-crisp in the oven at 350°F (175°C) for about 5 minutes can revive their crunch!
Is it possible to freeze kale chips?
While freezing is an option, it’s not ideal for maintaining that delightful crunch! If you must freeze them, place cooled chips in a freezer-safe bag or container. However, be prepared for a change in texture once they thaw; they may lose their crispy appeal. Enjoy fresh whenever possible!
What can I do if my kale chips burn easily?
Burnt edges usually mean the temperature was too high or the cooking time was too long. Make sure to keep an eye on them during baking around the 15-minute mark, as all ovens vary slightly in heat distribution. If you’re unsure, check them frequently after the 15-minute mark to achieve that perfect crispy finish without burning.
How many servings does this recipe yield?
This recipe yields about 4 servings, making it a perfect snack for sharing (or keeping all to yourself!). With only 50 calories per serving, they’re a guilt-free indulgence that everyone will love.
Can I customize the seasonings on my kale chips?
Definitely! The beauty of kale chips lies in their versatility. Feel free to experiment with different spices like smoked paprika, cayenne pepper for heat, or even Parmesan cheese instead of nutritional yeast for a cheesy flavor. Just remember to adjust the salt accordingly based on your chosen seasonings!
Kale Chips
Ingredients
Method
- Preheat the oven to 350°F (175°C).
- Wash and dry the kale leaves thoroughly.
- Remove the stems and tear the leaves into bite-sized pieces.
- In a large bowl, toss the kale with olive oil, salt, garlic powder, and nutritional yeast until evenly coated.
- Spread the kale leaves in a single layer on a baking sheet lined with parchment paper.
- Bake for 15-20 minutes, or until the edges are crispy but not burnt.
- Remove from the oven and let cool before serving.