
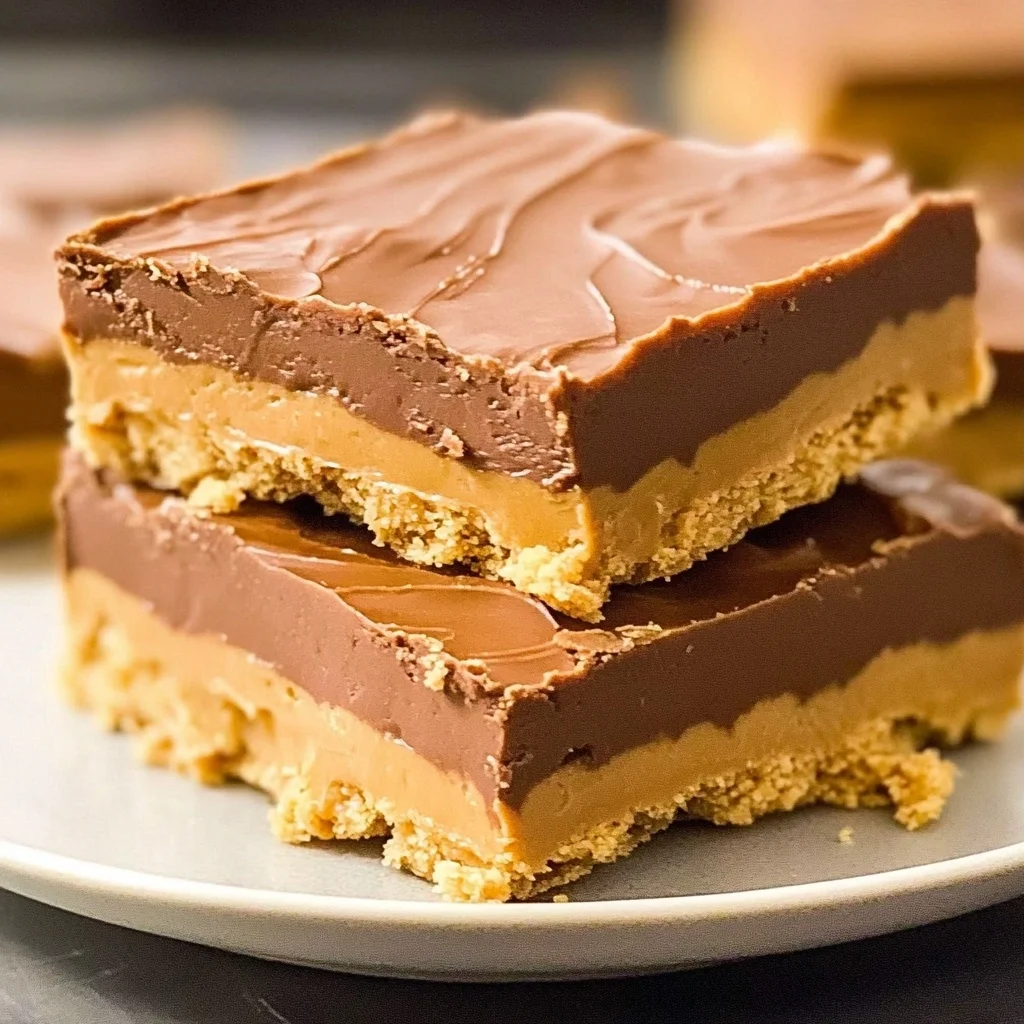
Imagine sinking your teeth into a warm, chewy square of nostalgia, where the sweet aroma of peanut butter mingles with a hint of vanilla, instantly transporting you back to carefree school days. These lunch lady peanut butter bars are not just a treat; they’re an experience filled with the delightful crunch of oats and the creamy richness that makes every bite feel like a warm hug.
As you gather around with friends or family, these bars become the star of any afternoon gathering or cozy movie night. Each bite promises a burst of flavors that will have everyone reminiscing about their favorite lunchroom memories while eagerly reaching for just one more square. Prepare to indulge in a deliciously rich journey that celebrates the simple joys of childhood and brings smiles to faces young and old.
Why Does Everyone Love lunch lady peanut butter bars?
Irresistibly chewy and delicious, these bars bring back the nostalgia of school lunches with every bite. Quick to make, you’ll whip them up in just 15 minutes of prep time! Rich peanut butter flavor is perfectly balanced with chocolate chips, making them a crowd-pleaser at any gathering. Versatile enough to customize with your favorite mix-ins, these bars are perfect for lunchboxes or an afternoon snack. Treat yourself and your loved ones to a delightful taste of childhood!
lunch lady peanut butter bars Ingredients
- For the Batter
- 1 cup unsalted butter (softened) – Use room temperature butter for a smooth batter that blends easily.
- 1 cup granulated sugar – This sweetener adds a lovely crisp texture to the bars.
- 1 cup brown sugar (packed) – The molasses in brown sugar provides a rich flavor that complements the peanut butter beautifully.
- 1 cup creamy peanut butter – Choose your favorite brand for that nostalgic taste of lunch lady peanut butter bars!
- 2 large eggs – Eggs help bind the ingredients together, creating a chewy consistency.
- 2 cups all-purpose flour – Flour gives structure to the bars, balancing the creaminess from the peanut butter.
- 1 teaspoon baking powder – This leavening agent ensures your bars rise and stay fluffy.
- 1 teaspoon vanilla extract – A splash of vanilla enhances the overall sweetness and flavor profile.
- 1/2 teaspoon salt – Salt balances the sweetness and heightens the flavors in your bars.
- For the Topping
- 1 cup chocolate chips – Melty chocolate chips add a delightful richness on top of your bars.
- 1/2 cup peanut butter (for drizzling) – Drizzle this over the top for an extra layer of creamy goodness!
How to Make lunch lady peanut butter bars
1. Preheat the oven to 350°F (175°C). Grease a 9×13 inch baking pan to prepare for your delightful treats.
2. Cream together the softened butter, granulated sugar, and brown sugar in a mixing bowl until smooth and fluffy, about 2-3 minutes.
3. Add the creamy peanut butter and mix until well combined, creating a rich base that will bring warmth to your kitchen.
4. Beat in the eggs one at a time, ensuring each is fully incorporated before adding the next, then stir in the vanilla extract for that comforting aroma.
5. Whisk together the flour, baking powder, and salt in a separate bowl. This ensures even distribution of leavening and flavor throughout your bars.
6. Gradually add the dry ingredients to the wet ingredients, mixing until just combined to maintain that chewy texture we love.
7. Spread the batter evenly into the prepared baking pan, smoothing it out for an even bake and golden finish.
8. Bake in the preheated oven for 25 minutes or until golden brown on top, filling your home with nostalgic scents of school lunches past.
9. Remove from the oven and immediately sprinkle chocolate chips over the top; they’ll melt beautifully into the warm batter.
10. Drizzle melted peanut butter over the chocolate chips for an extra layer of deliciousness that makes these bars truly special.
11. Allow to cool completely in the pan before cutting into bars; this helps them set perfectly for that ideal chewy bite.
Optional: Enjoy with a glass of cold milk for a delightful pairing!
Exact quantities are listed in the recipe card below.
Tips for the Best lunch lady peanut butter bars
- Butter Consistency: Ensure your unsalted butter is softened but not melted; this helps achieve a creamy texture in the batter.
- Sugar Measurements: Use packed brown sugar for the best flavor and texture; it adds moisture and richness to your lunch lady peanut butter bars.
- Mixing Technique: Cream the sugars and butter thoroughly before adding peanut butter; this ensures even distribution of sweetness throughout the bars.
- Egg Incorporation: Beat in each egg one at a time, which allows for better emulsification and a lighter, airier texture in your final dessert.
- Don’t Overmix: When combining wet and dry ingredients, mix just until combined to avoid tough bars. You want them chewy and soft!
- Cooling Time: Allow the bars to cool completely before cutting; this helps them set properly, making slicing easier and neater.
How to Store and Freeze lunch lady peanut butter bars

- Room Temperature: Keep your lunch lady peanut butter bars in an airtight container for up to 3 days to maintain their chewy texture.
- Fridge: For longer freshness, store them in the refrigerator for up to a week. Just remember to let them sit at room temperature before serving for the best flavor.
- Freezer: You can freeze individual bars wrapped tightly in plastic wrap and placed in a freezer-safe bag for up to 3 months. Thaw them overnight in the fridge before enjoying!
- Reheating: If you prefer them warm, pop a bar in the microwave for about 10-15 seconds. This will revive that gooey peanut butter goodness!
lunch lady peanut butter bars Your Way
Feel free to let your creativity shine as you customize these nostalgic treats to match your taste buds!
- Gluten-Free: Substitute all-purpose flour with a 1:1 gluten-free baking blend for a safe, chewy delight. This swap will keep the texture rich and satisfying without sacrificing flavor.
- Nut-Free: Use sun butter or soy nut butter instead of peanut butter for a deliciously creamy option that everyone can enjoy. These alternatives provide a similar richness while accommodating nut allergies.
- Chocolate Lovers: Mix in an additional 1/2 cup of chocolate chips into the batter for an extra chocolatey sensation. It’s an indulgent twist that makes each bite even more decadent!
- Oatmeal Crunch: Add 1 cup of rolled oats to the base mixture for a delightful chewiness and added texture. The oats bring a heartiness that complements the sweetness beautifully.
- Spicy Kick: Stir in 1 teaspoon of cinnamon or a pinch of cayenne pepper for a surprising warmth that elevates the flavors. This subtle heat adds depth to your classic bars, making them unforgettable.
- Fruit Fusion: Fold in 1 cup of chopped dried fruit, like cranberries or apricots, for a hint of tartness and natural sweetness. They not only enhance the flavor but also add lovely pops of color throughout.
- Vegan-Friendly: Replace eggs with flax eggs (2 tablespoons ground flaxseed mixed with 6 tablespoons water) and use coconut oil instead of butter for a plant-based version. These adjustments keep the bars moist while being kinder to our furry friends!
Make Ahead Options
These lunch lady peanut butter bars are perfect for meal prep, allowing you to savor that nostalgic flavor anytime you crave it. You can prepare the base ingredients—1 cup each of unsalted butter, granulated sugar, and packed brown sugar, along with 1 cup of creamy peanut butter, 2 large eggs, 2 cups of all-purpose flour, 1 teaspoon of baking powder, 1 teaspoon of vanilla extract, and 1/2 teaspoon of salt—up to 24 hours in advance. Just follow the initial steps: cream together the softened butter and sugars, mix in the peanut butter and eggs, then combine with the dry ingredients before spreading the batter in your greased pan. Bake as instructed for 25 minutes. For optimal quality when you’re ready to serve, store any leftover bars in an airtight container at room temperature for up to 3 days. Simply sprinkle on the chocolate chips and drizzle with melted peanut butter right before enjoying these delicious lunch lady peanut butter bars!
lunch lady peanut butter bars Recipe FAQs
What type of peanut butter should I use for these bars?
Using creamy peanut butter is ideal for achieving that rich, smooth texture. However, if you prefer a bit more crunch, feel free to substitute with crunchy peanut butter! Just make sure it’s well-mixed before adding it to your batter.
How should I store leftover peanut butter bars?
Once cooled, store the bars in an airtight container at room temperature for up to 3 days. If you want to keep them fresh longer, refrigerate them for up to a week. Just remember to let them come back to room temperature before enjoying!
Can I freeze lunch lady peanut butter bars?
Absolutely! These delicious bars freeze wonderfully. Once they are completely cool, cut them into individual pieces and wrap each one tightly in plastic wrap. Place them in a freezer-safe bag or container, and they will stay fresh for up to 3 months. Just thaw in the fridge overnight when you’re ready for a sweet treat!
What can I do if my bars turn out too dry?
If your bars come out dry, it may be due to overbaking or measuring errors. Make sure to bake them for just 25 minutes until they’re golden brown and a toothpick inserted comes out with a few moist crumbs. Next time, consider checking them a minute or two earlier!
How many servings does this recipe yield?
This recipe yields 12 scrumptious servings! Each bar is about 250 calories, making them the perfect after-school snack or dessert that brings back those nostalgic lunch lady vibes.
Can I customize the toppings on my peanut butter bars?
Of course! While chocolate chips and drizzled peanut butter are classic choices, you can get creative by adding chopped nuts, coconut flakes, or even caramel drizzle on top for extra sweetness. The sky’s the limit—make these bars uniquely yours!
Lunch Lady Peanut Butter Bars
Ingredients
Method
- Preheat the oven to 350°F (175°C). Grease a 9x13 inch baking pan.
- In a mixing bowl, cream together the softened butter, granulated sugar, and brown sugar until smooth.
- Add the peanut butter and mix until well combined.
- Beat in the eggs one at a time, then stir in the vanilla extract.
- In a separate bowl, whisk together the flour, baking powder, and salt.
- Gradually add the dry ingredients to the wet ingredients, mixing until just combined.
- Spread the batter evenly into the prepared baking pan.
- Bake in the preheated oven for 25 minutes or until golden brown.
- Remove from the oven and immediately sprinkle chocolate chips over the top.
- Drizzle melted peanut butter over the chocolate chips.
- Allow to cool completely in the pan before cutting into bars.