
Strawberry Heart Cocktail Garnish Tutorial for Romantic Drinks
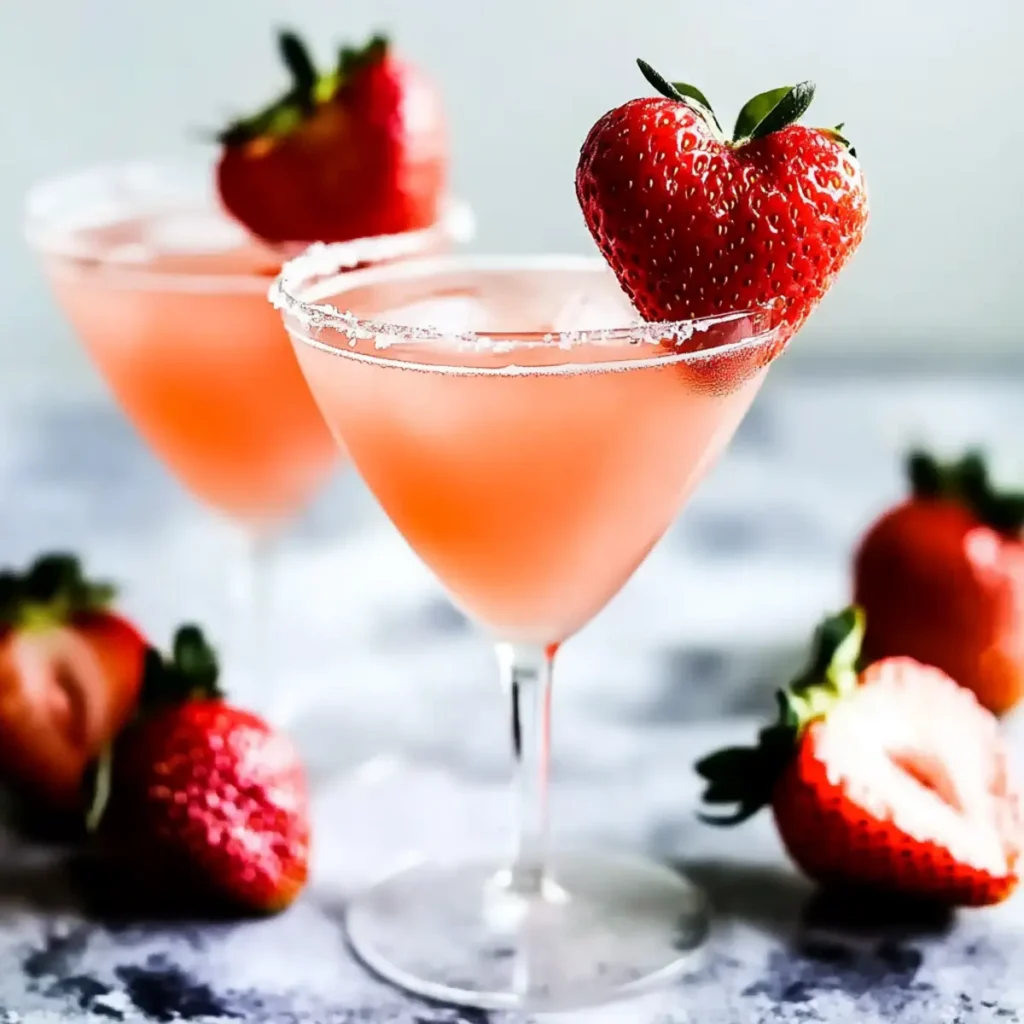
Strawberry Heart Cocktail Garnish Tutorial for Romantic Drinks is the perfect way to impress someone special while indulging in the sweet, fruity flavors of this delightful cocktail! Imagine a refreshing drink that not only excites your taste buds but also looks stunning in any glass. The vibrant red of fresh strawberries paired with the crispness of vodka and a playful splash of sparkling water makes each sip an enchanting experience. Picture yourself sitting on a sunlit patio, feeling the gentle breeze as you clink glasses with your loved one, each sip filled with laughter and delightful moments. This Strawberry Heart Cocktail is the ideal companion for those cozy nights in, romantic dinners, or delightful summer parties where love, good vibes, and deliciousness are on the agenda. So, let’s dive into this cocktail garnish tutorial and create memories that sparkle! Ingredients for Strawberry Heart Cocktail Garnish Tutorial for Romantic Drinks Here’s what you’ll need to make this delicious Strawberry Heart Cocktail Garnish Tutorial for Romantic Drinks: 10 fresh strawberries – Choose ripe, juicy strawberries for the best flavor, and save two halves for garnish. 20 drops liquid Stevia – A natural sweetener that enhances the drink’s flavor without added calories. 2-4 shots vodka – Use your favorite vodka for a solid foundation; more shots mean a stronger cocktail. 2 squeezes orange or tangerine – Adds a zesty citrus kick that perfectly complements the strawberries. 2 cups ice – Essential for a chilled cocktail experience, ensuring refreshment with every sip. 1 splash sparkling water – Lightens the drink and gives it that refreshing fizz to lift your spirits. 2 halves strawberries for heart garnish – Use a small heart-shaped cookie cutter to create a romantic touch for your beautifully crafted cocktails. How to Make Strawberry Heart Cocktail Garnish Tutorial for Romantic Drinks Follow these simple steps to prepare this delicious Strawberry Heart Cocktail Garnish Tutorial for Romantic Drinks: Step 1: Prepare the Strawberries Start by removing the stems from the strawberries. Utilize your small heart-shaped cookie cutter to create two halves that will serve as garnishes. Cut a tiny slit in each heart so they can elegantly perch on the rim of your glass. Step 2: Muddle the Strawberries In a cocktail shaker, combine several halved strawberries and the 20 drops of liquid Stevia. Muddle the berries well, releasing their sweet juices into the mix. Imagine the luscious strawberry aroma wafting up as you smash those delightful beauties! Step 3: Mix in the Vodka Now add 2-4 shots of your chosen vodka into the shaker. The more, the merrier (or perhaps a little merrier, depending on your evening plans!). Squeeze in a good dose of fresh orange or tangerine juice to brighten the drink, like sunshine in a glass! Step 4: Shake It Up! Fill the shaker with the 2 cups of ice, close the lid, and shake it like you just found out it’s Friday—vigorously! You want everything to blend beautifully, the ice will chill your concoction while the flavors dance together. Shake it for about 15 seconds. Step 5: Strain and Garnish Time to pour! Using a strainer, carefully pour the delicious mixture into your glasses, allowing the lovely pink drink to glisten. Garnish each drink with your heart-shaped strawberry on the rim and add a splash of zero-calorie seltzer water. Stir gently to incorporate the fizz, which adds that extra sparkle to your cocktail. Step 6: Serve and Enjoy! Take a moment to admire your stunning cocktail garnished with the adorable heart strawberries before serving. Relax and enjoy the refreshing flavors of your Strawberry Heart Cocktail, guaranteed to make your evening special. Cheers! With this Strawberry Heart Cocktail Garnish Tutorial for Romantic Drinks, you’ll not only impress your date with a drink that’s visually stunning but also delight them with its delicious taste. Enjoy every moment and sip! Perfecting Strawberry Heart Cocktail Garnish Tutorial for Romantic Drinks Cooking Process Begin by preparing your ingredients: muddle the strawberries with Stevia, add vodka and orange juice, then shake with ice. Finally, pour, garnish, and add a splash of sparkling water for a refreshing twist. This efficient sequence ensures maximum flavor with minimal effort. Add Your Touch to Strawberry Heart Cocktail Garnish Tutorial for Romantic Drinks Feel free to customize your Strawberry Heart Cocktail by switching the vodka for gin or using agave syrup instead of Stevia for a different sweetness. Add fresh mint or basil for an herbaceous kick that elevates the drink to new heights. Storing & Reheating Strawberry Heart Cocktail Garnish Tutorial for Romantic Drinks Since this cocktail is best enjoyed fresh, it’s not ideal for long-term storage. However, you can prepare the muddled strawberry mixture ahead of time and store it in the refrigerator for up to eight hours before serving. Just shake it again before pouring. A friend once praised my cocktails at a dinner party, claiming they felt like we were in a chic bar. It’s those little compliments that keep you motivated, isn’t it? FAQs About Strawberry Heart Cocktail Garnish Tutorial for Romantic Drinks What is Strawberry Heart Cocktail Garnish Tutorial for Romantic Drinks? The Strawberry Heart Cocktail Garnish Tutorial for Romantic Drinks is a delightful recipe that combines fresh strawberries, vodka, and a touch of sweetness from liquid Stevia. This drink is perfect for romantic occasions, adding a special touch with its charming heart-shaped strawberry garnish. The vibrant flavors create a refreshing cocktail that’s sure to impress anyone you serve it to. How do you make the heart-shaped strawberry garnish? Creating the heart-shaped strawberry garnish is a fun and simple process. First, remove the stems from the strawberries and carefully cut one strawberry in half. Using a small heart-shaped cookie cutter, cut out the heart shape from the halved strawberry. To make it easy to place on the rim of your glass, cut a small slit at the bottom of the heart. Voila! Your garnish is ready to wow your guests. Can I customize the Strawberry Heart Cocktail? Absolutely! One of the best
Deliciously Creamy Zesty Mexican White Table Sauce Recipe
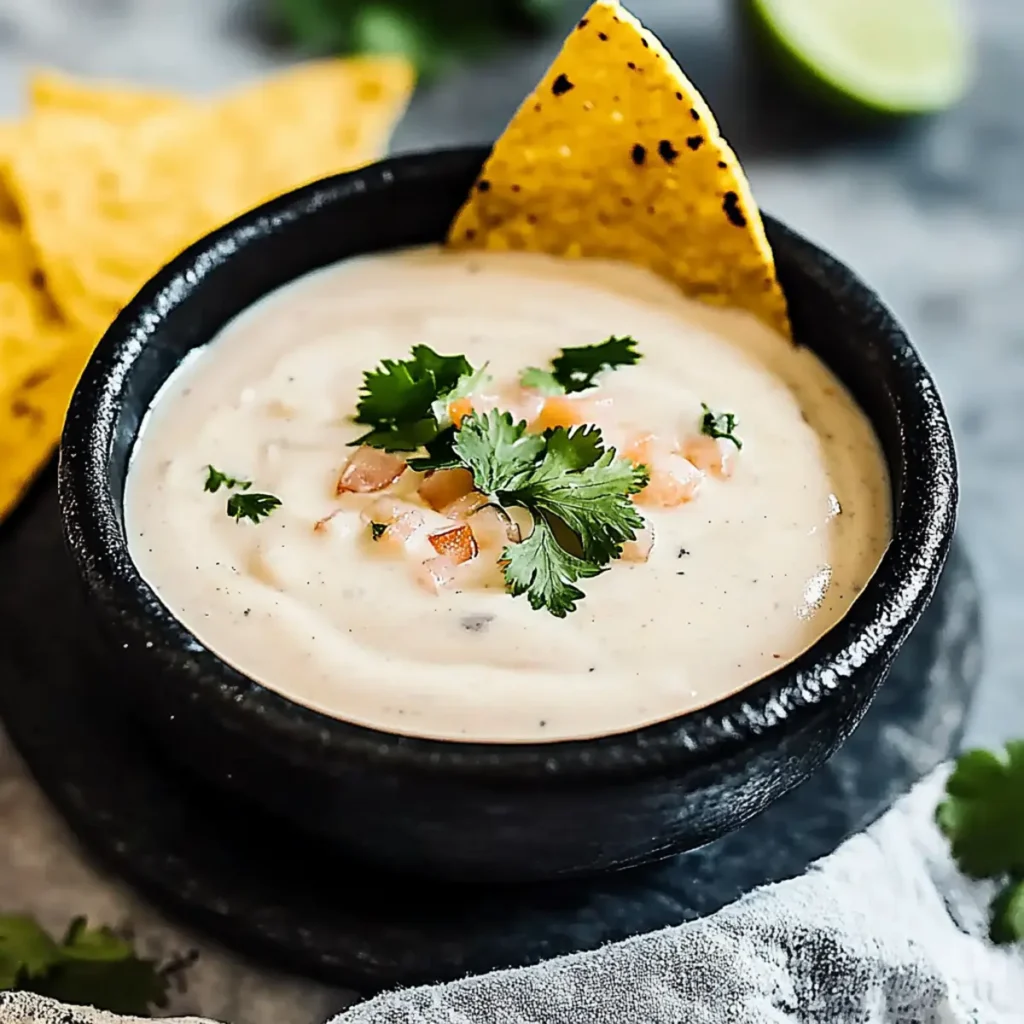
The Zesty Mexican White Table Sauce is like sunshine in a bowl. With its creamy texture and burst of tangy flavor, it’s the ultimate companion for all your favorite dishes. Every dip, drizzle, and dollop of this sauce transports you to a bustling street market in Mexico, where the air is filled with the scent of spices and laughter. It’s the kind of sauce that can turn a regular Tuesday night into a fiesta, making every meal feel special. Inspired by my own culinary adventures, I remember the first time I whipped up a batch of this zesty delight. It was a casual dinner with friends, and with just one taste, everyone was hooked. We laughed, shared stories, and relished every bite as the layers of flavor unfolded. This sauce is perfect for tacos, grilled meats, or even as a lively dip for chips. So whether you’re hosting a summer barbecue or simply craving a flavor explosion, get ready to impress your taste buds with this incredible creation. Ingredients for Zesty Mexican White Table Sauce Here’s what you’ll need to make this delicious Zesty Mexican White Table Sauce: 30 oz Miracle Whip – This creamy base adds a tangy sweetness that forms the foundation of the sauce. 1 cup sour cream – Adds a rich, creamy texture and a hint of tartness that balances the flavors beautifully. 6 cloves garlic, minced – Freshly minced garlic is key for that aromatic punch which elevates the sauce. 0.5 teaspoon garlic powder – A little extra garlic goodness that enhances the overall flavor profile. 0.5 tablespoon red pepper flakes – These little flakes add just the right amount of heat to keep things interesting. 0.5 teaspoon cayenne pepper – For an extra kick, this spice takes the zesty theme up a notch. 0.5 teaspoon salt – Essential for bringing all the flavors together and enhancing the overall taste. 1 teaspoon cumin – A warm, earthy spice that infuses the sauce with a hint of smokiness. 1 teaspoon dried oregano – This herb adds a lovely freshness that complements the spice blend. 2 dashes Frank’s hot sauce – This popular hot sauce packs a flavorful punch, rounding out the sauce’s zestiness. 0.5 lime juice – Fresh lime juice lends a bright, zesty flavor that uplifts the whole dish. 0.5 cup milk – It helps achieve a smooth, pourable consistency while mellowing the flavors. How to Make Zesty Mexican White Table Sauce Follow these simple steps to prepare this delicious Zesty Mexican White Table Sauce: Step 1: Combine the Base Ingredients In a large mixing bowl, combine the Miracle Whip and sour cream. This creamy duo serves as the perfect canvas for all the delicious flavors to come. Step 2: Add the Aromatics Stir in the minced garlic, garlic powder, red pepper flakes, cayenne pepper, salt, cumin, oregano, and Frank’s hot sauce. These ingredients work together to create a robust flavor profile that will make your taste buds dance. Step 3: Brighten with Lime Juice Squeeze in the fresh lime juice. This not only enhances the overall flavor but also adds a refreshing tang that cuts through the richness. Step 4: Adjust the Consistency Pour in the milk gradually and stir until the mixture reaches your desired consistency. You want it to be smooth and creamy, easy enough to dip into but thick enough to cling to your favorite foods. Step 5: Mix and Taste Mix thoroughly until the sauce is perfectly blended. Take a moment to taste it—this is your chance to adjust any spices if you’re feeling adventurous or if you prefer a little more kick! Step 6: Serve and Enjoy Transfer the sauce to a serving bowl and enjoy it alongside tacos, grilled chicken, or as a dip for fresh veggies. The possibilities are endless, and every bite is a little slice of heaven. Your Zesty Mexican White Table Sauce is now ready to serve! It’s creamy, zesty, and downright addictive. Whether it’s a festive occasion or just a casual night in, this sauce elevates any meal to a whole new level. Perfecting Zesty Mexican White Table Sauce Cooking Process Start by mixing the Miracle Whip and sour cream to create a creamy base. While that comes together, mince the garlic and gather your spices. Combine everything in a big bowl, finishing off with lime juice and milk for that perfect texture. Add Your Touch to Zesty Mexican White Table Sauce Feel free to swap out Miracle Whip for Greek yogurt for a healthier twist, or add diced jalapeños for an extra kick. Fresh herbs like cilantro can also brighten the flavor profile, making it uniquely yours. Storing & Reheating Zesty Mexican White Table Sauce Store your zesty creation in an airtight container in the fridge for up to a week. If you need to reheat, do it gently on the stove at low heat to avoid curdling. The first time I served this sauce at a family barbecue, everyone piled it on their plates. My cousin even jokingly asked if he could drink it straight! It’s wonderful to see how something so simple can bring so much joy to the table. FAQs About Zesty Mexican White Table Sauce What is Zesty Mexican White Table Sauce? Zesty Mexican White Table Sauce is a creamy and flavorful condiment that beautifully enhances a variety of dishes. Made primarily with Miracle Whip and sour cream, it boasts a rich texture complemented by a medley of spices like garlic, cumin, and oregano. This sauce isn’t just delicious; it’s versatile too! Whether you drench your tacos, slather it on grilled veggies, or use it as a dip for your favorite snacks, this sauce adds a vibrant twist to any meal. How can I use Zesty Mexican White Table Sauce? The beauty of Zesty Mexican White Table Sauce lies in its versatility. You can use it as a topping for tacos, nachos, or burrito bowls. It also serves wonderfully as a salad dressing or a delightful dip
Easy Chipotle Creamy Smoky Sauce Recipe for Flavorful Dishes
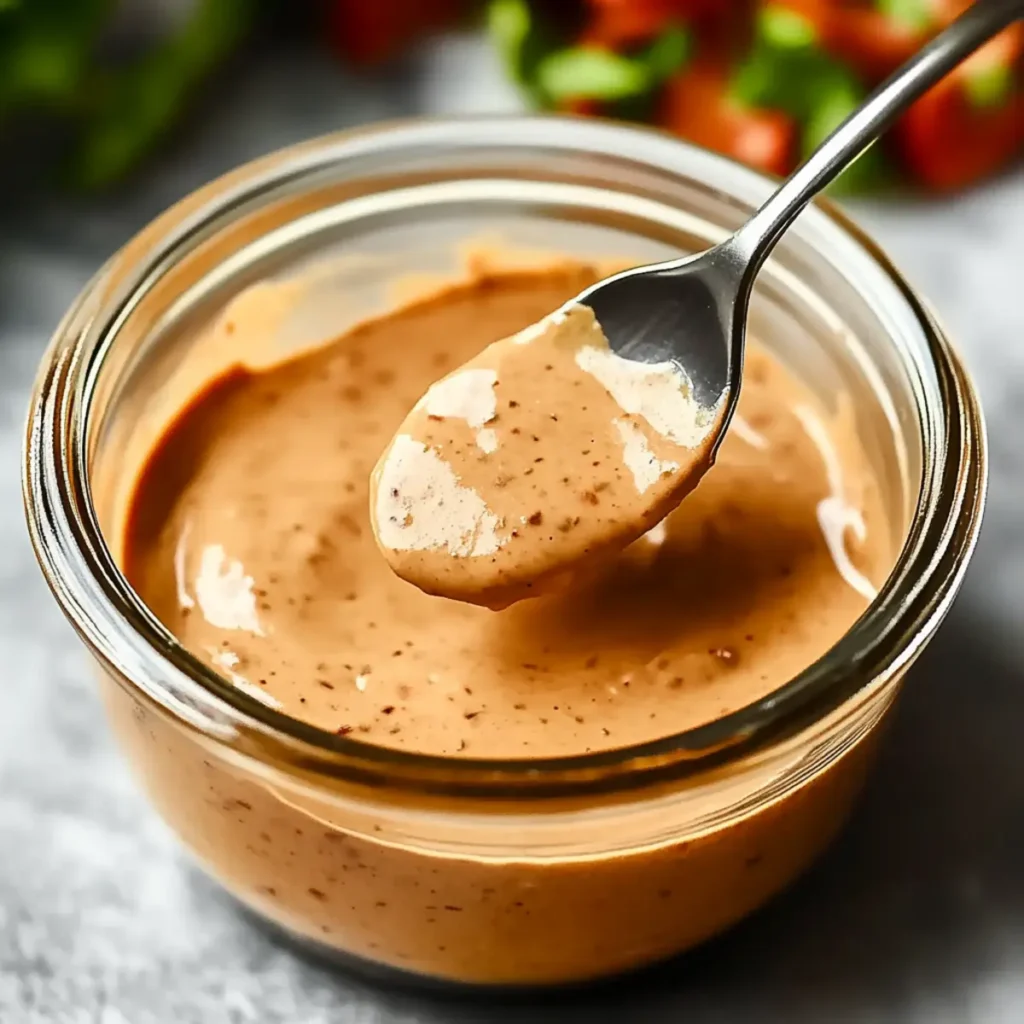
This easy chipotle creamy smoky sauce recipe for tasty dishes is like a flavor explosion in your mouth! Imagine a sultry, smoky flavor that dances with creamy goodness, tantalizing your taste buds and leaving you yearning for more. Perfect for slathering on tacos, drizzling on grilled chicken, or just dipping those late-night chips right into happiness! The moment you whip this up, you’ll have your friends and family instantly transported to flavor town, where every meal is a fiesta. Growing up, my kitchen was always bustling with flavors, and this sauce reminds me of those carefree summer barbecues. It’s that kind of recipe that brings everyone together, whether you’re throwing a backyard bash or simply enhancing a Tuesday night dinner. The aromas of chipotle and garlic wafting through the air is practically a hug for your senses, promising tantalizing flavors in every bite. Once you try this sauce, you’ll wonder how you ever lived without it. Ingredients for Easy Chipotle Creamy Smoky Sauce Recipe for Tasty Dishes Here’s what you’ll need to make this delicious Easy Chipotle Creamy Smoky Sauce Recipe for Tasty Dishes: 0.25 cup mayonnaise – Adds creaminess and richness to the sauce, balancing the heat of the chipotle. 1 cup sour cream – Provides a tangy contrast to the smoky flavors, creating a delightful base for the sauce. 2 chipotle peppers in adobo sauce – These little powerhouses give the sauce its smoky heat and depth of flavor; don’t skimp on the sauce! 0.5 whole lime (juiced) – Adds a refreshing zing that brightens up the sauce and enhances the overall flavor profile. 1 clove garlic – Fresh garlic infuses an aromatic punch and is a must for flavor depth. Salt (to taste) – A little sprinkle to elevate all the taste sensations and ensure balance in flavors. How to Make Easy Chipotle Creamy Smoky Sauce Recipe for Tasty Dishes Follow these simple steps to prepare this delicious Easy Chipotle Creamy Smoky Sauce Recipe for Tasty Dishes: Step 1: Gather Your Ingredients First things first, channel your inner chef and gather all your ingredients. You’ll need a food processor to whip this sauce up into a smooth masterpiece. Make sure your chipotle peppers are all ready to mingle with the rest of the ingredients. Step 2: Combine the Base In your food processor, toss in the mayonnaise and sour cream. These two creamy delights form the luxurious base of your sauce. Feel free to give them a quick stir if you’re feeling extra fancy before the buzz of the processor! Step 3: Add the Zing Next, squeeze in the juice from half a lime. This is where the magic happens! The acidity from the lime really cuts through the creaminess and elevates the flavors to the next level. Step 4: Spice it Up Now it’s time to bring the heat! Add those two chipotle peppers along with a bit of the adobo sauce. You’re going to adore how this spicy addition wraps itself around the creamy base like a warm blanket on a chilly night. Toss in the garlic for that aromatic kick. Step 5: Blend Until Smooth Cover the food processor and blend it all together until it’s perfectly smooth. Take a moment to appreciate the delightful aroma that fills your kitchen. Nudge your friends or family to come take a whiff; they’re going to want to dive in. Step 6: Taste and Adjust Finally, taste your sauce! Does it need a pinch more salt? Perhaps a little more lime to really pop? Adjust it to your liking, and trust me, there’s no such thing as too much flavor here! Transfer to a serving bowl and prepare to be amazed. This sauce is perfect for dipping, slathering, or drizzling over your favorite dishes. Whether it’s tacos for Tuesday, grilled meats for a BBQ, or just a bowl of crunchy veggies, this easy chipotle creamy smoky sauce will elevate every bite! Perfecting Easy Chipotle Creamy Smoky Sauce Recipe for Tasty Dishes Cooking Process Start by prepping all your ingredients first. Chop the garlic and chipotle peppers, then make the sauce while allowing any main ingredients to cook. This ensures everything comes together seamlessly for the perfect flavor combination. Add Your Touch to Easy Chipotle Creamy Smoky Sauce Recipe for Tasty Dishes Feel free to swap out the sour cream for Greek yogurt for a lighter option. You can also add extra spices like cumin or smoked paprika to enhance the smoky flavor, or even throw in some fresh herbs for a pop of color and freshness. Storing & Reheating Easy Chipotle Creamy Smoky Sauce Recipe for Tasty Dishes Store leftover sauce in an airtight container in the fridge for up to a week. To reheat, gently warm it in a saucepan over low heat, stirring constantly to maintain its creamy texture without separating. The first time I served this Easy Chipotle Creamy Smoky Sauce, my friends were practically stealing bites straight from the bowl. Their feedback was so enthusiastic that it made me feel like a gourmet chef, even in my humble kitchen. FAQs About Easy Chipotle Creamy Smoky Sauce Recipe for Tasty Dishes What is Easy Chipotle Creamy Smoky Sauce Recipe for Tasty Dishes? The Easy Chipotle Creamy Smoky Sauce Recipe for Tasty Dishes is a delightful blend of flavors that elevates any meal. It combines mayonnaise, sour cream, chipotle peppers in adobo sauce, lime juice, and garlic into a smooth, creamy sauce that complements a variety of dishes. This sauce isn’t just delicious; it offers a smoky kick that enhances the flavors of grilled meats, tacos, and even vegetables. Perfect for gatherings or weeknight dinners, this sauce brings a taste of the Southwest right to your kitchen. How do I use the Easy Chipotle Creamy Smoky Sauce? You can use the Easy Chipotle Creamy Smoky Sauce in various creative ways! Drizzle it over tacos, burritos, or grilled chicken for a flavor boost. It makes an excellent dip for veggies or tortilla chips, turning any
Delicious Cowboy Mushrooms Sautéed in Flavorful Cowboy Butter
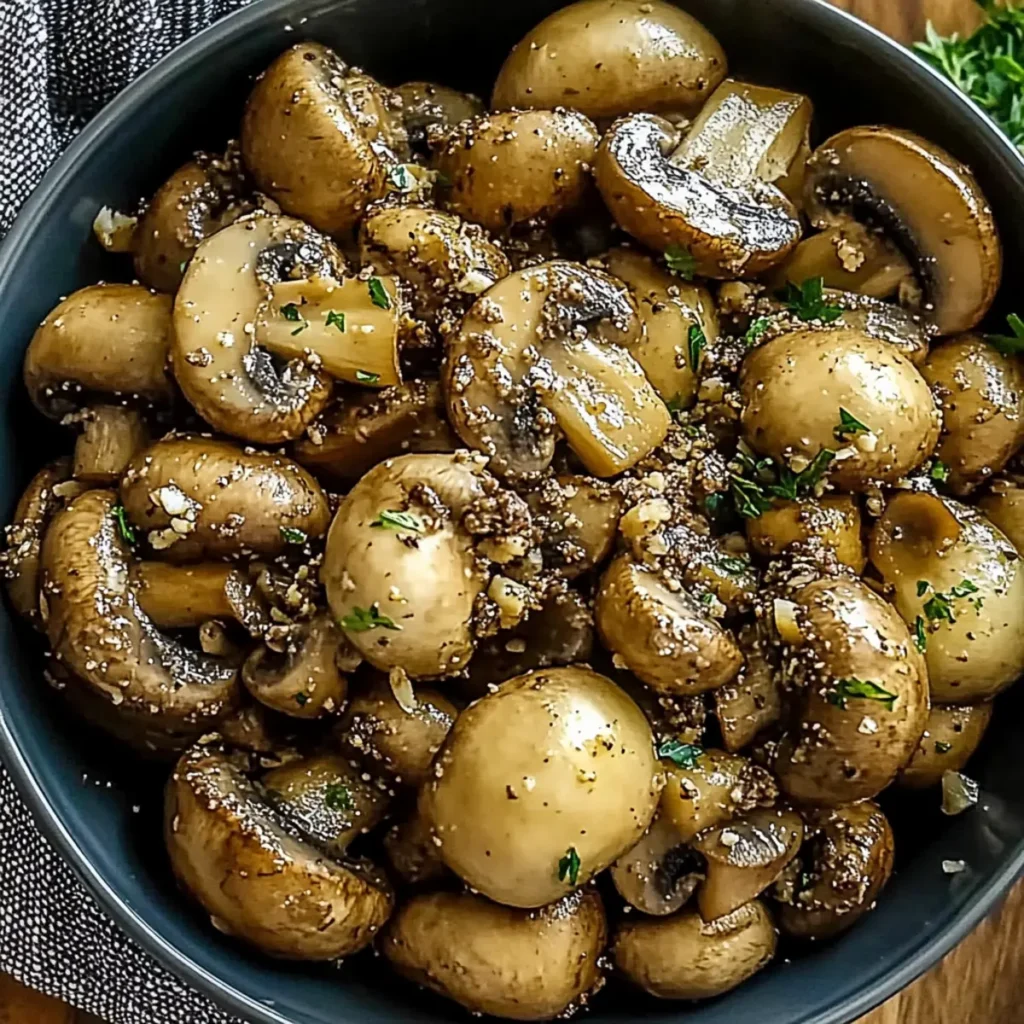
The aroma of earthiness fills the kitchen as you toss the luscious white button mushrooms into melted cowboy butter. Each bite of the delicious cowboy mushrooms sautéed in flavorful cowboy butter transports you to sun-soaked, sprawling prairies, where flavor and simplicity reign supreme. Imagine yourself sitting around a crackling campfire with friends, laughter echoing into the night as you savor these incredible mushrooms, just as your ancestors did. This dish is not just a meal but a heartwarming experience, a celebration of home-cooked goodness that inspires warmth and joy. Ingredients for Delicious Cowboy Mushrooms Sautéed in Flavorful Cowboy Butter Here’s what you’ll need to make this delicious delicious cowboy mushrooms sautéed in flavorful cowboy butter: 2 pounds white button mushrooms – Fresh and cleaned mushrooms are essential for that hearty, umami flavor and meaty texture. Choose firm and unblemished ones for the best results. 1 cup cowboy butter – A flavorful blend of butter infused with herbs and spices that adds depth and richness to your mushrooms, a key component in this dish. Salt – To taste, enhancing all the natural flavors of the mushrooms and butter, ensuring a perfectly seasoned dish. How to Make Delicious Cowboy Mushrooms Sautéed in Flavorful Cowboy Butter Follow these simple steps to prepare this delicious delicious cowboy mushrooms sautéed in flavorful cowboy butter: Step 1: Heat the Skillet Place a large skillet over medium heat and add the cowboy butter. Let it melt slowly, allowing the rich aroma to envelop your kitchen. Step 2: Add the Mushrooms Once the butter is bubbly and fragrant, toss in the cleaned mushrooms. Give them a gentle stir to coat with the heavenly cowboy butter. Step 3: Sauté to Perfection Cook the mushrooms, stirring occasionally for about 20-22 minutes. They should be tender and have developed a beautiful golden color — just imagine that divine caramelization taking place! Step 4: Season Once the mushrooms are beautifully sautéed, sprinkle a generous amount of salt according to your taste preference. This seasoning is the finishing touch that elevates the flavor profile. Step 5: Serve Up With Style Transfer the sautéed mushrooms onto a serving dish. For an additional WOW factor, drizzle with a bit of melted cowboy butter and garnish with fresh herbs, if desired. Enjoy your delicious cowboy mushrooms sautéed in flavorful cowboy butter as a side dish, atop a juicy steak, or even tossed into pasta for an extra layer of flavor! How about it? Grab your skillet and get ready to dig into a dish that’s as fun to make as it is to savor! Your taste buds will thank you, and who knows? You just might have a new family favorite on your hands. Happy cooking! Perfecting Delicious Cowboy Mushrooms Sautéed in Flavorful Cowboy Butter Cooking Process To achieve the best results when preparing Delicious Cowboy Mushrooms Sautéed in Flavorful Cowboy Butter, start by melting the butter in a skillet before adding in the mushrooms. This allows the mushrooms to absorb the rich flavors from the butter as they cook, creating a delightful taste. Add Your Touch to Delicious Cowboy Mushrooms Sautéed in Flavorful Cowboy Butter Feel free to customize your Delicious Cowboy Mushrooms Sautéed in Flavorful Cowboy Butter by adding herbs like thyme or rosemary for an aromatic twist. You can also swap in different mushroom varieties or toss in some garlic to elevate the flavor profile even further. Storing & Reheating Delicious Cowboy Mushrooms Sautéed in Flavorful Cowboy Butter Store any leftover Delicious Cowboy Mushrooms Sautéed in Flavorful Cowboy Butter in an airtight container in the refrigerator for up to three days. When reheating, do so slowly on the stovetop to ensure the mushrooms retain their tender texture. Cooking this dish brings back fond memories of a cozy family gathering where I served it for the first time. Watching my loved ones gobble it up made my heart swell with joy. FAQs About Delicious Cowboy Mushrooms Sautéed in Flavorful Cowboy Butter What is Delicious Cowboy Mushrooms Sautéed in Flavorful Cowboy Butter? Delicious Cowboy Mushrooms Sautéed in Flavorful Cowboy Butter is a mouth-watering dish that elevates simple white button mushrooms to a whole new level. This recipe combines tender sautéed mushrooms with the rich, buttery flavor of cowboy butter, creating a delightful side or main dish that pairs well with various meals. The cooking technique emphasizes the natural flavors, resulting in a satisfying experience that’s sure to impress your guests. With minimal effort and a bit of finesse, you can enjoy a dish that tastes like it’s straight from a gourmet restaurant. How long does it take to prepare Delicious Cowboy Mushrooms Sautéed in Flavorful Cowboy Butter? Preparing Delicious Cowboy Mushrooms Sautéed in Flavorful Cowboy Butter is remarkably quick and convenient, with a total time of just 25 minutes. The prep work only takes about 5 minutes, where you clean and chop the mushrooms. The actual cooking time spans around 20 minutes, allowing the mushrooms to develop their golden-brown color and absorb the buttery richness. This dish is perfect for busy weeknights or spontaneous dinner gatherings, ensuring you spend less time in the kitchen and more time enjoying your meal with loved ones. What can I serve with Delicious Cowboy Mushrooms Sautéed in Flavorful Cowboy Butter? Delicious Cowboy Mushrooms Sautéed in Flavorful Cowboy Butter is a versatile dish that complements various main courses beautifully. Serve it alongside grilled steak for a hearty meal, or pair it with roasted chicken for a comforting dinner option. It also works wonderfully as a topping for baked potatoes or as an accompaniment to creamy risottos. For a vegetarian touch, enjoy it with quinoa or as part of a fresh garden salad. This dish can seamlessly adapt to whatever you’re in the mood for, making it a fantastic addition to your culinary repertoire. Can I customize Delicious Cowboy Mushrooms Sautéed in Flavorful Cowboy Butter? Absolutely! One of the beautiful things about Delicious Cowboy Mushrooms Sautéed in Flavorful Cowboy Butter is its adaptability. You can enhance the dish by adding
Easy Stuffed Mushrooms Recipe in Just 26 Minutes or Less
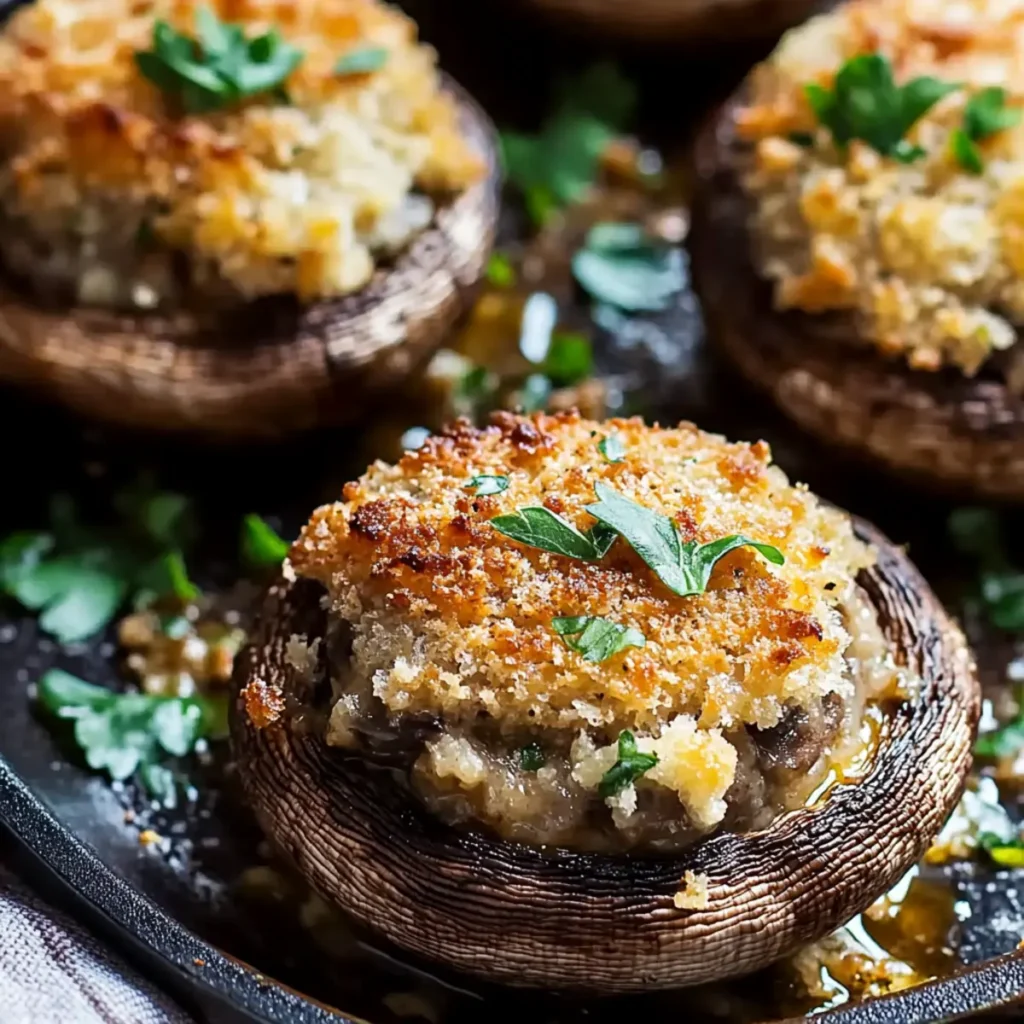
Easy Stuffed Mushrooms Recipe in Just 26 Minutes or Less Imagine sinking your teeth into a warm, savory stuffed mushroom that bursts with flavor in every bite. These easy stuffed mushrooms are more than just a tasty appetizer; they’re a crowd-pleaser, a party starter, and, quite frankly, a reason to celebrate the humble mushroom. The perfect balance of buttery, garlicky goodness fills each one, bringing irresistible aromas wafting through your kitchen, making it impossible to resist! This recipe reminds me of cozy evenings spent with friends gathered around the kitchen island, sharing stories and laughter. There’s something uniquely comforting about popping these delightful morsels in your mouth while enjoying great company. Whether it’s game night, a holiday feast, or just a casual dinner, these easy stuffed mushrooms effortlessly elevate any occasion, transforming your dining experience into something special. Ingredients for Easy Stuffed Mushrooms Here’s what you’ll need to make this delicious Easy Stuffed Mushrooms: 24 oz whole button mushrooms – select fresh, firm mushrooms without any blemishes for the best flavor and texture. ¾ cup Italian seasoned bread crumbs – these add a delightful crunch; feel free to use gluten-free breadcrumbs for a lighter version. 5 TBSP butter (plus extra as needed/desired) – provides richness; use unsalted butter to control seasoning better. ¼ cup finely minced yellow onion – adds a sweet, aromatic flavor; you could use shallots if you prefer a more delicate taste. 2-3 cloves garlic (smashed and minced) – fresh garlic is key for a robust flavor; add more if you adore garlic. ½ tsp garlic powder (to taste) – enhances the garlicky goodness; adjust according to your preference. 1 tsp parsley – fresh or dried; brings a pop of color and freshness to the stuffing. Salt (to taste) – always to enhance the flavors. Pepper (to taste) – freshly cracked pepper elevates the taste profile. How to Make Easy Stuffed Mushrooms Follow these simple steps to prepare this delicious Easy Stuffed Mushrooms: Step 1: Clean the Mushrooms Start by brushing the mushrooms clean with a slightly damp paper towel to remove any dirt. Remember, don’t soak them in water; we want to keep them dry and flavorful! Step 2: Prepare the Stems Gently twist off the stems from the mushrooms and finely mince them. Set them aside – we’ll use them in our fillings; no waste here! Step 3: Sauté the Aromatics In a non-stick skillet, melt the butter over medium heat. Once it’s melted and bubbling, add the minced garlic, chopped mushroom stems, and yellow onion. Sauté until fragrant and tender, about 3-4 minutes, letting all those delicious smells take over your kitchen. Step 4: Add the Breadcrumbs Stir in the Italian seasoned bread crumbs into the pan, making sure they soak up the buttery goodness. Season with garlic powder, salt, and pepper. Give it a taste and adjust the seasoning if needed. This is your moment to make it truly delicious! Step 5: Stuff the Mushrooms Let the stuffing cool slightly before filling the mushrooms. Line a cookie sheet with foil and grease it lightly with olive oil. Generously stuff each mushroom cap with the mixture; they should be heaping! No one likes a sad, under-filled mushroom. Step 6: Bake to Perfection Preheat the oven to 350 degrees F (175 degrees C). Arrange the stuffed mushrooms on the prepared cookie sheet and bake for about 20 minutes, or until golden brown. If you’re in the mood for extra soft mushrooms, give them an additional 10 minutes. You’ll know they’re done when the tops are beautifully golden and the aroma fills your space. Once baked, transfer them to a serving dish, and prepare for compliments. These easy stuffed mushrooms are best enjoyed warm, ideally served to a crowd (or all to yourself—no judgment!). As you gather around the table with friends, a plate of these delightful easy stuffed mushrooms will surely steal the show. Enjoy every bite, and remember, joy is best when shared with others—and a little bit of buttery mushroom goodness doesn’t hurt either! Perfecting Easy Stuffed Mushrooms Cooking Process Start by cleaning the mushrooms and removing the stems while sautéing the garlic, onions, and stems in butter. Then, mix everything with breadcrumbs before stuffing the mushrooms and baking them to golden perfection. Add Your Touch to Easy Stuffed Mushrooms Feel free to swap the bread crumbs for crushed crackers or use different herbs like thyme, rosemary, or even a dash of chili powder for a spicy kick. Storing & Reheating Easy Stuffed Mushrooms Store any leftovers in an airtight container in the fridge for up to three days. Reheat gently in the oven at 350°F until heated through to retain that lovely texture. Sometimes I whip up these stuffed mushrooms to impress friends, and they always rave about them. It’s a joy to see everyone scrambling for seconds and asking for my secret recipe! FAQs About Easy Stuffed Mushrooms What is Easy Stuffed Mushrooms? Easy Stuffed Mushrooms are a delightful appetizer or side dish made by hollowing out whole mushrooms and filling them with a savory mixture, typically of breadcrumbs, butter, garlic, and onions. You can customize the filling with various herbs and spices, making this recipe versatile and suited to different tastes. Perfect for gatherings or weeknight dinners, they offer an impressive presentation while being incredibly easy to prepare. With just a handful of simple ingredients, you can create a restaurant-quality dish at home that your family and friends will adore. What types of mushrooms work best for Easy Stuffed Mushrooms? While button mushrooms are the most commonly used for Easy Stuffed Mushrooms due to their mild flavor and ideal size, you can also use portobello, cremini, or even shiitake mushrooms for a twist. Each type offers a unique taste and texture, allowing you to experiment according to your preferences. Just remember that larger mushrooms may need more filling and longer baking times, so adjust accordingly for optimal results. Can I make Easy Stuffed Mushrooms ahead of time? Yes, you
Delightful Dirty Shirley Pink Cocktail Recipe with Vodka Fizz
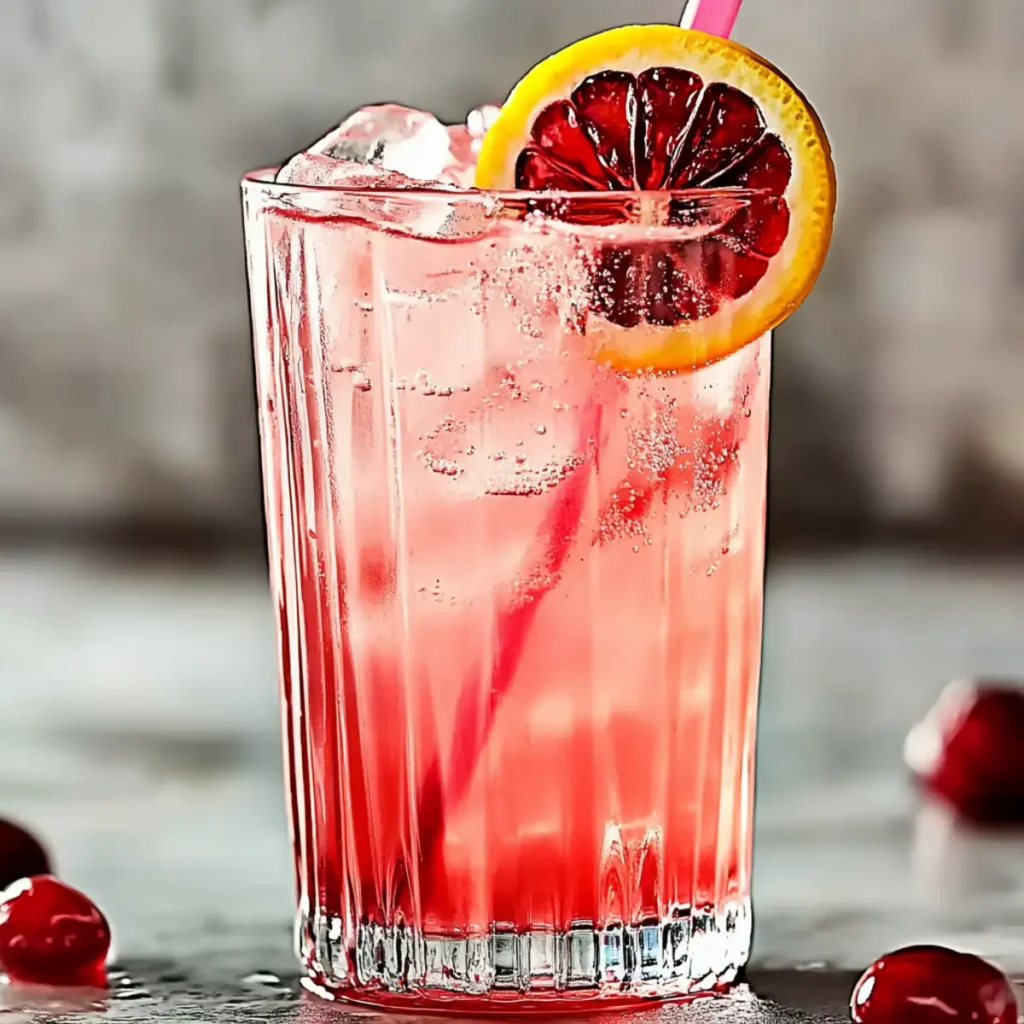
There’s something undeniably delightful about a cocktail that combines all the playfulness of childhood with the elegance of adulthood. Picture this: a vibrant pink drink that not only looks stunning but packs a punch of refreshing flavor—meet your new favorite party starter: the Delightful Dirty Shirley Pink Cocktail Recipe with Vodka Fizz. This drink is a whimsical twist that takes you back to those sunny days at the fair, where you’d sip on cherry-laden sodas topped with fluffy whipped cream, all while trying not to spill anything on your favorite summer outfit. Whether it’s a celebratory gathering or a cozy night cap after a long day, this Dirty Shirley cocktail shines wherever it appears. With its bubbly lemonade base, a splash of sweet grenadine, and a kick of vodka, every sip is an adventure waiting to happen. So let’s dive into crafting a drink that’s as delightful as its name suggests! Ingredients for Delightful Dirty Shirley Pink Cocktail Recipe with Vodka Fizz Here’s what you’ll need to make this delicious Delightful Dirty Shirley Pink Cocktail Recipe with Vodka Fizz: 2 oz vodka – Use your favorite brand for a smooth finish; opt for a flavored vodka to add an interesting twist. 1 oz fresh lime juice – Freshly squeezed is best for that zesty punch. Avoid bottled lime juice if you can. 1 oz grenadine – This syrup adds sweetness and that lovely pink hue, so don’t skip it. 4 oz lemon-lime soda – Choose a sparkling soda for fizz; it keeps the cocktail light and refreshing. 1 maraschino cherry – For serving; it’s the classic garnish that adds character to this delightful drink. 1 lime wheel – Another garnish option that adds a pop of color and flavor. How to Make Delightful Dirty Shirley Pink Cocktail Recipe with Vodka Fizz Follow these simple steps to prepare this delicious Delightful Dirty Shirley Pink Cocktail Recipe with Vodka Fizz: Step 1: Prepare Your Glass Fill a tall glass with ice cubes, filling it generously to keep your drink chilled and refreshing on hot days. Step 2: Pour in the Vodka Add 2 oz of your chosen vodka over the ice, allowing it to chill immediately as it melds with the ingredients. Step 3: Mix in Fresh Lime Juice and Grenadine Pour in 1 oz of fresh lime juice followed by 1 oz of grenadine, watching the colors swirl and blend as they create a beautiful hue. Step 4: Top it with Lemon-Lime Soda Add 4 oz of lemon-lime soda, filling the glass almost to the brim. Give it a gentle stir with a long-handled spoon to combine all the flavors. Step 5: Add the Final Touches For the finishing touches, drop in a maraschino cherry and place a lime wheel on the rim for that stunning visual appeal. Step 6: Serve and Enjoy Your Delightful Dirty Shirley Pink Cocktail Recipe with Vodka Fizz is now ready to be served. Raise a toast to the most colorful and cheerful drink of the season! With this delightful cocktail in hand, you’ll be whisked away to sunny days filled with laughter and happiness. Not only does it taste fantastic, but it’s also easy to whip up, ensuring that anyone can become a home mixologist with just a little practice. Sipping on this drink is like wrapping yourself in a cozy nostalgia blanket while looking forward to new adventures. So what are you waiting for? Gather your ingredients, invite your friends, and let the good times roll! Perfecting Delightful Dirty Shirley Pink Cocktail Recipe with Vodka Fizz Cooking Process Start by filling a tall glass with ice. Pour the vodka, fresh lime juice, and grenadine over the ice. Next, trepidatiously pour in the lemon-lime soda, then stir gently to mix everything together without creating too much froth. Voilà, you have a refreshing cocktail in a flash. Add Your Touch to Delightful Dirty Shirley Pink Cocktail Recipe with Vodka Fizz Feel free to swap out the vodka for flavored varieties like berry or citrus to give the cocktail a new twist. Add a splash of club soda for extra fizz or include muddled fresh fruit for a fruity infusion. Make it your own! Storing & Reheating Delightful Dirty Shirley Pink Cocktail Recipe with Vodka Fizz Although this cocktail is best served fresh, you can pre-mix the vodka, lime juice, and grenadine and store it in the fridge. Just add soda and ice right before serving to keep it bubbly. Sharing my first experience making the Delightful Dirty Shirley Pink Cocktail is like recounting a charming story. I remember a vibrant summer party when my friends raved about it, leading to all of us raising our glasses and laughing under the twinkling lights. FAQs About Delightful Dirty Shirley Pink Cocktail Recipe with Vodka Fizz What is Delightful Dirty Shirley Pink Cocktail Recipe with Vodka Fizz? The Delightful Dirty Shirley Pink Cocktail Recipe with Vodka Fizz is a fun and vibrant twist on the classic Shirley Temple. This cocktail combines vodka, fresh lime juice, grenadine, and lemon-lime soda, resulting in a refreshing drink perfect for parties and warm summer days. The addition of a maraschino cherry and a lime wheel provides a classic touch, making it visually appealing and delicious. It’s a great choice for those looking to indulge in something light and bubbly, while still capturing a nostalgic flavor. How do I make the Delightful Dirty Shirley Pink Cocktail Recipe with Vodka Fizz? To craft the Delightful Dirty Shirley Pink Cocktail Recipe with Vodka Fizz, start by filling a tall glass with ice. Pour in 2 ounces of vodka and an ounce each of fresh lime juice and grenadine. Next, gently add 4 ounces of lemon-lime soda and stir just enough to combine the flavors. To complete the drink, garnish with a maraschino cherry and a lime wheel. This simple and quick preparation results in a delightful and refreshing cocktail you can enjoy in just five minutes. Can I customize the Delightful Dirty Shirley Pink Cocktail
Easy Creamy Cilantro Lime Taco Sauce Recipe in Just 5 Minutes
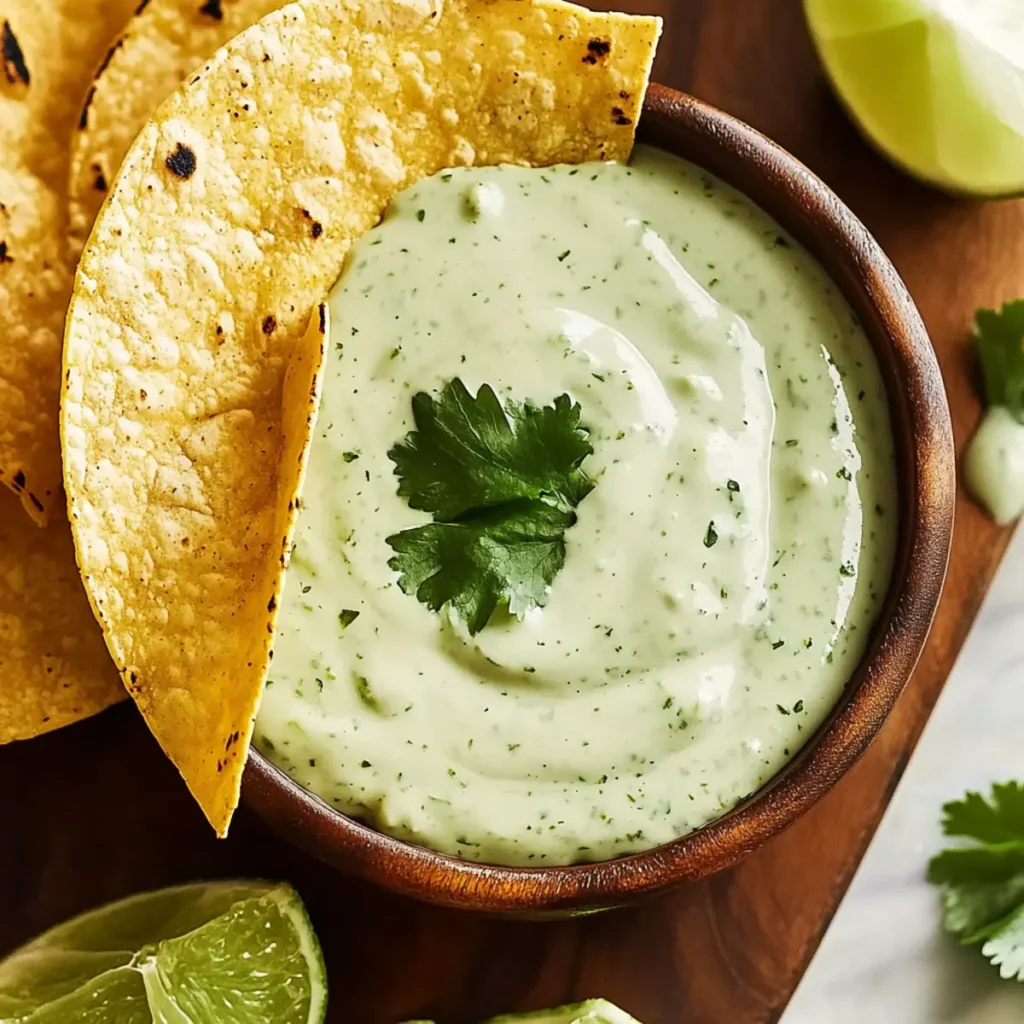
Creamy Cilantro Lime Taco Sauce is like summer in a jar, a vibrant burst of flavors ready to elevate any dish you serve. Imagine a creamy sauce that dances on your tongue, perfectly balanced with tangy lime, aromatic garlic, and fresh cilantro, ready to transform your tacos, salads, or even a simple dip. Preparing this sauce will have your taste buds singing and your guests wondering how you became a kitchen wizard. Picture this: a casual gathering with friends, and everyone is diving into a flavorful taco bar. The secret? A generous dollop of this creamy concoction that turns an ordinary meal into an unforgettable experience. Not only is it a crowd-pleaser, but it also takes a mere five minutes to whip up. So, let’s dive into this culinary adventure that will have your family and friends begging for your Cooking 101 secrets. Ingredients for Creamy Cilantro Lime Taco Sauce Here’s what you’ll need to make this delicious Creamy Cilantro Lime Taco Sauce: 1 cup whole milk Greek yogurt or sour cream – You can use Greek yogurt for a healthier option, or sour cream for that classic tangy flavor, either adds creaminess. 2 tablespoons mayonnaise – This adds richness and a smooth texture. Opt for vegan mayo if you’re looking for a plant-based version. 1 tablespoon fresh lime juice – Freshly squeezed lime juice is essential for that bright, zesty flavor. Avoid bottled for the best taste. 1 small garlic clove – Fresh garlic cloves pack a punch! Mince it finely to infuse the sauce with garlicky goodness. ½ teaspoon sea salt – A pinch of sea salt enhances all the flavors without overpowering the sauce. ¼ teaspoon onion powder – This adds depth and a hint of sweetness to balance the tangy elements. ½ cup fresh cilantro – Fresh cilantro provides a vibrant color and aromatic flavor that’s hard to resist. Adjust the amount to your taste preference. How to Make Creamy Cilantro Lime Taco Sauce Follow these simple steps to prepare this delicious Creamy Cilantro Lime Taco Sauce: Step 1: Gather Your Ingredients Start by rounding up all your ingredients. Place the Greek yogurt or sour cream, mayonnaise, lime juice, garlic, sea salt, and onion powder near your food processor to make the process a breeze. Step 2: Blend the Base In the food processor, combine the Greek yogurt or sour cream, mayonnaise, lime juice, garlic, salt, and onion powder. Process until the mixture is creamy and well blended. The aroma of garlic and lime will already be intoxicating. Step 3: Add the Cilantro Throw in the fresh cilantro. Pulse the mixture until the cilantro is finely chopped but not completely pureed. You want those beautiful green flecks visible for that vibrant look. Step 4: Taste and Adjust Before finishing, taste your sauce. Does it need a pinch more salt or a splash of lime juice? Adjust as necessary to suit your palate. Step 5: Serve Once satisfied with the flavor, transfer the creamy cilantro lime taco sauce to a serving bowl and drizzle it generously over tacos, or use it as a dip for chips or veggies. Step 6: Garnish (Optional) To elevate the visual appeal, garnish with a sprinkle of chopped cilantro or a slice of lime on the side. Your guests are in for a treat! The beauty of this recipe is in its versatility. Use it as a taco sauce or as a salad dressing, sandwich spread, or even a dipping sauce for crispy vegetables. It’s a quick and easy way to add a gourmet touch to any meal without the hassle of complex preparations. Enjoy the explosion of flavor and texture that this Creamy Cilantro Lime Taco Sauce brings to every dish! Perfecting Creamy Cilantro Lime Taco Sauce Cooking Process Begin your culinary adventure by prepping all ingredients before diving in. First, blend the yogurt, mayo, lime juice, garlic, salt, and onion powder until creamy. Finally, fold in freshly chopped cilantro for that green goodness. Add Your Touch to Creamy Cilantro Lime Taco Sauce Feel free to get creative! Swap out the Greek yogurt for buttermilk for a tangy twist. Add a dash of chili powder for some extra heat, or toss in diced jalapeños for a zesty kick. Storing & Reheating Creamy Cilantro Lime Taco Sauce Store any leftovers in an airtight container in the fridge for up to three days. When ready to enjoy again, simply give it a good stir before using; no need for reheating! Building this delightful sauce takes me back to a sunny Saturday barbecue with friends. They tried it for the first time and couldn’t stop raving about it, even asking to take some home. FAQs About Creamy Cilantro Lime Taco Sauce What is Creamy Cilantro Lime Taco Sauce? Creamy Cilantro Lime Taco Sauce is a zesty, rich sauce that combines the creaminess of Greek yogurt or sour cream with the fresh flavors of lime and cilantro. This delightful sauce complements a wide variety of dishes, especially tacos, grilled meats, and vegetables. The garlic and onion powder add a savory depth while the lime juice brightens the overall flavor profile. Perfect for those who want to add a splash of flavor to their meals, this sauce is a family favorite and incredibly easy to whip up at home. How can I customize my Creamy Cilantro Lime Taco Sauce? You can easily personalize your Creamy Cilantro Lime Taco Sauce to fit different tastes. Consider swapping Greek yogurt with buttermilk for a tangy flair, or add a pinch of chili powder for some warmth. To elevate the flavor further, try tossing in diced jalapeños or even some avocado for creaminess. Don’t hesitate to experiment with herbs as well; fresh parsley or dill can enhance the flavor in unique ways. The possibilities are endless, making this sauce a versatile addition to your culinary repertoire. What dishes pair well with Creamy Cilantro Lime Taco Sauce? Creamy Cilantro Lime Taco Sauce pairs wonderfully with a variety of dishes, elevating
Delicious Pan Seared Wild Mushrooms Recipe for Beginners
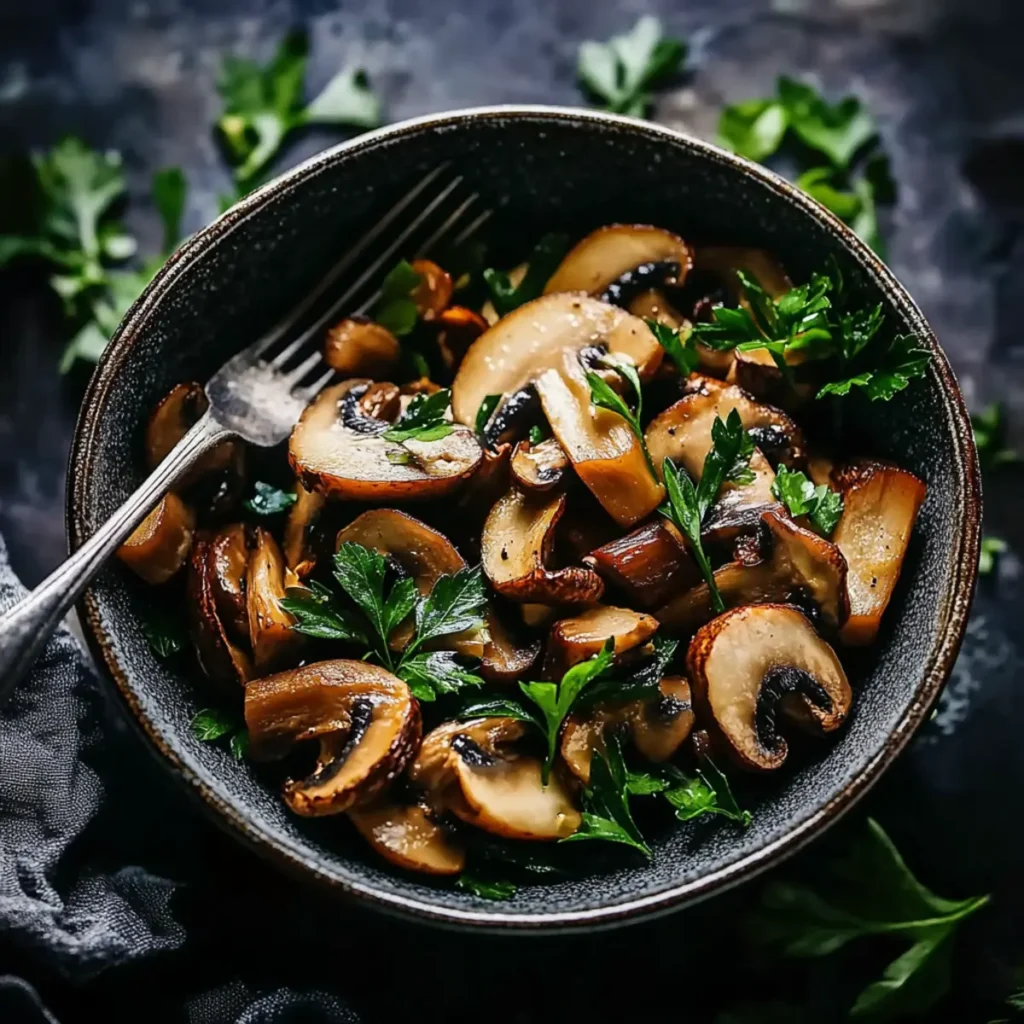
Delicious Pan Seared Wild Mushrooms Recipe for Beginners is your ticket to a culinary adventure that brings the forest right to your table. Picture this: earthy, umami-rich mushrooms sizzling in a pan, their natural juices mingling with aromatic garlic and a splash of white wine. The fragrant aroma wafts through your kitchen, promising a delightful dish that’s both easy to prepare and packed with incredible flavor. Imagine sharing this dish with family or friends on a cozy evening, perhaps paired with a hearty pasta or a simple piece of grilled chicken. This is more than just a recipe; it’s an experience that captures the joy of cooking. Let’s get started on a journey through the woods with these delicious pan seared wild mushrooms! Ingredients for Delicious Pan Seared Wild Mushrooms Recipe for Beginners Here’s what you’ll need to make this delicious Delicious Pan Seared Wild Mushrooms Recipe for Beginners: 3 lbs assorted fresh wild mushrooms – A mix of shiitake, portabella, and oyster mushrooms gives depth of flavor; choose firm and vibrant mushrooms. ¼ cup dairy-free butter – Provides richness and flavor without dairy; you can also use vegan butter for a plant-based option. 2-3 cloves garlic – Fresh garlic adds a savory aroma that enhances the overall taste; crush or mince finely. ½ cup dry white wine – Use a high-quality wine for the best flavor; it helps deglaze the pan and elevate the dish. ¼ cup chopped fresh parsley – Adds a pop of color and freshness; feel free to substitute with thyme or chives if desired. 1 tsp salt – Essential for flavor enhancement; adjust according to personal taste. Pepper – Freshly ground black pepper adds a nice kick; adjust to taste as well. How to Make Delicious Pan Seared Wild Mushrooms Recipe for Beginners Follow these simple steps to prepare this delicious Delicious Pan Seared Wild Mushrooms Recipe for Beginners: Step 1: Prepare Your Mushrooms Begin by rinsing the assorted mushrooms under cold water to remove any lingering dirt. Leave small or petite mushrooms whole, halve the medium-sized ones, and quarter the larger ones. Step 2: Sauté the Mushrooms Heat a large sauté pan over medium-high heat. When the pan is hot and ready to rock, toss in all of the prepared mushrooms. Cook them while stirring frequently, allowing them to release all of their water, which takes about 10 to 15 minutes. Step 3: Prepare the Garlic Butter Meanwhile, as the mushrooms are working their magic, heat the dairy-free butter in a small sauté pan over medium heat. Once it’s melting nicely, add the minced garlic and let it sauté, stirring occasionally until softened (about 5 minutes). Don’t forget to toss in the chopped parsley during the last 2-3 minutes of cooking for an aromatic burst of flavor. Step 4: Add the Wine Once the mushrooms have released their liquid, drain off any water in the sauté pan. Now for the good stuff: pour in the dry white wine, adding it ¼ cup at a time and giving it a good stir between each addition. The wine will create a lovely sauce that pulls all the flavors together. Step 5: Combine and Season Add the garlicky mixture into the mushroom pan. Season everything with salt and freshly cracked pepper to taste. Let it simmer for an additional 5 minutes to let the flavors mingle and deepen. Serving Suggestion Transfer your stunning pan seared wild mushrooms to serving plates and drizzle the delicious garlic butter sauce over the top. Pair it with crusty bread for dipping or over a bed of pasta for a full meal that’s both simple and scrumptious. Now, you’ve got yourself a delightful dish ready to impress! Whether it’s a weeknight dinner or a fancy gathering, this delicious pan seared wild mushrooms recipe for beginners will surely steal the show. Enjoy! Perfecting Delicious Pan Seared Wild Mushrooms Recipe for Beginners Cooking Process Start by rinsing and preparing your mushrooms. Sear them first until they release their water. Meanwhile, sauté the garlic and parsley in butter. Combine everything for a flavor-packed finish. Add Your Touch to Delicious Pan Seared Wild Mushrooms Recipe for Beginners Feel free to experiment with different herbs like thyme or rosemary. Swap the white wine for vegetable broth, or toss in some toasted nuts for a crunchy twist. Personalize the recipe to fit your taste. Storing & Reheating Delicious Pan Seared Wild Mushrooms Recipe for Beginners Store leftovers in an airtight container in the fridge for up to three days. To reheat, gently warm in a sauté pan over low heat to retain texture and flavor. Sharing this pan-seared mushroom dish at a family dinner left everyone raving about the flavors. My cousin even asked for a cooking lesson, and I gladly obliged, making a memorable evening together. FAQs About Delicious Pan Seared Wild Mushrooms Recipe for Beginners What is Delicious Pan Seared Wild Mushrooms Recipe for Beginners? The “Delicious Pan Seared Wild Mushrooms Recipe for Beginners” is a simple yet flavorful dish that showcases assorted fresh wild mushrooms cooked to perfection. It combines mushrooms, garlic, and fresh herbs with a splash of white wine for a rich, savory flavor. With just a few easy steps, this recipe transforms ordinary ingredients into a gourmet experience, making it accessible for novice cooks who want to impress their guests. What types of mushrooms work best for this recipe? For the best results in your pan seared wild mushrooms, use a mixture of various mushrooms, such as shiitake, cremini, and oyster varieties. Each type brings its unique flavor and texture to the dish. The variety not only enhances the taste but also adds visual appeal. Experiment and find your favorite combinations—feel free to explore local farmers’ markets for unique wild mushroom offerings! Can I make this recipe vegan-friendly? Absolutely! To make the Delicious Pan Seared Wild Mushrooms Recipe for Beginners vegan, simply replace the dairy-free butter with a plant-based alternative such as olive oil or coconut oil. This swap will still
Delicious Strawberries & Chill Cocktail Recipe for Cool Evenings
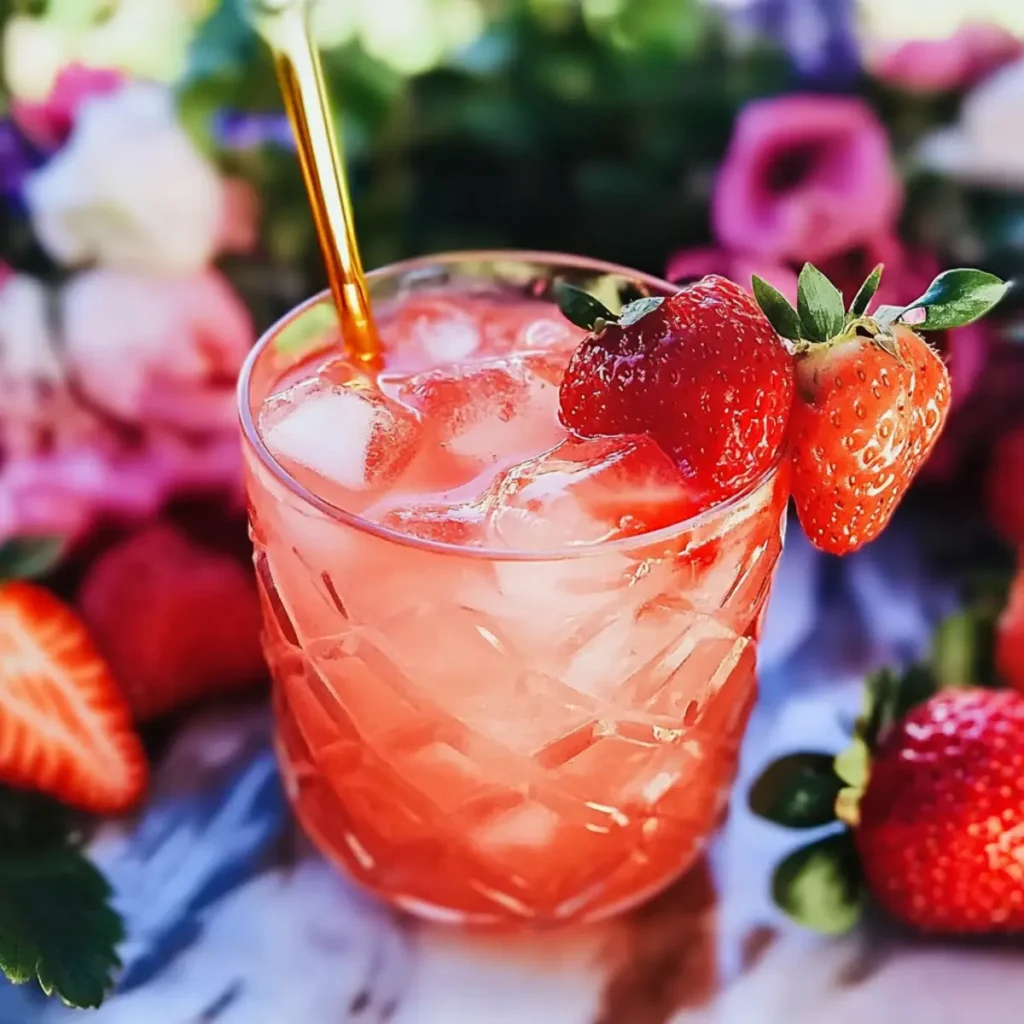
Strawberries & Chill Cocktail is not just a drink; it’s a delightful escape into a world of flavor that dances on your tongue. Imagine the sweet, tangy burst of strawberries mingling with a hint of floral hibiscus and the invigorating kick of Kraken Rum. This cocktail invites you to unwind and enjoy the moment while capturing the essence of summer, no matter the season. Picture yourself lounging on a warm evening, the sun setting in a blush of orange and pink, as you sip this vibrant cocktail adorned with fresh strawberry garnishes that beckon you to take another refreshing sip. This drink is perfect for any occasion, whether you’re hosting friends for a cozy get-together or simply enjoying a quiet night in. Prepare for both your taste buds and social media feed to be dazzled. Ingredients for Strawberries & Chill Cocktail Here’s what you’ll need to make this delicious Strawberries & Chill Cocktail: 5 oz Hibiscus Simple Syrup – This syrup adds a lush floral sweetness that’s perfect for balancing the tartness of the lemon vodka. ¾ oz Kraken Rum – A rich, spiced rum that brings depth and a hint of unexpected warmth to the cocktail. 1 oz Svedka Strawberry Lemonade Vodka – This vodka infuses the cocktail with vibrant strawberry flavors and a refreshing lemonade twist. 2 ¾ oz Rose Lemonade – A sparkling twist that not only enhances flavor but also adds a beautiful blush color to the drink. Fresh strawberries (for garnish) – These beauties add visual charm and a burst of freshness, perfect for topping your cocktail. Ice (for shaking and serving) – The essential ingredient to chill your drink and make it refreshingly cool. How to Make Strawberries & Chill Cocktail Follow these simple steps to prepare this delicious Strawberries & Chill Cocktail: Step 1: Gather Your Ingredients Make sure you have all your ingredients in front of you. You’ll need your hibiscus syrup, Kraken Rum, Svedka Strawberry Lemonade Vodka, rose lemonade, fresh strawberries, and some ice to shake things up. Step 2: Prepare the Shaker Fill a cocktail shaker with ice. The more ice, the better as you want your drink icy-cold and refreshing. Step 3: Mix the Ingredients Pour in the hibiscus syrup, Kraken Rum, Svedka Strawberry Lemonade Vodka, and rose lemonade. Put the lid on and give it a good shake! Think Dance Party in a shaker rather than just your average swirl. Step 4: Strain the Mixture After a good shake, use a strainer to pour the cocktail into a fancy glass. You want to keep all those icy shards out while still letting the beautiful colors flow. Step 5: Garnish with Strawberries Slice a fresh strawberry and gently lay it on the rim of the drink or drop a couple right in. It’s all about that visual appeal! Step 6: Enjoy Your Cocktail Find a comfy spot, put your feet up, and take a moment to enjoy your creation. This Strawberries & Chill Cocktail is perfect for sipping slowly as you chat with friends or reflect on your day. Serve it up and watch as your friends marvel at your cocktail-making prowess! Whether it’s a home gathering or a solo evening of Netflix and snacks, this drink is your new go-to. So why not kick back, relax, and let the chill vibes flow? Enjoy! Perfecting Strawberries & Chill Cocktail Cooking Process Begin by shaking the hibiscus simple syrup, Kraken Rum, strawberry lemonade vodka, and rose lemonade with ice in a cocktail shaker until perfectly chilled. Strain into a glass and garnish with fresh strawberries for a beautiful finish. Add Your Touch to Strawberries & Chill Cocktail Make this cocktail your own by swapping out the rum for a flavored vodka or using regular lemonade instead of rose lemonade. Experiment with different fruits for garnish, such as raspberries or mint leaves, for that extra flair. Storing & Reheating Strawberries & Chill Cocktail While cocktails are best enjoyed fresh, you can store any leftover mixture in the refrigerator for up to a day. Shake well before serving again and add fresh ice for an instant refresh. It’s funny; I remember the first time I whipped this up for a get-together. My friends were so impressed they thought I had taken mixology classes! It turns out, all I needed was a good recipe and a bit of creativity. FAQs About Strawberries & Chill Cocktail What is Strawberries & Chill Cocktail? The Strawberries & Chill Cocktail is a refreshing, vibrant drink that perfectly combines the sweetness of strawberries with the floral notes of hibiscus and the tartness of lemonade. With ingredients like Kraken Rum and Svedka Strawberry Lemonade Vodka, this cocktail is both easy to make and bursting with flavor. It’s perfect for any occasion, whether you’re hosting a gathering or simply unwinding after a long day. This cocktail not only tastes incredible, but it also looks stunning, making it a fantastic choice for impressing your guests. How do I make a Strawberries & Chill Cocktail? To make a Strawberries & Chill Cocktail, start by shaking 5 oz of hibiscus simple syrup, ¾ oz of Kraken Rum, 1 oz of Svedka Strawberry Lemonade Vodka, and 2 ¾ oz of rose lemonade with ice in a cocktail shaker. Once chilled, strain the mixture into a glass and garnish with fresh strawberries on top. This simple, straightforward process ensures a beautifully balanced drink that will have everyone asking for the recipe. Can I customize my Strawberries & Chill Cocktail? Absolutely! One of the best things about the Strawberries & Chill Cocktail is its versatility. You can swap out the Kraken Rum for a flavored vodka of your choice, or even use regular lemonade instead of rose lemonade for a different flavor profile. Feel free to experiment with various fruits for garnishing, like raspberries, mint leaves, or even a sprig of basil for an added twist. What can I serve with Strawberries & Chill Cocktail? When serving the Strawberries & Chill Cocktail, consider pairing it
Fresh & Healthy Everyday Salad Dressing Ready in Just 5 Minutes
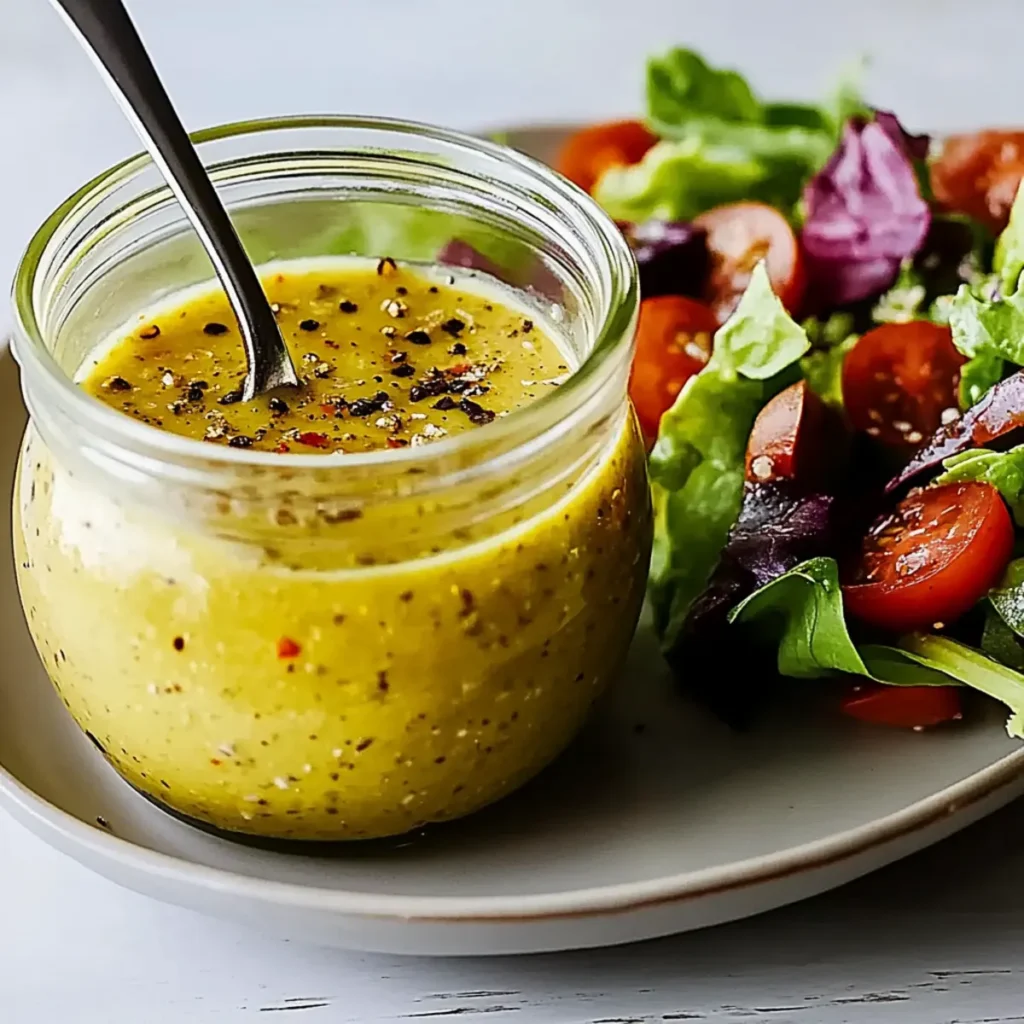
Fresh & Healthy Everyday Salad Dressing is the secret weapon to elevate your salads from boring to brilliant in just five minutes. Imagine drizzling a zesty, tangy masterpiece over fresh greens, transforming the mundane into a vibrant explosion of flavor. Your taste buds will dance with joy, and your salad will be the talk of the dinner table. But this salad dressing isn’t just about taste; it’s about the stories that come with every bite. Picture hosting a dinner party where guests rave about your culinary skills, while in reality, you whipped this dressing up faster than they can say “vinaigrette.” It’s an incredible combination of ingredients that brings that extra oomph to any meal, making even the simplest salads seem like a gourmet creation. Ingredients for Fresh & Healthy Everyday Salad Dressing Here’s what you’ll need to make this delicious Fresh & Healthy Everyday Salad Dressing: ½ cup olive oil – Use extra virgin for the best flavor and health benefits. It adds a rich, fruity aroma that binds the ingredients together. ⅓ cup lemon juice – Freshly squeezed is ideal, bringing a burst of acidity that brightens up every salad. 1 piece shallot, minced – Adds a mild onion flavor that complements the other ingredients without overpowering. 1 tablespoon Dijon mustard – This offers a hint of spice and creaminess, ensuring your dressing is anything but boring. 1 tablespoon honey or maple syrup – Use whatever you fancy for a touch of sweetness amidst the tangy ingredients. ½ teaspoon dried Italian spices – A mix of basil, thyme, parsley, and oregano will add depth and fragrance to your dressing. ½ teaspoon coarse sea salt – Essential for enhancing all the flavors. Adjust to your taste. ¼ teaspoon white pepper – For a bit of subtle heat without the black specks in your dressing. How to Make Fresh & Healthy Everyday Salad Dressing Follow these simple steps to prepare this delicious Fresh & Healthy Everyday Salad Dressing: Step 1: Gather Your Ingredients Before you dive into making this dressing, ensure all your ingredients are at hand and ready to go. This will make the process smoother and less chaotic—no one likes a salad dressing emergency. Step 2: Whisk It Up In a small bowl, whisk together the olive oil, lemon juice, minced shallot, Dijon mustard, honey or maple syrup, dried Italian spices, coarse sea salt, and white pepper. Enjoy the delightful aroma wafting up as you combine these ingredients. Step 3: The Jar Method Alternatively, if you’re a fan of shaking things up (literally), dump all the ingredients into a glass jar with a tight-fitting lid. Make sure the lid is secure, then shake vigorously until everything is beautifully mixed and emulsified. Isn’t that satisfying? Step 4: Taste and Adjust Grab a spoon and taste your dressing. Is it tangy enough? Do you want more sweetness? Adjust according to your personal preference—after all, this dressing is all about you! Step 5: Store for Later Pour the dressing back into the jar if you shook it, or transfer it to an airtight container. It can be stored in the fridge for up to two weeks. If it solidifies, just place the jar in a bowl of warm water to loosen it, or let it sit at room temperature for a bit. Step 6: Dress Your Salad When you’re ready to enjoy, simply drizzle your Fresh & Healthy Everyday Salad Dressing over mixed greens, roasted veggies, or even grilled chicken. This dressing turns any meal into a masterpiece—your taste buds will thank you! Now that you’re armed with the key to making the most incredible Fresh & Healthy Everyday Salad Dressing, it’s time to take your culinary adventures to the next level. Whether it’s a quick weeknight dinner or a lavish meal with friends, this simple yet stellar dressing will never let you down. Enjoy the journey of homemade deliciousness while making memories with family and friends at every meal! This showstopping Fresh & Healthy Everyday Salad Dressing delivers restaurant-quality results using simple ingredients you probably already have at home. The perfect balance of textures and flavors creates an unforgettable dining experience that will have everyone asking for seconds. Picture-perfect presentation with vibrant colors makes this dish absolutely Instagram-worthy and guaranteed to impress any dinner guest. Incredibly versatile recipe that works beautifully for weeknight dinners, meal prep, special occasions, or even outdoor entertaining sessions. Perfecting Fresh & Healthy Everyday Salad Dressing Cooking Process To whip up your Fresh & Healthy Everyday Salad Dressing efficiently, start by gathering all your ingredients. Measure out the olive oil and lemon juice first, followed by mincing the shallot. Next, combine all ingredients in a bowl or jar, whisking or shaking until lovely and creamy. Add Your Touch to Fresh & Healthy Everyday Salad Dressing Make this Fresh & Healthy Everyday Salad Dressing truly your own by substituting maple syrup for honey if you prefer a vegan option. You can swap lemon juice with apple cider vinegar for a tangy twist or throw in your favorite herbs to amp up those flavors! Storing & Reheating Fresh & Healthy Everyday Salad Dressing This Fresh & Healthy Everyday Salad Dressing can be stored in the fridge for up to two weeks. To maintain freshness, keep it in a tightly sealed jar. If it solidifies, just warm it gently in a bowl of warm water before using. Experimenting with recipes in the kitchen has led me to some incredible family moments, especially when my mom tasted this dressing and exclaimed it was the best she’d ever had. Those words truly made my day! FAQs About Fresh & Healthy Everyday Salad Dressing What is Fresh & Healthy Everyday Salad Dressing? Fresh & Healthy Everyday Salad Dressing is a delightful blend of simple and wholesome ingredients designed to elevate your salads. With a harmonious balance of olive oil, lemon juice, and a hint of sweetness from honey or maple syrup, this dressing enhances any salad with a burst of flavor.