
easy goulash recipes simple and comforting for all
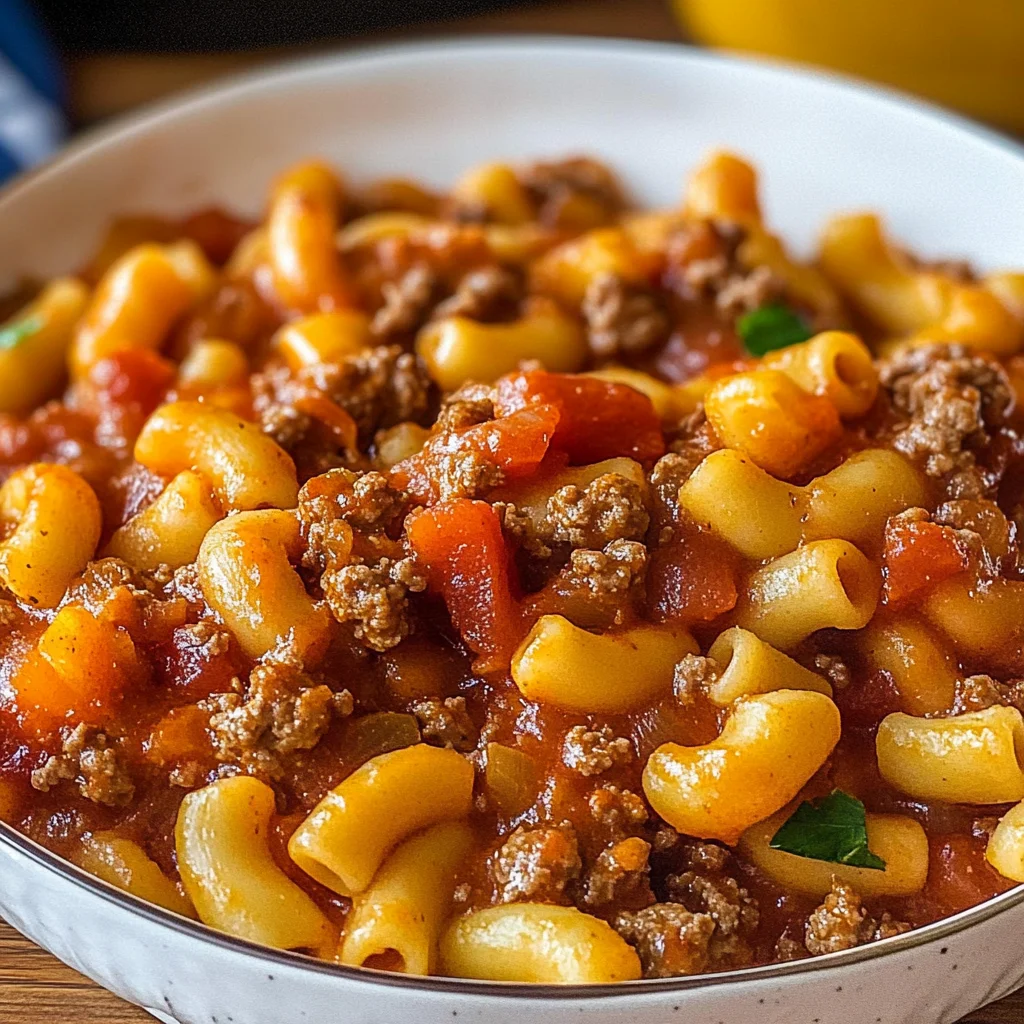
Imagine a steaming bowl of goulash, its rich tomato sauce mingling with perfectly cooked macaroni and tender ground beef, creating a cozy embrace for your taste buds. The aroma wafts through the kitchen, instantly transporting you back to family dinners where laughter and deliciousness filled the air, making even the pickiest eaters smile. Easy goulash recipes simple enough for anyone to master bring back those heartwarming memories and become a go-to meal on chilly nights or busy weeknights. With each bite, you’re reminded of home, warmth, and the joy of sharing comfort food that never fails to satisfy. Why Is easy goulash recipes simple So Irresistibly Good? Comforting flavors come together with ground beef and rich tomato sauce, creating a dish that warms the soul. Quick prep time of just 10 minutes means you can whip this up even on busy weeknights. Hearty macaroni adds satisfying texture, while Italian seasoning elevates every bite with aromatic goodness. Plus, it’s a crowd-pleaser—perfect for feeding families or entertaining friends! Ingredients for easy goulash recipes simple For the Meat 1 lb ground beef (or ground turkey) – Use ground turkey for a leaner option that still delivers great flavor. For the Aromatics 1 cup onion (chopped) – Freshly chopped onion adds a sweet and savory base to your goulash. 2 cloves garlic (minced) – Minced garlic enhances the dish with a warm, aromatic touch. For the Sauce 1 can diced tomatoes (14.5 oz) – The canned tomatoes provide a rich, tangy flavor and juicy texture. 1 cup beef broth (or water) – Beef broth intensifies the flavor; water can be used in a pinch. 2 tablespoons tomato paste – Tomato paste thickens the sauce and adds depth to the overall taste. For the Pasta 2 cups elbow macaroni (uncooked) – Elbow macaroni is perfect for soaking up the delicious sauce while maintaining a hearty texture. For the Seasoning 2 teaspoons Italian seasoning – This blend of herbs infuses your goulash with traditional Italian flavors. 1 teaspoon salt (to taste) – Adjust salt according to preference for optimal seasoning balance. 1 teaspoon black pepper (to taste) – Freshly ground black pepper brings a subtle heat and enhances all other flavors. This easy goulash recipe is not only simple but also packed with comforting goodness that your whole family will love! Directions: easy goulash recipes simple 1. Brown the ground beef in a large pot over medium heat until fully cooked, about 5-7 minutes. Drain excess fat to keep your goulash light and flavorful. 2. Sauté the chopped onion and minced garlic in the pot, cooking until the onion turns translucent, usually around 3-4 minutes. This will create a lovely aromatic base for your dish. 3. Combine the diced tomatoes, beef broth, tomato paste, and Italian seasoning into the pot. Stir well to mix everything together for a rich, hearty sauce. 4. Boil the mixture until it bubbles vigorously, then add the uncooked elbow macaroni. This is where your goulash begins to take shape! 5. Simmer on low heat, covering the pot and stirring occasionally for about 20 minutes, until the macaroni is tender and has absorbed all those delicious flavors. 6. Season with salt and black pepper to taste before serving. A little adjustment here can make all the difference in flavor! Optional: Garnish with fresh parsley for a pop of color and freshness. Exact quantities are listed in the recipe card below. Expert Tips Meat Choices: Use ground turkey for a leaner option, but ensure it’s well-seasoned to avoid blandness in your easy goulash recipes simple. Onion Perfection: Sauté the onion until golden, not just translucent; this enhances the overall flavor profile of your dish. Garlic Timing: Add minced garlic just after the onion is done; cooking it too long can lead to bitterness in flavor. Tomato Balance: If using low-sodium beef broth, adjust seasoning with extra salt or pepper to enhance the richness of the sauce. Macaroni Cooking: Stir the macaroni occasionally while simmering to prevent sticking and ensure even cooking throughout. Taste Testing: Always taste before serving! Adjust salt and pepper at the end to personalize your easy goulash recipes simple. How to Store and Freeze easy goulash recipes simple Fridge: Store any leftover easy goulash recipes simple in an airtight container for up to 3 days. Make sure it cools completely before sealing. Freezer: You can freeze your easy goulash recipes simple for up to 3 months. Portion it into freezer-safe containers, leaving some space for expansion. Reheating: When you’re ready to enjoy your goulash again, thaw it in the fridge overnight. Reheat on the stove over medium heat, stirring occasionally until heated through. Leftover Ingredients: Any uncooked elbow macaroni or fresh ingredients should be stored separately. Use them within a week for best quality. easy goulash recipes simple Your Way Feel free to add your personal touch and create a version of this dish that sings with your family’s favorite flavors. Ground Turkey: Swap ground beef for ground turkey for a lighter alternative that still packs in flavor. This change will yield a slightly milder taste, making it perfect for those who prefer leaner meats. Vegetable Medley: Stir in chopped bell peppers, zucchini, or carrots for a burst of color and nutrition. Not only do they enhance the visual appeal, but they also provide a delightful crunch that complements the softness of the macaroni. Spicy Kick: Add diced jalapeños or crushed red pepper flakes to bring some heat to your goulash. A little spice can elevate the whole dish, turning comfort food into an exciting culinary adventure for those who enjoy bold flavors. Creamy Version: Introduce a splash of cream or a dollop of sour cream at the end for a rich and creamy twist. This addition transforms the texture and adds depth, creating an indulgent version that’s hard to resist. Herb Infusion: Experiment with fresh herbs like basil or parsley for a refreshing finish. Adding these herbs just before serving can brighten up the flavors, leaving you with
Crispy Menbosha Recipe: Easy Air Fried Shrimp Toasts Delight

Crispy Menbosha is a dish that takes simple ingredients and transforms them into a delightful culinary experience. Imagine sinking your teeth into a crispy toast with a juicy shrimp filling that practically dances on your taste buds. This is not just food; it’s a savory journey that reminds us that cooking can be both easy and fun. I remember the first time I tried making crispy Menbosha. It was a rainy Tuesday evening, and I found myself craving comfort food that wouldn’t take hours to prepare. Little did I know that this dish would become a staple in my kitchen, perfect for cozy nights or when friends drop by unexpectedly. The aroma that fills your house while these little toasts are air frying is something you simply have to experience. Ingredients for Crispy Menbosha Recipe: Delicious Shrimp Toasts Air Fried to Perfection Here’s what you’ll need to make this delicious Crispy Menbosha Recipe: Delicious Shrimp Toasts Air Fried to Perfection: 6 slices white bread – Choose fresh slices for the best texture; you can also use whole wheat for a healthier twist. 10 large shrimps – Make sure they are deveined and deshelled for ease; fresh or frozen can work. 2-3 stalks green onion – Chopped finely to add freshness and a gentle kick to your filling. 3 tablespoons cornstarch – This binds the shrimp mixture and gives a lovely crisp when cooked. 0.5 tablespoon cooking rice wine – Adds depth and enhances the flavor of the shrimp. 0.5 teaspoon black pepper – Adjust according to your taste; a pinch can go a long way. 0.25 teaspoon salt – Essential for enhancing the flavors of the other ingredients. Canola oil spray – To keep your Menbosha crispy, light, and not too greasy during air frying. How to Make Crispy Menbosha Recipe: Delicious Shrimp Toasts Air Fried to Perfection Follow these simple steps to prepare this delicious Crispy Menbosha Recipe: Delicious Shrimp Toasts Air Fried to Perfection: Step 1: Prepare the Shrimp Filling In a large mixing bowl, combine the minced shrimp, chopped green onions, egg white, cornstarch, cooking rice wine, salt, and pepper. Mix well until all ingredients are thoroughly combined, channeling your inner chef while making this delightful concoction. You want it to be cohesive but not overly gooey. Step 2: Prepare the Bread Trim the crusts off each slice of bread, because let’s face it, nobody needs a chewy crust in this scenario. Next, cut each slice into 4 equal pieces, creating 12 delightful toast bites that will house your shrimp filling. Step 3: Assemble the Menbosha Take about 1 tablespoon of the shrimp mixture and sandwich it between two pieces of your bread. Press down lightly to ensure it clings together. Picture cute little pillows of shrimp goodness waiting to be transformed. Step 4: Air Fry to Perfection Spray both sides of each shrimp toast with canola oil spray. This is where the magic happens! Place the shrimp toasts in an air fryer basket (or a lined sheet pan if you’re going old-school) and bake at 350°F for 5-6 minutes. Keep an eye on them; you want them golden and crispy but not too burnt. Step 5: Serve and Savor Once they’re perfectly golden, remove them from the air fryer and serve them hot! Whether you dip them in sweet chili sauce or your favorite condiment, you’re in for a flavor explosion. Trust me; your taste buds will thank you. With just a few simple steps, you have created a mouthwatering dish that anyone would be proud to serve. These crispy Menbosha toasts are not just an appetizer; they are the star of the show, perfect for gatherings or cozy nights in. So, go ahead and impress your friends with this easy air-fried delight that promises restaurant-level flavors right from your kitchen! Perfecting Crispy Menbosha Recipe: Delicious Shrimp Toasts Air Fried to Perfection Cooking Process For optimal efficiency and fantastic results, prepare the shrimp filling first, then assemble the shrimp toasts while your air fryer preheats. This way, you maximize your time and end up with perfectly crispy bites in no time. Add Your Touch to Crispy Menbosha Recipe: Delicious Shrimp Toasts Air Fried to Perfection Feel free to customize your Crispy Menbosha by swapping out shrimp for crab or adding cilantro for an extra kick. Depending on your taste buds, enhance the flavor with a splash of lime juice or some chili flakes for heat. Storing & Reheating Crispy Menbosha Recipe: Delicious Shrimp Toasts Air Fried to Perfection To store, place leftover Crispy Menbosha in an airtight container in the fridge for up to two days. Reheat them in the air fryer at 350°F for 3-5 minutes to restore their crispiness. Cooking these Crispy Menbosha always reminds me of a lively evening with friends, where they devoured the shrimp toasts in minutes and begged for my secret recipe. Their laughter and satisfaction made the effort totally worth it. FAQs About Crispy Menbosha Recipe: Delicious Shrimp Toasts Air Fried to Perfection What is Crispy Menbosha Recipe: Delicious Shrimp Toasts Air Fried to Perfection? Crispy Menbosha is a delightful Asian-inspired dish featuring shrimp-filled toasts that are air-fried to achieve a perfectly crispy exterior. This recipe utilizes simple ingredients like white bread, shrimp, green onions, and cornstarch, making it accessible for home cooks. It’s light yet full of flavor, perfect as a snack or appetizer. The end result is a mouthwatering combination of savory shrimp filling complemented by the crunch of bread, creating an unforgettable culinary experience. How long does it take to make Crispy Menbosha? This delicious recipe is perfect for those short on time! You can prepare Crispy Menbosha in just 16 minutes, which includes 10 minutes of prep and 6 minutes of cooking time in an air fryer. It’s a quick and satisfying dish ideal for busy weeknights or spontaneous gatherings with friends. Perfection is just a few minutes away, making it a top choice for those who crave both speed and flavor. Can I
Delicious Gruyère & Thyme Italian Focaccia Recipe for Homemade Bread
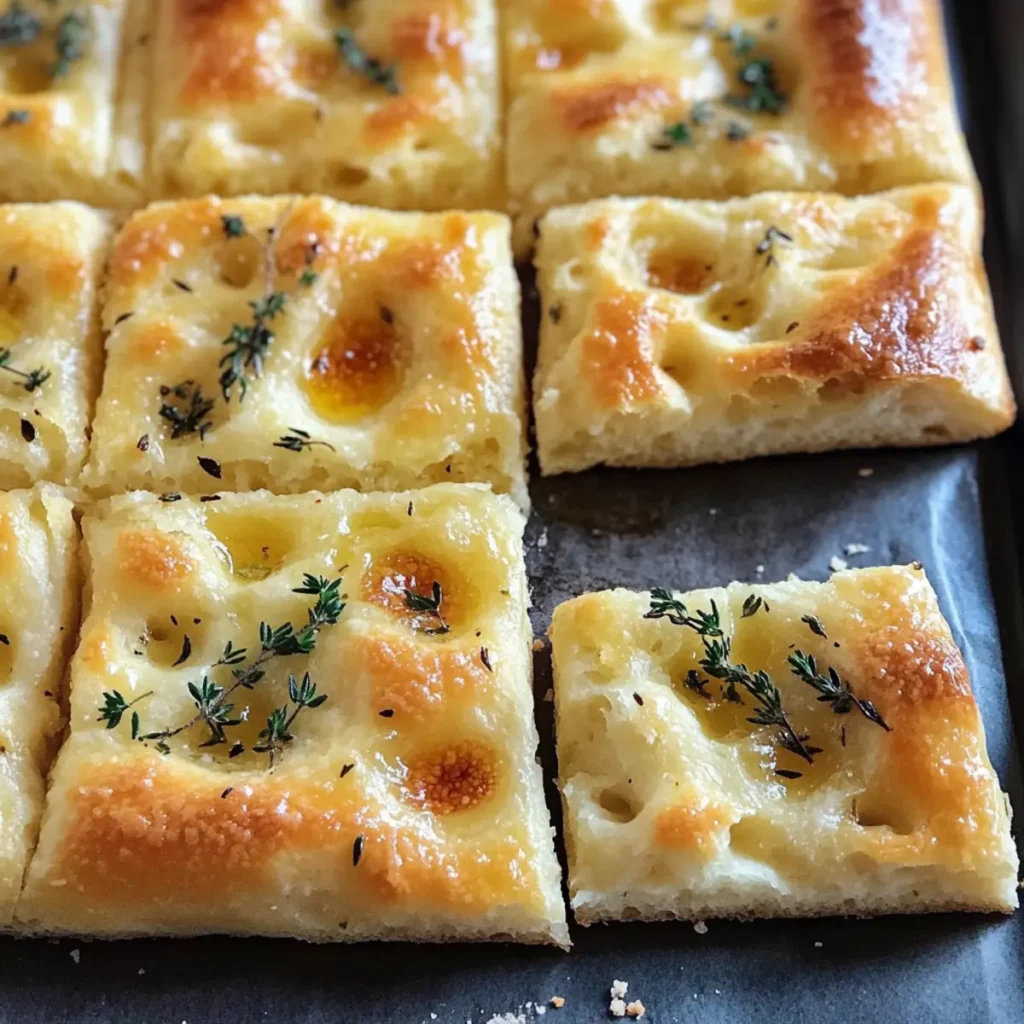
Imagine walking into a warm kitchen where the rich aroma of freshly baked bread dances through the air, teasing your senses with its promise of comfort and indulgence. That’s the magic of this Gruyère & Thyme Italian Focaccia—a delightful blend of buttery gruyère cheese and aromatic thyme, making each bite an unforgettable experience. It’s like a warm hug for your taste buds, inviting you to slow down and savor the moment. Now, if you’re anything like me, you likely have fond memories tied to the kitchen—whether it’s a family gathering, a cozy evening with friends, or just a Sunday morning that feels like a mini celebration. This focaccia embodies all those moments. Perfect for parties, picnics, or an intimate dinner at home, it promises to elevate any occasion with its irresistible flavors. So roll up your sleeves, and let’s create some magical bread together. Ingredients for Gruyère & Thyme Italian Focaccia Here’s what you’ll need to make this delicious Gruyère & Thyme Italian Focaccia: 6.25 cups bread flour – Choose high-quality bread flour for the best texture, as it yields that lovely chewy crumb characteristic of focaccia. 2 teaspoons instant dry yeast – Quick-acting yeast allows for a faster rise, meaning more time for you to enjoy snacking. 2 cups warm water – Warm water (about 105°F to 115°F) activates the yeast, helping it work its magic. 1 tablespoon granulated sugar – This little bit of sugar nourishes the yeast and adds a subtle sweetness to your focaccia. 0.5 cups extra virgin olive oil – A good quality olive oil enriches the dough and adds a luscious flavor. 2 tablespoons extra virgin olive oil (for greasing) – Use more olive oil to prevent sticking and create a delightful crust on the focaccia. 4 teaspoons fine sea salt – Enhances the flavor of the bread, but be careful not to overdo it. 0.25 cups room temperature water – Helps balance the hydration in the dough for a perfect consistency. 7 ounces gruyère cheese – Cut into small cubes to melt beautifully throughout the focaccia, adding creaminess and depth. 2 tablespoons fresh thyme leaves – Using fresh thyme elevates the flavor profile and brings a lovely herbal aroma. 2 teaspoons Maldon sea salt flakes – These flaky sea salt flakes provide a delightful crunch and burst of flavor on top of the bread. How to Make Gruyère & Thyme Italian Focaccia Follow these simple steps to prepare this delicious Gruyère & Thyme Italian Focaccia: Step 1: Combine the Dry Ingredients In a large bowl, whisk together the bread flour, instant dry yeast, granulated sugar, and fine sea salt until well combined. This mixture is the foundation of your focaccia, so make sure it’s even and blended. Step 2: Mix in the Water Add the warm water and room temperature water into the flour mixture. Stir until the dough begins to form, ensuring all dry bits are incorporated. You’re making a nice sticky dough, so don’t be shy! Step 3: Knead the Dough Dust a clean surface with flour and knead the dough for about 10 minutes. You want it to be smooth and elastic, kind of like when you stretch your favorite pair of yoga pants. Add flour as needed, but resist the urge to overdo it, as we want a moist dough. Step 4: Infuse with Olive Oil Incorporate the olive oil into the kneaded dough, mixing it thoroughly until it’s well combined. This step is like giving your dough a luxurious spa treatment—each fold and push should ooze flavor. Step 5: Let the Dough Rise Place the dough in a greased bowl and cover it with a clean kitchen towel. Let it rise in a warm place for about 2 hours, or until it has doubled in size. Go ahead and take a short nap; this is the dough’s time to shine! Step 6: Shape the Focaccia Once risen, gently deflate the dough (it deserves a good pat on the back) and spread it into a greased baking pan. Top it generously with the cubes of gruyère cheese and fresh thyme leaves. Allow it to rise for another 30 minutes while you mentally prepare for the deliciousness ahead. Step 7: Prepare for Baking Preheat your oven to 400°F (200°C). This is the pivotal moment where your house will begin to smell like a gourmet bakery. Step 8: Add Finishing Touches Sprinkle Maldon sea salt flakes generously over the top of your focaccia, ensuring every bite will burst with flavor. It’s like sprinkles on a cupcake—absolutely necessary. Step 9: Bake to Perfection Bake for about 50 minutes, or until the focaccia is golden brown and crispy on the outside. Don’t rush this step; the deliciousness is worth every second. Step 10: Slice and Serve Let it cool slightly before serving. Slice with generosity, sharing the love and flavor amidst friends or family. This focaccia is perfect for pairing with a savory soup, a fresh salad, or simply as a snack all on its own! Enjoy the delightful experience of savoring your homemade Gruyère & Thyme Italian Focaccia—a dish that proves good things come to those who bake. This showstopping Gruyère & Thyme Italian Focaccia delivers restaurant-quality results using simple ingredients you probably already have at home. The perfect balance of textures and flavors creates an unforgettable dining experience that will have everyone asking for seconds. Picture-perfect presentation with vibrant colors makes this dish absolutely Instagram-worthy and guaranteed to impress any dinner guest. Incredibly versatile recipe that works beautifully for weeknight dinners, meal prep, special occasions, or even outdoor entertaining sessions. Perfecting Gruyère & Thyme Italian Focaccia Cooking Process Start by mixing your dry ingredients to activate the yeast, then add the warm water. Knead the dough until it’s smooth, let it rise, and incorporate the olive oil. After letting the dough rise a second time, pop it in the oven for a golden finish. Add Your Touch to Gruyère & Thyme Italian Focaccia Feel free to swap out Gruyère for
How to Make Copycat McDonald’s Sweet And Sour Sauce at Home

It’s time to elevate your dipping game with a tasty treat that’s sure to send your taste buds dancing! Imagine a sweet and savory concoction that perfectly balances tanginess with a hint of spice—welcome to the world of Copycat McDonald’s Sweet And Sour Sauce. This delightful sauce brings the iconic fast-food flavor right into your kitchen, making every meal feel like a special occasion. Whether you’re revisiting childhood nostalgia from those happy meals or you’re just a fan of dipping, this sauce doesn’t disappoint. Perfect for chicken nuggets, egg rolls, or even as a vibrant dressing in salads, it’s a versatile addition that gets better with every bite! Ingredients for Copycat McDonald’s Sweet And Sour Sauce Here’s what you’ll need to make this delicious Copycat McDonald’s Sweet And Sour Sauce: ½ cup apricot preserves – This is the star of the sauce, adding sweetness and a fruity base that’s essential for the flavor profile. ¼ cup peach preserves – To boost the sweetness further, peach preserves add complexity and a nice fruity nuance to the sauce. 1 ½ tablespoons white vinegar – This gives the tangy kick that balances the sweetness; it’s necessary for that classic McDonald’s flavor. ½ tablespoon soy sauce – A splash of soy sauce adds an umami richness that deepens the overall flavor. ¼ teaspoon ground mustard – The mustard is subtle yet critical for adding a slight tang that enhances the other flavors. ¼ teaspoon garlic powder – Just a pinch of garlic powder gives this sauce a little aromatic pop without overwhelming the sweetness. 2 tablespoons light corn syrup – This helps thicken the sauce while adding an extra touch of sweetness that’s reminiscent of your favorite fast food dips. 2 teaspoons cornstarch – Cornstarch acts as a thickening agent, ensuring your sauce has the perfect consistency. 2 teaspoons water – A little water is needed to help dissolve the cornstarch for a smooth sauce. How to Make Copycat McDonald’s Sweet And Sour Sauce Follow these simple steps to prepare this delicious Copycat McDonald’s Sweet And Sour Sauce: Step 1: Blend the Base Place the apricot preserves, peach preserves, white vinegar, soy sauce, ground mustard, and garlic powder into your trusty food processor. Blend until the entire mixture is smooth and delightful. Step 2: Heat it Up Pour the blended mixture into a medium saucepan and add the light corn syrup. Over medium-low heat, stir often and let it simmer for about five minutes. Enjoy the aroma wafting through your kitchen! Step 3: Prepare the Thickening Mix In a small bowl, whisk together cornstarch and water until it’s completely combined. This will give our sauce that perfect thickness. Step 4: Combine and Cook While continuously whisking, pour the cornstarch mixture into the saucepan with the sauce. Keep stirring for about three minutes, or until the sauce begins to thicken up beautifully. Step 5: Cool it Down Remove the saucepan from heat. Allow the sauce to cool completely in the pot, or if you’re in a hurry, transfer it to a bowl that speeds up the cooling process. Try pairing this sweet and sour sauce with your favorite snacks. Drizzle it on chicken nuggets, dip egg rolls, or pour it over grilled tofu for a delightful flavor explosion. Your taste buds will surely thank you for this homemade crispy delight! You Must Know About Copycat McDonald’s Sweet And Sour Sauce This showstopping Copycat McDonald’s Sweet And Sour Sauce delivers restaurant-quality results using simple ingredients you probably already have at home. The perfect balance of textures and flavors creates an unforgettable dining experience that will have everyone asking for seconds. Picture-perfect presentation with vibrant colors makes this dish absolutely Instagram-worthy and guaranteed to impress any dinner guest. Incredibly versatile recipe that works beautifully for weeknight dinners, meal prep, special occasions, or even outdoor entertaining sessions. Perfecting Copycat McDonald’s Sweet And Sour Sauce Cooking Process Start by blending the apricot and peach preserves with the vinegar and soy sauce to create a smooth base. While simmering your mixture, whisk the cornstarch and water to thicken the sauce to perfection. Add Your Touch to Copycat McDonald’s Sweet And Sour Sauce Feel free to swap out the preserves for your favorite flavors, or add a splash of heat with some diced jalapeños. You can even experiment with adding minced ginger for a zingy twist. Storing & Reheating Copycat McDonald’s Sweet And Sour Sauce Store any leftovers in an airtight container in the refrigerator for up to a week. Reheat gently on the stove or in short bursts in the microwave, stirring frequently to maintain the sauce’s silky texture. It was during a friend’s birthday party when I debuted this Copycat McDonald’s Sweet And Sour Sauce. The crowd went wild, and one friend swore it was better than the real thing, which left me beaming with pride. FAQs About Copycat McDonald’s Sweet And Sour Sauce What is Copycat McDonald’s Sweet And Sour Sauce? Copycat McDonald’s Sweet And Sour Sauce is a homemade version of the beloved sauce served at McDonald’s. This flavorful blend combines apricot and peach preserves with vinegar, soy sauce, and spices, creating the iconic sweet and tangy taste fans love. With a few simple ingredients, you can whip up this sauce in just 10 minutes, making it perfect for dipping nuggets, fries, or even as a tangy glaze for grilled meats. Making this sauce at home allows you to control the ingredients and tailor the flavor to your liking. How do you store Copycat McDonald’s Sweet And Sour Sauce? To store your Copycat McDonald’s Sweet And Sour Sauce, simply transfer any leftovers into an airtight container. Keep it in the refrigerator, where it will last for up to a week. Make sure the sauce is completely cooled before sealing it in the container. When you’re ready to use it again, gently reheat the sauce over low heat on the stove, or microwave it in short increments, stirring frequently to maintain its desired thickness and texture. Can
Easy Big Mac Sauce Recipe You Can Make in 2 Minutes

Big Mac Sauce brings a nostalgic flavor explosion from fast food favorites right into your kitchen. This creamy, tangy blend swings open the doors to homemade burger nights that feel extra special. Imagine sinking your teeth into a juicy homemade burger, generously slathered with this sauce, each bite releasing a delightful burst of flavor. Sharing this sauce with friends and family during a weekend barbecue or game night can create lasting memories. The incredible fusion of mayonnaise, tangy relish, and zesty mustard paints a vibrant flavor picture that I guarantee will have your taste buds begging for more. Get ready for an unforgettable culinary experience that’s easy, delicious, and downright addictive! Ingredients for Big Mac Sauce Here’s what you’ll need to make this delicious Big Mac Sauce: 1 cup mayonnaise – A creamy base that provides a rich texture. Use full-fat for the best flavor. 1 tablespoon pickle relish – Adds a tangy sweetness; choose sweet or dill based on your preference. 2 teaspoons white vinegar – Offers a sharp acidity that balances the richness of the mayo. 2 teaspoons mustard – Gives a zesty kick; yellow mustard works perfectly here. 1/2 teaspoon smoked paprika – Imparts a subtle smokiness that elevates the sauce’s flavor profile. 1/2 teaspoon salt – Enhances all the flavors, making everything pop. 1/2 teaspoon pepper – Adds a hint of warmth for that extra zing. How to Make Big Mac Sauce Follow these simple steps to prepare this delicious Big Mac Sauce: Step 1: Gather Your Tools Start by collecting your mixing bowls and whisk. Having everything ready will save you time and keep the kitchen chaos at bay. Step 2: Combine the Ingredients In a mixing bowl, combine mayonnaise, pickle relish, white vinegar, mustard, smoked paprika, salt, and pepper. This is where the magic starts. Whisk all the ingredients together until fully combined and smooth, leaving no lumps behind. Step 3: Taste-Test Now comes the fun part! Dip a spoon into the sauce and give it a taste. If it needs more zing, feel free to add a squirt of mustard or a pinch of salt. Adjust it till it’s just right for your palate. Step 4: Chill Out Transfer the sauce to an airtight container and let it chill in the refrigerator for at least 30 minutes. This helps the flavors meld beautifully. You can even prepare it the night before for maximum flavor infusion! Step 5: Serve with Style Remove from the fridge and serve this vibrant Big Mac Sauce with your favorite burgers, fries, or even as a dip for veggies. It’s perfect for all occasions! Big Mac Sauce isn’t just a tasty addition to burgers; it can jazz up sandwiches, salad dressings, or even be used as a dip for crisp veggies. It’s versatile enough to bring any meal to life, making it not just a recipe but a culinary travel guide into flavor bliss. Imagine having your friends over for a cozy gathering, and you’re serving sizzling homemade burgers topped with this dreamy sauce. Their faces when they taste it? Priceless. You’ll be crowned the home chef of the year! Why wait? Whip up this delightful sauce in mere minutes, and unlock creativity in your culinary adventures! The blend of flavors promises to take your meals from good to absolutely unforgettable. Get ready to enjoy each savory bite of Big Mac Sauce! Perfecting Big Mac Sauce Cooking Process To create your Big Mac Sauce, gather all your ingredients first. Start by whisking the mayonnaise and relish together before adding the vinegar, mustard, smoked paprika, salt, and pepper. This method ensures all flavors meld beautifully. Add Your Touch to Big Mac Sauce Feel free to get creative with your Big Mac Sauce! You can swap in Greek yogurt for a lighter option, experiment with spicy mustard, or even throw in some diced jalapeños for a kick. The possibilities are endless. Storing & Reheating Big Mac Sauce Store any leftover Big Mac Sauce in an airtight container in the fridge for up to a week. For best results, give it a good stir before serving again, as the flavors may deepen and meld even more while it sits. A few months ago, I whipped up this sauce for a BBQ, and my friends raved about it non-stop. They insisted I bottle it up and sell it—guess they loved it as much as I did! FAQs About Big Mac Sauce What is Big Mac Sauce? Big Mac Sauce is a delicious, creamy condiment that brings the iconic taste of the McDonald’s Big Mac burger right into your kitchen. It’s made primarily from mayonnaise, pickle relish, and a blend of spices that creates a savory and tangy flavor profile. This sauce is not only fantastic on burgers but also pairs beautifully with sandwiches, fries, and even as a salad dressing. The taste is unmistakably unique, making it a beloved staple among burger lovers. Can I customize my Big Mac Sauce? Absolutely! One of the best things about making your own Big Mac Sauce is your ability to customize it to suit your taste. You might replace the mayonnaise with Greek yogurt for a healthier twist or add a hint of garlic powder for complexity. Feel free to experiment with different mustards or even a dash of hot sauce if you crave some heat. Your Big Mac Sauce can be as unique as your culinary creativity allows! How long does Big Mac Sauce last? When stored properly, Big Mac Sauce can last up to a week in the fridge. It’s crucial to keep it in an airtight container to maintain its flavor and freshness. Over time, the flavors may meld and deepen, making it even more delightful when you reach for it after a couple of days. Just be sure to give it a good stir before using it again! What can I serve with Big Mac Sauce? There are countless delicious options to pair with your Big Mac Sauce. Naturally, it’s perfect
Delicious Pull-Apart Cheesy Bread with Garlic and Parsley Infusion
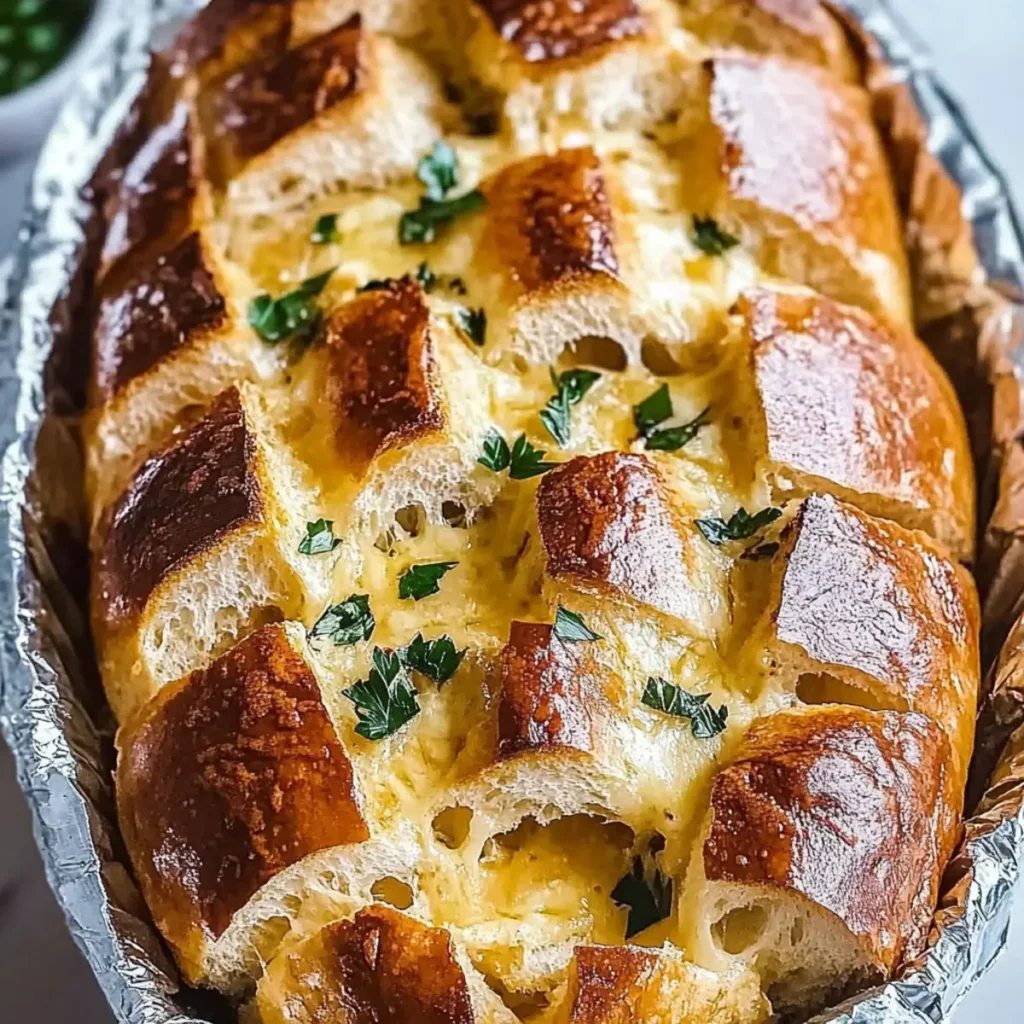
Imagine sinking your teeth into a warm loaf of Pull-Apart Cheesy Bread with Garlic and Parsley Infusion, where every gooey bite greets you with an explosion of cheesy goodness mingling with aromatic garlic and fresh parsley. This bread is not just food; it’s an experience—one that turns a simple gathering into an unforgettable feast. Perfect for family dinners, game nights, or even that solo binge-watching session on a Sunday—because you deserve bread that loves you back. You know that feeling when the cheese stretches tantalizingly as you pull apart a slice? That’s what we’re talking about with this recipe. Close your eyes and envision toasty crusts giving way to a heavenly, buttery, and cheesy interior. It’s the ideal companion to soups, salads, or on its own for a cheesy feast that even your most critical food friend will devour with glee! Ingredients for Pull-Apart Cheesy Bread with Garlic and Parsley Infusion Here’s what you’ll need to make this delicious Pull-Apart Cheesy Bread with Garlic and Parsley Infusion: 1 loaf crusty bread – A sourdough or Vienna loaf works best for that delightful crust and soft interior. 1 cup shredded Mozzarella cheese – Gives the pull-apart effect and cheesy goodness. Feel free to mix in some cheddar for an extra kick. 100 g unsalted butter, softened – The base of our buttery garlic infusion that helps everything come together beautifully. 2 large garlic cloves, minced – Because garlic makes everything better; its aromatic essence is what elevates this dish. 3/4 tsp salt – A must to enhance all the flavors and bring harmony to the dish. 1 tbsp fresh parsley, finely chopped – Adds freshness and a pop of color to the cheesy delight. How to Make Pull-Apart Cheesy Bread with Garlic and Parsley Infusion Follow these simple steps to prepare this delicious Pull-Apart Cheesy Bread with Garlic and Parsley Infusion: Step 1: Preheat the Oven Begin by preheating your oven to 350°F (175°C). This initial heat will create the perfect environment for melting all that cheese to pure ooey-gooey perfection. Step 2: Slice the Loaf Take your crusty bread and slice it into a grid pattern. Be careful here; you want to cut deep enough to create pockets but not all the way through—think of it like a cheesy treasure map. Step 3: Prepare the Garlic Butter In a mixing bowl, combine the softened butter, minced garlic, salt, and chopped parsley. Mix it well until the garlic is evenly dispersed—this is the magical potion that coats your bread. Step 4: Spread the Butter Mixture Generously spread the garlic butter mixture between the loaf slices. Don’t be shy—get in there! Each slice deserves a taste of that enticing buttery goodness. Step 5: Add the Cheese Stuff the shredded mozzarella into each of those lovely slices packed with garlic butter. It’s like playing Tetris but much more delicious. Step 6: Bake to Perfection Wrap the loaf in aluminum foil, creating a cozy blanket for it in the oven. Bake for 25 minutes, then remove the foil for an additional 10 minutes. This will allow the cheese to melt and bubble up beautifully. Once it’s done baking, pull it out, and brace yourself for the heavenly aromas. Pull apart the slices, serving them hot, and watch your guests’ eyes light up. This Pull-Apart Cheesy Bread with Garlic and Parsley Infusion is a show-stopper, perfectly crispy on the outside and delightfully cheesy on the inside. Enjoy every cheesy moment and let the compliments roll in! This showstopping Pull-Apart Cheesy Bread with Garlic and Parsley Infusion delivers restaurant-quality results using simple ingredients you probably already have at home. The perfect balance of textures and flavors creates an unforgettable dining experience that will have everyone asking for seconds. Picture-perfect presentation with vibrant colors makes this dish absolutely Instagram-worthy and guaranteed to impress any dinner guest. Incredibly versatile recipe that works beautifully for weeknight dinners, meal prep, special occasions, or even outdoor entertaining sessions. Perfecting Pull-Apart Cheesy Bread with Garlic and Parsley Infusion Cooking Process To achieve the best results, gather all your ingredients first. Prep the butter mixture while the oven heats up. Slice the bread, and generously spread the garlic mixture between the cuts before adding cheese. Finally, wrap the loaf and bake to melting perfection. Add Your Touch to Pull-Apart Cheesy Bread with Garlic and Parsley Infusion Get creative with your Pull-Apart Cheesy Bread by swapping the Mozzarella for Cheddar or adding ingredients like chopped sun-dried tomatoes or crispy bacon. Feel free to experiment with different herbs, such as basil or oregano, for an extra flavor kick. Storing & Reheating Pull-Apart Cheesy Bread with Garlic and Parsley Infusion Store leftover Pull-Apart Cheesy Bread in an airtight container in the refrigerator for up to three days. To reheat, wrap it in foil and pop it into a preheated oven at 350°F until warmed through and cheeses bubble. Sometimes, when I serve this Pull-Apart Cheesy Bread, my friends declare it the best thing they’ve ever tasted. It’s become a tradition at our game nights, where everyone fights over the last piece. FAQs About Pull-Apart Cheesy Bread with Garlic and Parsley Infusion What is Pull-Apart Cheesy Bread with Garlic and Parsley Infusion? Pull-Apart Cheesy Bread with Garlic and Parsley Infusion is a delightful bread dish that transforms a simple loaf into a cheesy, buttery treat. It often features crusty sourdough or Vienna bread sliced in a grid pattern and filled with a delectable mixture of garlic, parsley, and melted cheese. Ideal for sharing, this dish is perfect for gatherings, game nights, or simply indulging yourself on a cozy evening. Its addictive flavor and inviting aroma will captivate anyone who takes a bite! Can I customize the cheese in Pull-Apart Cheesy Bread with Garlic and Parsley Infusion? Absolutely! While mozzarella cheese gives this dish a delightful stretchiness, you’re free to get creative with your cheese choices. Try using sharp cheddar for a zesty kick or pepper jack for a bit of heat. Mixing different cheeses can also
Delicious Roasted Cauliflower with Garlic Recipe in 40 Minutes

Roasted Cauliflower with Garlic is not just food; it’s a glorious event for your taste buds! Imagine golden florets, kissed by the warmth of the oven, mingling with garlic’s aroma and a sprinkle of vibrant spices. If you have yet to experience this sensational side dish, you’re in for a treat that will make your kitchen feel like a five-star restaurant! Whether it’s a weeknight dinner or a festive gathering, Roasted Cauliflower with Garlic shines as the perfect accompaniment. This delightful dish embodies comfort, bringing warmth and joy to any table, while promising an explosion of flavors that will have everyone coming back for seconds. Ingredients for Roasted Cauliflower with Garlic Here’s what you’ll need to make this delicious Roasted Cauliflower with Garlic: 1 large head cauliflower – About 10 cups of chopped florets; look for firm and fresh heads with compact florets for the best flavor. 3 tablespoons olive oil – Provides richness and helps achieve that delightful caramelization. 2 teaspoons paprika – Adds a mild smokiness and beautiful color to the dish. 3/4 teaspoon salt – Essential for enhancing all the flavors; adjust as per your taste preferences. 1/2 teaspoon ground black pepper – For that extra kick that complements the garlic beautifully. 5 large cloves garlic – Minced garlic infuses the dish with bold flavor; use fresh garlic for maximum impact. 1/4 cup parmesan cheese (optional) – A sprinkle adds savory goodness; feel free to substitute with nutritional yeast for a vegan option. 2 tablespoons fresh lemon juice – Brightens the overall flavor, balancing the richness of the roasted cauliflower. 2 tablespoons chopped fresh parsley – This lovely herb adds a burst of freshness and a pop of color. How to Make Roasted Cauliflower with Garlic Follow these simple steps to prepare this delicious Roasted Cauliflower with Garlic: Step 1: Preheat the Oven Begin by preheating your oven to 425 degrees F. This temperature is ideal for roasting and will give your cauliflower the perfect golden-brown finish. Step 2: Prepare the Cauliflower Take your large head of cauliflower and chop it into fluffy florets, about 10 cups total. Place these florets without stress on a large rimmed baking sheet where they will bask in the oven’s heat. Step 3: Season the Vegetables Drizzle 3 tablespoons of olive oil over the cauliflower florets and toss them like you mean it! Then, sprinkle the paprika, salt, and black pepper, tossing again to ensure each floret is evenly coated in seasoning and oil. Step 4: Roast the Cauliflower Spread the seasoned cauliflower in a single layer on the baking sheet and slide it into the oven. Bake for 20-25 minutes until it’s golden and tender. Enjoy the savory aromas wafting through your kitchen! Step 5: Add Garlic and Optional Parmesan After 20-25 minutes of roasting, remove the cauliflower from the oven. Sprinkle the minced garlic and, if you’re feeling fancy, the parmesan cheese over the top. It gets even better when you return it to the oven for an extra 5 minutes. Step 6: Final Touches Once the garlic is fragrant and the cheese is bubbling, remove your culinary masterpiece from the oven. Drizzle with fresh lemon juice and garnish with chopped parsley. Serve immediately and bask in the glory of your delicious creation! Now that you know how to make Roasted Cauliflower with Garlic, you’re one step closer to elevating your cooking game. This dish pairs beautifully with just about anything, from succulent roasted meats to a cozy pasta dish. It’s perfect for those dinner parties where you want to impress without breaking a sweat, making vegetable lovers feel right at home and satisfying even the pickiest eaters at your table. Enjoy your cooking journey! Perfecting Roasted Cauliflower with Garlic Cooking Process To achieve the best results, start by preheating your oven while you prepare the cauliflower. Toss the florets in olive oil and seasonings, then spread them evenly on a baking sheet for even roasting. Add Your Touch to Roasted Cauliflower with Garlic Feel free to customize your Roasted Cauliflower with Garlic by adding spices like cumin or turmeric, swapping the parmesan for nutritional yeast for a dairy-free option, or mixing in other roasted vegetables for more variety. Storing & Reheating Roasted Cauliflower with Garlic Store any leftovers in an airtight container in the refrigerator for up to three days. To reheat, simply warm them in the oven for best texture, or microwave them for a quicker option. Experiencing the joy of my friends savoring this dish for the first time was unforgettable; their delighted faces said it all, and I immediately knew it was a keeper! FAQs About Roasted Cauliflower with Garlic What is Roasted Cauliflower with Garlic? Roasted Cauliflower with Garlic is a delightful side dish that elevates humble cauliflower into a golden, caramelized treat bursting with flavor. The process involves tossing cauliflower florets in olive oil, garlic, and spices before roasting them in the oven. This method enhances the natural sweetness of the cauliflower while the garlic adds a savory depth. It’s perfect for anyone looking to enjoy a healthy, plant-based dish that can easily complement any meal or stand out on its own as a star side. How do I make Roasted Cauliflower with Garlic extra flavorful? To intensify the flavor of your Roasted Cauliflower with Garlic, experiment with additional spices and herbs. Consider adding cumin or smoked paprika for heat and smokiness. Fresh or dried herbs like thyme or rosemary can also enhance the aromatic profile. Don’t forget to drizzle a touch of balsamic vinegar or lemon juice after roasting for an extra layer of brightness that can take the flavor up a notch. Can I make Roasted Cauliflower with Garlic ahead of time? Absolutely! You can prepare your Roasted Cauliflower with Garlic ahead of time for meal prep or gatherings. After roasting, allow the cauliflower to cool completely before storing it in an airtight container in the refrigerator. It can last for up to three days. When you’re ready to enjoy
Refreshing Strawberry Hibiscus Iced Tea Recipe for Summer Sipping

Imagine a hot summer day where the sun shines relentlessly, and the only thing that can possibly quench your thirst is a brightly colored glass filled with a refreshing drink. Take a sip of this vibrant Refreshing Strawberry Hibiscus Iced Tea Recipe for Summer Sipping, and transport yourself to a tropical paradise. The tangy hibiscus dances on your taste buds while the sweet strawberries add a luscious twist, making every sip feel like a celebration. Just the thought of this tea brings back memories of lazy afternoons lounging in the backyard, with laughter echoing as the world lazily drifts by. Whether you’re hosting a sunny garden party or simply seeking solace from the heat, this iced tea has got your back. Trust me; the tantalizing aroma and eye-catching hues will have even your pickiest guests asking for more. Get ready for an amazing flavor experience that’s not just a recipe but a journey of summertime joy. Ingredients for Refreshing Strawberry Hibiscus Iced Tea Recipe for Summer Sipping Here’s what you’ll need to make this delicious Refreshing Strawberry Hibiscus Iced Tea Recipe for Summer Sipping: 5 cups water – Fresh, filtered water ensures the best flavor in your tea. ½ cup dried hibiscus flowers – Look for bright red flowers; they provide tartness and a stunning color. 1 ½ cups frozen strawberries – Using frozen strawberries adds an extra chill and sweetness; fresh will work too if you have them! 10 leaves fresh mint – Choose vibrant green leaves; mint gives a refreshing twist to the drink. 1/3 cup honey – Adjust this to your taste; honey adds a natural sweetness that complements the tart hibiscus. How to Make Refreshing Strawberry Hibiscus Iced Tea Recipe for Summer Sipping Follow these simple steps to prepare this delicious Refreshing Strawberry Hibiscus Iced Tea Recipe for Summer Sipping: Step 1: Boil the Water Bring 5 cups of water to a rolling boil in a stovetop kettle or a large pot. There’s something oddly satisfying about watching water heat up and transform. Step 2: Steep the Hibiscus Once the water is at a boil, remove it from the heat and add the ½ cup of dried hibiscus flowers. Let them steep for about 15 minutes, and prepare for the captivating aroma that fills your kitchen! Step 3: Strain the Tea After steeping, grab a fine mesh strainer or cheesecloth and strain the hibiscus tea into a pitcher. Admire that beautiful red hue and make a mental note to immediately Instagram that color! Step 4: Add Strawberries and Mint Toss in the 1 ½ cups of frozen strawberries and the 10 fresh mint leaves into the tea. They’ll not only look stunning but also infuse the tea with additional flavor as it chills. Step 5: Sweeten to Taste Stir in the honey, adjusting to taste as you mix. If you like it sweeter, go for it! It’s your drink after all, so make it as fabulous as you want. Step 6: Chill and Serve Pop the pitcher into the refrigerator to chill, or if you’re impatient like me, serve the iced tea immediately over ice. Garnish with extra mint or a slice of strawberry for that extra flair! Enjoy each sip with friends, family, or even by yourself while lounging in your pajamas. On a warm summer day, there’s really nothing better than this Refreshing Strawberry Hibiscus Iced Tea that will keep you cool and smiling! Perfecting Refreshing Strawberry Hibiscus Iced Tea Recipe for Summer Sipping Cooking Process To make this exquisite iced tea, start by boiling the water, then steep the dried hibiscus flowers before straining. Incorporate the frozen strawberries and mint and sweeten to taste before chilling. Add Your Touch to Refreshing Strawberry Hibiscus Iced Tea Recipe for Summer Sipping Feel free to customize your iced tea by substituting agave syrup for honey, adding fresh lemon slices for a citrus twist, or mixing in other favorite berries for a fruity flair. Storing & Reheating Refreshing Strawberry Hibiscus Iced Tea Recipe for Summer Sipping Store any leftovers in a sealed pitcher in the fridge for up to five days. Enjoy it chilled; there’s no need to reheat hibiscus tea, as it’s best served cold. Sharing this recipe with friends brought everyone together on a sunny afternoon, filled with laughter and compliments that warmed my heart. It felt great to create such a vibrant experience. FAQs About Refreshing Strawberry Hibiscus Iced Tea Recipe for Summer Sipping What is Refreshing Strawberry Hibiscus Iced Tea Recipe for Summer Sipping? The Refreshing Strawberry Hibiscus Iced Tea Recipe for Summer Sipping is a delightful and vibrant drink that’s perfect for hot weather. It combines the tartness of hibiscus flowers with the sweetness of strawberries and the refreshing touch of mint. This iced tea is not only visually stunning but also incredibly easy to prepare, making it a favorite for summer gatherings and outdoor picnics. How can I customize my Refreshing Strawberry Hibiscus Iced Tea? Feel free to get creative with your Refreshing Strawberry Hibiscus Iced Tea Recipe for Summer Sipping! You can swap honey for agave syrup or maple syrup if you’re looking for a vegan alternative. Adding fresh lemon slices introduces a zesty flavor, while mixing in other berries such as blueberries or raspberries can enhance its fruity notes. Experiment with flavors to make the perfect blend for your palate. How should I store leftover Refreshing Strawberry Hibiscus Iced Tea? If you find yourself with leftover Refreshing Strawberry Hibiscus Iced Tea, simply pour it into a sealed pitcher and store it in the refrigerator. It will stay fresh for up to five days. Serve it chilled, as this iced tea is best enjoyed cold and refreshing. Avoid reheating it, as hibiscus tea is meant to be served over ice for that cool, thirst-quenching experience. Is Refreshing Strawberry Hibiscus Iced Tea healthy? Absolutely! The Refreshing Strawberry Hibiscus Iced Tea Recipe for Summer Sipping packs a healthy punch with antioxidants from hibiscus flowers and vitamins from strawberries. Hibiscus tea is
Delicious Cheesy Black Bean Dip Perfect for Game Day Snacking
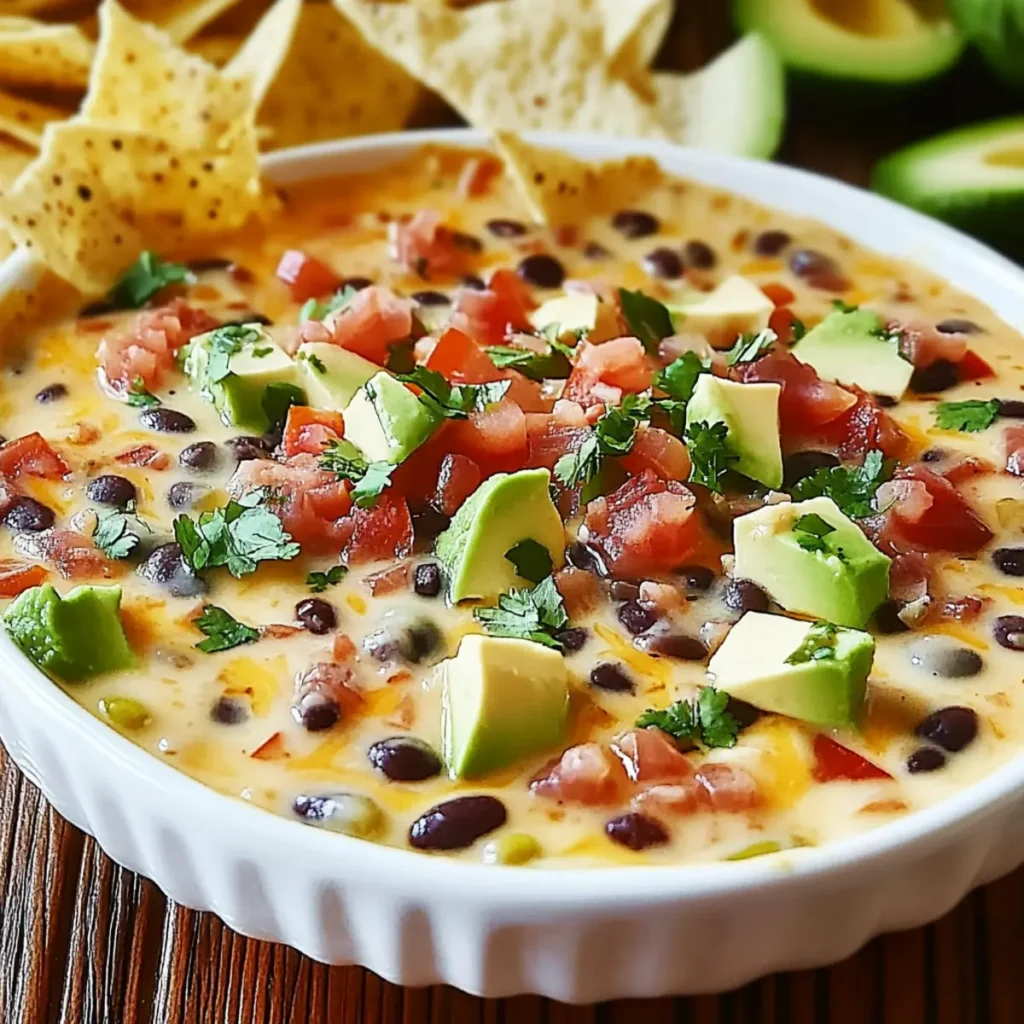
Indulging in a bowl of Cheesy Black Bean Dip is like curling up in a cozy blanket on a chilly evening—pure comfort that warms you from the inside out. With the first scoop, you’ll experience a delightful blend of creamy cheese, vibrant spices, and hearty black beans that dance together like old friends at a reunion. This dip is the star of any gathering, whether it’s a game day fiesta or a casual get-together with friends. Imagine the savory aroma wafting through your kitchen as you whip up this easy-to-make treat, instantly igniting memories of laughter-filled evenings and spirited conversations. Perfect for satisfying those late-night snack cravings or serving as a crowd-pleasing appetizer, this cheesy dip will elevate your snacking game. Now, let’s dive into why this recipe is destined to become your go-to party staple. Ingredients for Cheesy Black Bean Dip Here’s what you’ll need to make this delicious Cheesy Black Bean Dip: 1 Tbsp. extra-virgin olive oil: A touch of richness that serves as a base for sautéing the vegetables. 1 small yellow onion, roughly chopped: Sweetens the dip and adds a depth of flavor as it caramelizes. 1 medium green bell pepper, roughly chopped: This adds a fresh crunch and a pop of color to the dish. 1/2 tsp. ground cumin: An essential spice that brings warmth and earthiness to the dip. 1/2 tsp. paprika: Provides a subtle smokiness and vibrant color. 1/4 tsp. garlic powder: Adds that unmistakable garlicky goodness without overpowering the other flavors. 1 14.5-oz. can diced tomatoes, undrained: Juicy tomatoes enhance the dip’s texture and flavor. 1 16-oz. block pasteurized cheese product: The indulgent heart of this dip, creating a creamy, gooey sensation that’s irresistible. 1/4 cup whole milk: Helps achieve the perfect creamy consistency, keeping the dip smooth and delightful. 1 15.5-oz. can black beans, rinsed and drained: Adds protein and a heartiness that makes this dip truly satisfying. 1/4 cup freshly chopped cilantro (plus more for serving): Brightens the flavor and adds a fresh pop to each bite. 4 tsp. Cholula® Original Hot Sauce: A splash of spice that brings everything together with a zesty kick. 8 oz. shredded Mexican-style cheese: For that gooey melted topping, giving the dip a deliciously cheesy finish. 2 avocados, diced: Added for a fresh, creamy topping that pairs beautifully with the spicy flavors. Tortilla chips: Essential for serving and scooping up all that cheesy goodness. How to Make Cheesy Black Bean Dip Follow these simple steps to prepare this delicious Cheesy Black Bean Dip: Step 1: Sauté the Vegetables In a large skillet, heat the olive oil over medium heat. Add the chopped onion and bell pepper, cooking until they soften and turn golden, approximately 5 minutes. Stir in the ground cumin, paprika, and garlic powder, allowing them to bloom for about 1 minute until fragrant. Step 2: Combine in the Slow Cooker Scrape the sautéed onion mixture into a slow cooker. Add the diced tomatoes (with their juices), the block of pasteurized cheese, and the whole milk. This is where the magic begins, as these ingredients blend to create a creamy base. Step 3: Cook Until Bubbling Set your slow cooker to high for 60 minutes or low for 120 minutes. Watch patiently as the dip transforms into a bubbling masterpiece, mesmerizing you with its aroma. Step 4: Stir in the Remaining Ingredients Once bubbling, stir in the rinsed black beans, chopped cilantro, and Cholula hot sauce until everything is well combined. Then, add the shredded Mexican-style cheese to the mix, stirring until it just melts and creates a harmonious cheesiness throughout. Step 5: Add Toppings Top your cheesy dip with diced avocado and garnish with additional cilantro. Just before serving, dash generously with Cholula hot sauce to set the flavor ablaze. Step 6: Serve and Enjoy Grab your favorite tortilla chips and scoop away! Transfer the dip to serving bowls, and watch it disappear as guests indulge in its creamy, spicy goodness. And there you have it—the ultimate Cheesy Black Bean Dip! Perfect for any occasion, and trust me, you’ll want it front and center at your next get-together. Enjoy your culinary triumph, and happy snacking! Perfecting Cheesy Black Bean Dip Cooking Process Start by sautéing the onions and bell peppers until they’re deliciously tender. Scrape everything into a slow cooker, add the tomatoes and cheese, then let them meld together while you enjoy some well-deserved downtime. Add Your Touch to Cheesy Black Bean Dip Feel free to swap black beans for chickpeas or white beans for a lovely twist. Try adding jalapeños for some heat or a splash of lime juice for a refreshing zing that brightens up the flavors. Storing & Reheating Cheesy Black Bean Dip Store leftover Cheesy Black Bean Dip in an airtight container in the fridge for up to three days. To reheat, gently warm it in the microwave or stove, adding a splash of milk if it thickens too much. Sometimes, I whip up this Cheesy Black Bean Dip for game night, and the way my friends devour it makes me feel like a culinary rock star. They always beg for the recipe, and I happily oblige! FAQs About Cheesy Black Bean Dip What is Cheesy Black Bean Dip? Cheesy Black Bean Dip is a scrumptious appetizer made from black beans, cheese, and a mix of spices and vegetables. This easy-to-make dip often features creamy cheese melted into a blend with sautéed onions and bell peppers. It’s perfect for gatherings and casual snacking alike. You can customize it by adding ingredients like avocado, cilantro, and hot sauce for an extra kick. This dip is especially popular at game days, making it a must-try for any gathering. How can I make my Cheesy Black Bean Dip spicier? If you’re looking to add some heat to your Cheesy Black Bean Dip, consider incorporating jalapeños or serrano peppers into the sautéed vegetables. You could also increase the amount of Cholula Hot Sauce or drizzle in some spicy salsa for
Perfect Traditional Coleslaw Recipe for Summer Gatherings in 35 Minutes
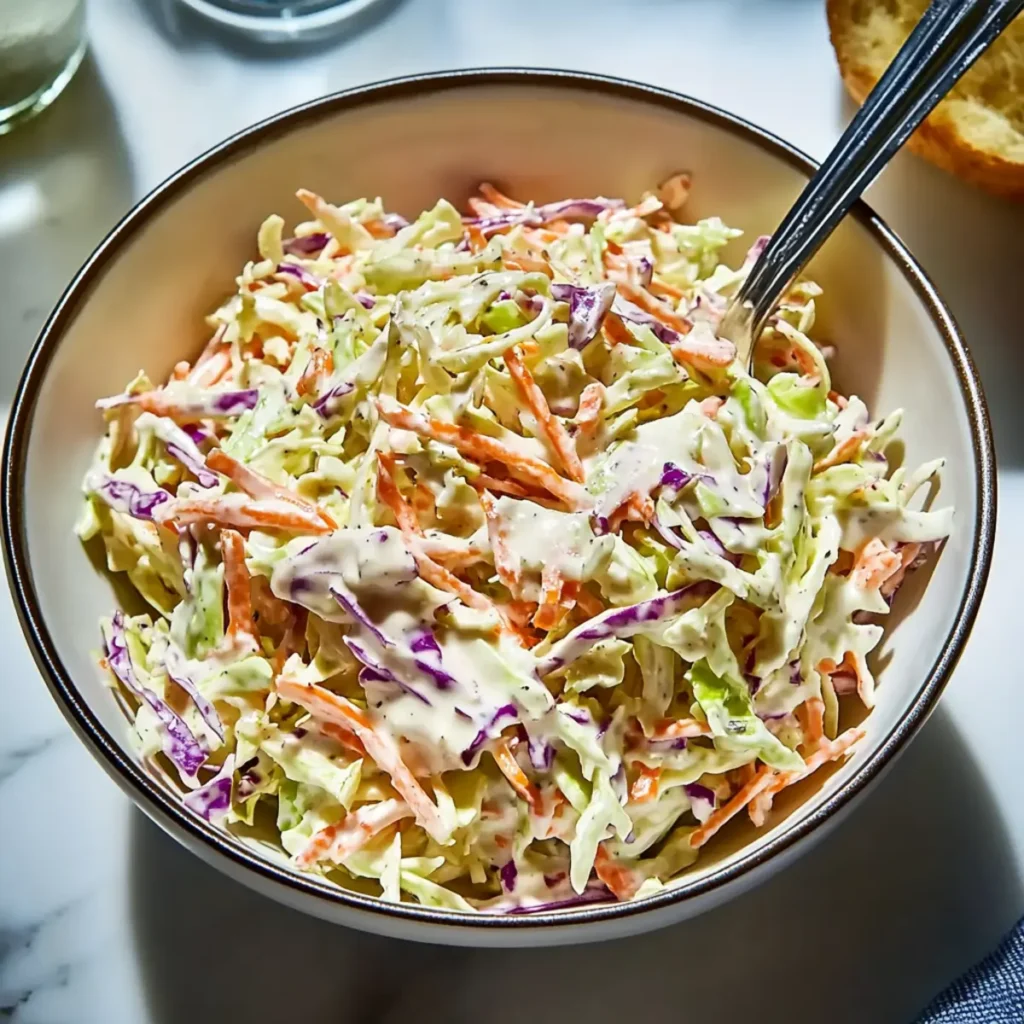
The aroma of crisp, refreshing vegetables mingled with a tangy dressing is enough to transport you straight to a sun-drenched picnic table. When you think of summer gatherings, nothing quite compares to the crunch and zest of the perfect traditional coleslaw recipe for summer gatherings—it’s like a party for your taste buds. Imagine the sound of laughter, clinking glasses, and the sizzling of the grill wafting through the air as family and friends dig into a bowl filled with colorful, vibrant ingredients. The memories I’ve shared over a bowl of coleslaw are as delicious as the dish itself. This creamy, refreshing side is perfect for barbecues, backyard picnics, or just a sunny day on the patio. Get ready for an amazing flavor experience that will have everyone asking for seconds! Ingredients for Perfect Traditional Coleslaw Recipe for Summer Gatherings Here’s what you’ll need to make this delicious Perfect Traditional Coleslaw Recipe for Summer Gatherings: 1 large head green cabbage – About 3 1/2 pounds, finely shredded to ensure a satisfying crunch in every bite. 1 large red onion – Finely sliced for a pop of color and a touch of sharpness that balances the sweetness of the cabbage. 1 large carrot – Peeled and grated to add vibrant color and a hint of natural sweetness to the mix. 1/4 cup fresh parsley leaves – Roughly chopped to give a fresh, herbal finish that brightens the flavors. 1 cup white sugar – To sweeten the dressing; feel free to adjust based on your sweetness preference. 1/2 cup kosher salt – Used for seasoning; this will help draw moisture from the cabbage for optimal texture. 3/4 cup mayonnaise – Provides creaminess and richness in the dressing, which is essential for the classic coleslaw taste. 1/4 cup apple cider vinegar – Adds tang and brightness, cutting through the richness of the mayonnaise. 2 tablespoons Dijon mustard – For a subtle kick and depth of flavor, be sure to choose your favorite brand. 1 tablespoon freshly ground black pepper – Adds just the right amount of heat without overwhelming the fresh vegetables. 3 tablespoons sugar – A touch more sugar can be added to balance out the tartness of the vinegar. How to Make Perfect Traditional Coleslaw Recipe for Summer Gatherings Follow these simple steps to prepare this delicious Perfect Traditional Coleslaw Recipe for Summer Gatherings: Step 1: Prepare the Vegetables Finely shred the cabbage and place it in a large mixing bowl. The goal here is to get those tender shreds that will soak up all the dressing beautifully. Step 2: Add Color and Crunch Finely slice the red onion and add it to the bowl with the cabbage. Next, peel and grate the carrot, tossing it in as well. Don’t be shy—this extra color is what makes your coleslaw gorgeous and Instagram-ready. Step 3: Introduce the Fresh Herb Roughly chop the fresh parsley leaves and mix them into the vibrant combination. The parsley doesn’t just make it pretty; it adds a fresh zing that will have your taste buds dancing. Step 4: Whip Up the Dressing In a separate bowl, combine the white sugar, kosher salt, mayonnaise, apple cider vinegar, Dijon mustard, ground black pepper, and the additional sugar. Whisk it all together until you get a beautifully smooth dressing that promises to be the star of the show. Step 5: Combine and Toss Pour the dressing over the cabbage mixture and toss it all until every bit of cabbage is evenly coated. You want to make sure that the sweet and tangy harmony reaches every shred. Step 6: Serve and Enjoy Transfer your coleslaw to a beautiful serving dish and watch it disappear! For the perfect finishing touch, consider topping it with a sprinkle of extra parsley or some toasted seeds for a delightful crunch. Now that you have this perfect traditional coleslaw recipe for summer gatherings down to a T, you’ll have everyone raving about your potluck contributions. It’s time to showcase your culinary skills with this easy, delicious side that truly embodies summer fun. Enjoy every crunchy, creamy bite! Perfecting Perfect Traditional Coleslaw Recipe for Summer Gatherings Cooking Process Start by finely shredding the cabbage and putting it into a large mixing bowl. Next, slice the red onion and grate the carrot, adding them both to the bowl. Finally, whip up the dressing in a separate bowl, and combine everything for a delightful coleslaw. Add Your Touch to Perfect Traditional Coleslaw Recipe for Summer Gatherings Get creative! Swap the green cabbage for purple or add in some diced apples for a sweet crunch. Try using Greek yogurt instead of mayonnaise for a lighter version, or throw in some chopped nuts for extra texture. Storing & Reheating Perfect Traditional Coleslaw Recipe for Summer Gatherings Store any leftover coleslaw in an airtight container in the fridge for up to three days. The flavors will meld beautifully, but remember to give it a good toss before serving it again—no one likes an unappetizing bite! Sharing this delightful coleslaw recipe reminds me of summer picnics where family and friends would gather, and the coleslaw disappeared faster than the sun could set. It’s a true crowd-pleaser! FAQs About Perfect Traditional Coleslaw Recipe for Summer Gatherings What is Perfect Traditional Coleslaw Recipe for Summer Gatherings? The Perfect Traditional Coleslaw Recipe for Summer Gatherings is a classic dish that combines finely shredded cabbage, carrots, and onions tossed in a creamy dressing. This refreshing side dish is often served at picnics, barbecues, and family gatherings, offering a delightful balance of crunch and flavor. With ingredients like mayonnaise, apple cider vinegar, and a touch of sugar, it’s a crowd-pleaser that complements a variety of main courses. Whether for a potluck or casual dinner, this coleslaw is sure to impress and keep everyone coming back for seconds. How long can I store the Perfect Traditional Coleslaw Recipe for Summer Gatherings? You can store the Perfect Traditional Coleslaw in an airtight container in the refrigerator for up to three