
Easy Creamy White Garlic Parmesan Sauce Recipe in 10 Minutes
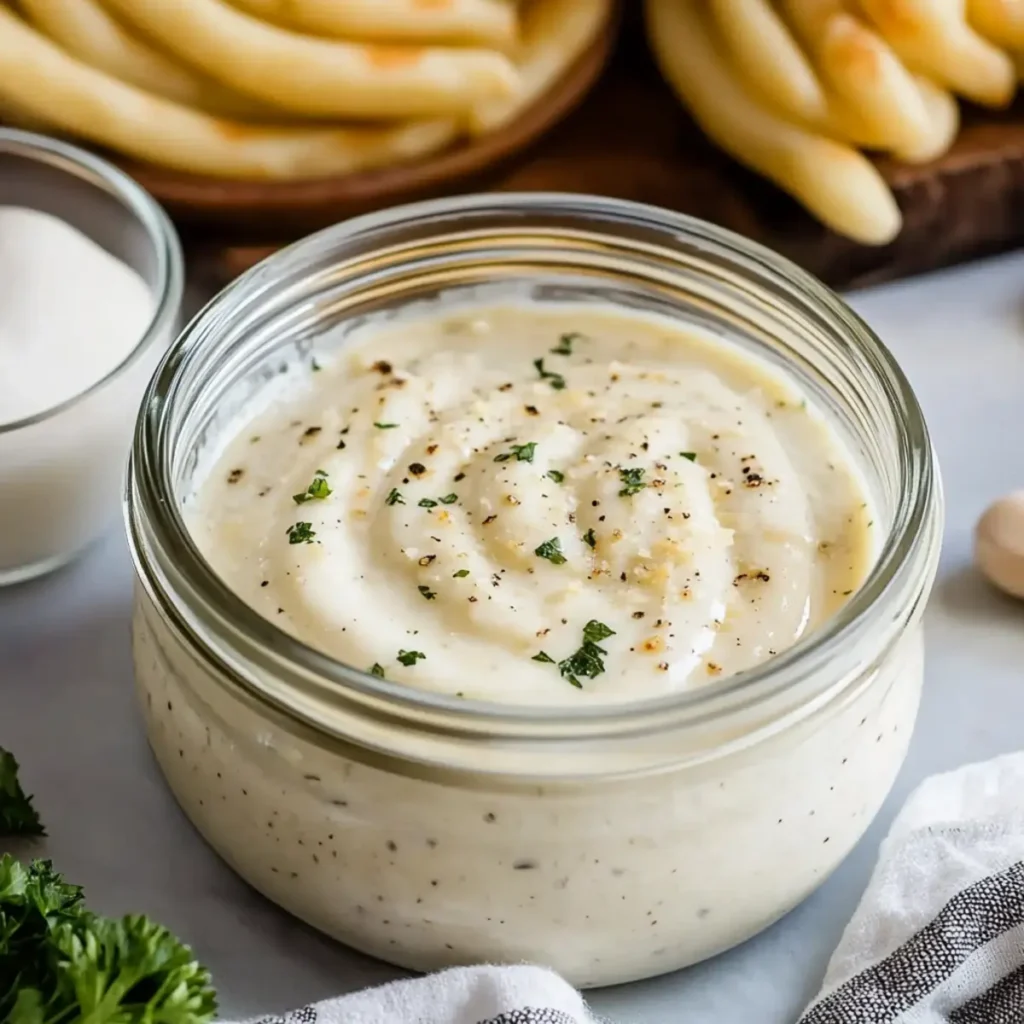
There’s something magical about a rich, velvety sauce that warms your heart and delights your taste buds. The moment you whip up a batch of Creamy White Garlic Parmesan Sauce, the kitchen fills with the heavenly aroma of garlic and cheese, instantly transforming even the most mundane meal into a culinary masterpiece. Whether drizzled over freshly cooked pasta, used as a dip for crunchy veggies, or slathered onto grilled chicken, this sauce proves to be the fast track to flavor town. This recipe not only promises a deliciously creamy sauce but also brings back memories of cozy family dinners and leisurely weekends spent experimenting in the kitchen. Picture yourself gathering around the table, everyone savoring their meal, and the joy that a little homemade goodness brings. With just a handful of ingredients, and a mere ten minutes of your time, you’ll create a sauce that could easily earn rave reviews at any restaurant. Ingredients for Creamy White Garlic Parmesan Sauce Here’s what you’ll need to make this delicious Creamy White Garlic Parmesan Sauce: ¼ cup unsalted butter – Use unsalted butter for better control of flavor and saltiness while adding a delicious creaminess to the sauce. 4 cloves garlic, minced – Fresh garlic adds the most flavor; feel free to adjust the amount based on your love for this aromatic ingredient. ¼ cup all-purpose flour – This thickening agent will give your sauce that scrumptious, creamy texture we all crave. 1 ½ cups vegetable broth or chicken broth – The choice between vegetable or chicken broth will influence the dish’s depth of flavor, so pick your favorite! 1 cup heavy cream – Heavy cream promises richness that’s simply unmatched in creating a smooth and luscious sauce. ¾ cup grated Parmesan cheese – For a cheesy punch, freshly grated Parmesan melts seamlessly into the sauce, enhancing its flavor. 1 teaspoon garlic powder – This brings an extra hit of garlic flavor to ensure each bite is deliciously garlicky. ½ teaspoon onion powder – Adds another layer of savory goodness without being overpowering. ¼ teaspoon salt – Start with a small amount; adjust to taste as you go. ¼ teaspoon black pepper – A hint of heat balances the flavors perfectly. 2 teaspoons Italian seasoning – This blend of herbs gives the sauce an aromatic flat of flavor with a touch of warmth. How to Make Creamy White Garlic Parmesan Sauce Follow these simple steps to prepare this delicious Creamy White Garlic Parmesan Sauce: Step 1: Melt the Butter In a small saucepan, melt the unsalted butter over medium-low heat. This gentle heating ensures that you don’t scorch the butter, setting the stage for a smooth sauce. Step 2: Sauté the Garlic Add the minced garlic to the melted butter and cook for about one minute, stirring constantly. You want the garlic to become fragrant without allowing it to brown, as burnt garlic can turn bitter. Step 3: Make the Roux Next, whisk in the all-purpose flour until a paste starts to form. This mixture is known as a roux, which will help thicken your sauce. Step 4: Add Broth and Seasonings Gradually stir in the vegetable or chicken broth along with the garlic powder, onion powder, salt, black pepper, and Italian seasoning. Bring this delightful concoction to a low simmer and cook for about 2-3 minutes until the sauce begins to thicken. Step 5: Incorporate Cream and Cheese Reduce the heat to low, then stir in the heavy cream and grated Parmesan cheese. Keep stirring until the sauce is smooth and well-combined, ensuring the cheese has melted completely. Step 6: Cool and Serve Allow the sauce to cool slightly. It will continue to thicken as it cools, transforming from a runny delight into a perfect rich coating. Serve warm over wings, pasta, or as a delectable dipping sauce. This Creamy White Garlic Parmesan Sauce is perfect for enhancing meals with its magical flavors. So, gather your ingredients and create this restaurant-quality sauce in just 10 minutes! Whether it’s date night or just a cozy night in, this recipe is bound to win hearts and tantalize taste buds. Enjoy every cheesy, velvety bite! This showstopping Creamy White Garlic Parmesan Sauce delivers restaurant-quality results using simple ingredients you probably already have at home. The perfect balance of textures and flavors creates an unforgettable dining experience that will have everyone asking for seconds. Picture-perfect presentation with vibrant colors makes this dish absolutely Instagram-worthy and guaranteed to impress any dinner guest. Incredibly versatile recipe that works beautifully for weeknight dinners, meal prep, special occasions, or even outdoor entertaining sessions. Perfecting Creamy White Garlic Parmesan Sauce Cooking Process Start by melting your butter in a saucepan while you mince your garlic, then add the garlic for maximum flavor release. Next, whisk your flour into the butter for a roux base before gradually incorporating the broth and seasonings. Finally, blend in the cream and cheese for a velvety finish. Add Your Touch to Creamy White Garlic Parmesan Sauce Feel free to swap in different cheeses like Gruyère or cheddar for a unique flavor twist. You can also toss in fresh herbs, veggies like spinach or sun-dried tomatoes, or even some crispy bacon bits for extra richness. The beauty lies in your creativity. Storing & Reheating Creamy White Garlic Parmesan Sauce Store your leftover creamy sauce in a sealed container in the refrigerator for up to four days. To reheat, warm it over low heat on the stove and stir in a splash of milk or broth to restore its creamy consistency before serving. When I first whipped up this sauce for my family, their eyes lit up like they had just won the lottery. The way they devoured it and begged for more made my heart swell with pride and gave me a newfound confidence in my cooking skills. FAQs About Creamy White Garlic Parmesan Sauce What is Creamy White Garlic Parmesan Sauce? Creamy White Garlic Parmesan Sauce is a luscious, rich sauce that combines the
How to Make Rustic Italian Crusty Bread at Home
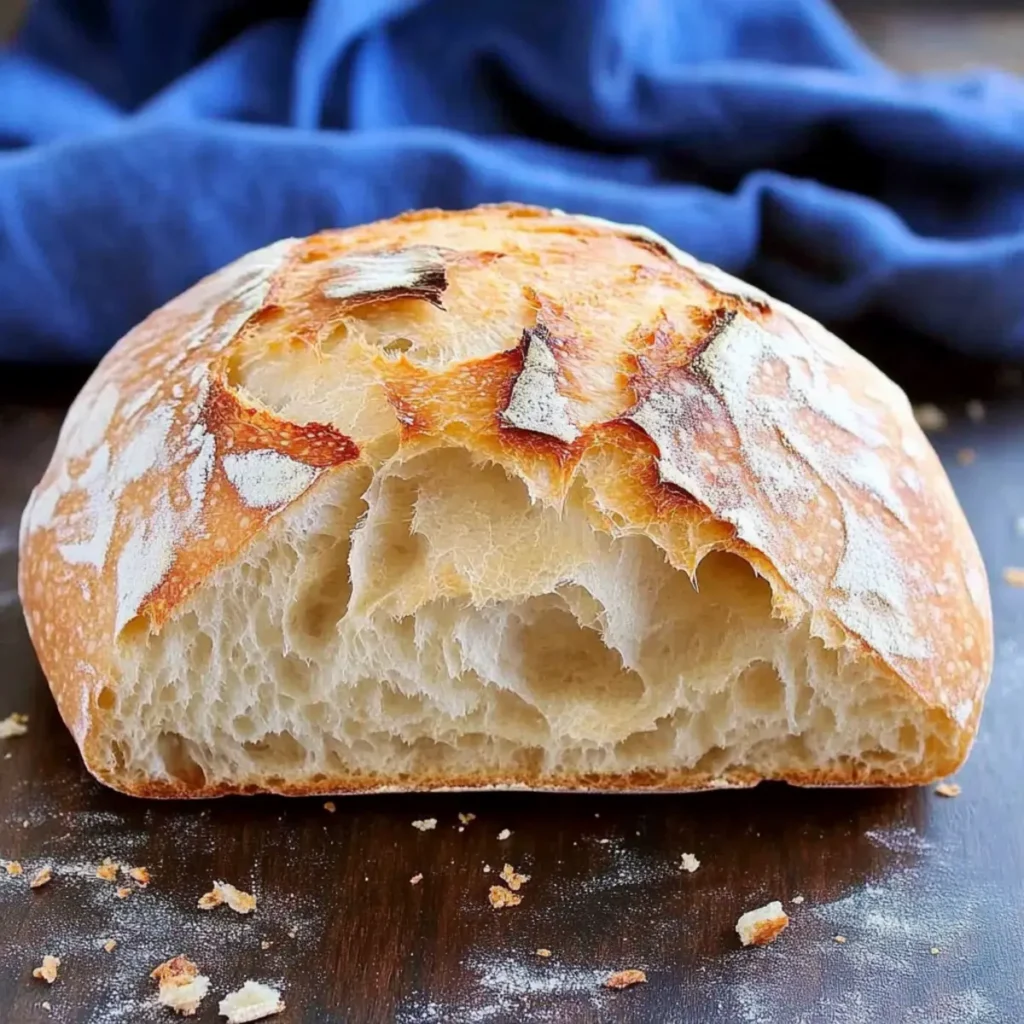
When it comes to the comforting embrace of bread baking in your kitchen, nothing beats the aroma of Rustic Italian Crusty Bread filling the air. Just imagine the golden-brown crust crackling as you slice through it, revealing a soft, warm interior that practically begs to be slathered with all the butter. This is the kind of bread that can transform your ordinary meal into an extraordinary feast and make even the most mundane dinner feel like a cozy Italian trattoria experience. Baking this Rustic Italian Crusty Bread isn’t just about the end result; it’s about the journey. It brings back memories of family gatherings where we would gather around the kitchen, kneading dough and sharing stories, laughter spilling over like the rising yeast. A loaf this delightful is perfect for any occasion, whether it’s a Sunday brunch with the family or a date night where you want to wow that special someone. Get ready for a fun and flavor-packed adventure in your kitchen! Ingredients for Rustic Italian Crusty Bread Here’s what you’ll need to make this delicious Rustic Italian Crusty Bread: 3.25 cups all-purpose flour – Essential for that chewy texture; choose a high-quality brand for the best results. 1 tsp sea salt – Elevates all the flavors, making the bread truly irresistible. 1.5 cups warm water – Activates the yeast; make sure it’s between 100°F to 110°F for optimal results. 2 tsp instant yeast (or active dry yeast) – The magic ingredient that ensures your dough rises nicely. How to Make Rustic Italian Crusty Bread Follow these simple steps to prepare this delicious Rustic Italian Crusty Bread: Step 1: Mix the Dry Ingredients In a large mixing bowl, combine the flour, salt, and instant yeast. Make sure to give it a good whisk to incorporate everything evenly. It’s like blending the cast of a great Italian opera before the performance starts. Step 2: Add the Warm Water Pour in the warm water into the dry ingredients. Mix together until you have a soft, sticky dough. Don’t worry if it seems messy; that just means magic is happening! Step 3: Let the Dough Rise Cover your bowl with plastic wrap and a tea towel, letting it rise in a warm place for about 2 to 3 hours. You want it to double in size, just like your anticipation for that first bite. Step 4: Shape the Dough Sprinkle some flour onto your kitchen counter. Dump the dough onto it and flour your hands before gently folding the dough onto itself to create a round ball. Feel free to chime in with your best Italian accent at this stage! Step 5: Prepare for Baking Make a few artistic cuts on top of the loaf with a sharp knife—these cuts aren’t just for flair, they help the steam escape, so your bread doesn’t explode (as fun as that sounds). Place the dough on a floured pizza peel, cardboard, or parchment paper and let it rest while preheating the oven. Step 6: Bake the Bread Preheat your oven to 450°F. If you have a pizza stone, now’s the time to use it; heat it for about 45 minutes. Fill an oven-proof bowl with water and place it on the bottom rack for added steam. Once everything is hot and ready, sprinkle some semolina flour or cornmeal on your pizza stone, carefully slide your dough on top, and bake for 30 to 45 minutes until it’s beautifully golden brown. When it’s out of the oven, don’t rush! Let your Rustic Italian Crusty Bread cool completely on a rack before slicing. Slice it up, serve with some olive oil, and enjoy the praises of those fortunate enough to share in your homemade masterpiece! This showstopping Rustic Italian Crusty Bread delivers restaurant-quality results using simple ingredients you probably already have at home. The perfect balance of textures and flavors creates an unforgettable dining experience that will have everyone asking for seconds. Picture-perfect presentation with vibrant colors makes this dish absolutely Instagram-worthy and guaranteed to impress any dinner guest. Incredibly versatile recipe that works beautifully for weeknight dinners, meal prep, special occasions, or even outdoor entertaining sessions. Perfecting Rustic Italian Crusty Bread Cooking Process To achieve perfect Rustic Italian Crusty Bread, first prepare your dough to rise while preheating the oven and setting up your pizza stone. Fold the dough and cut it elegantly before baking for a beautifully rustic appearance. Add Your Touch to Rustic Italian Crusty Bread Feel free to customize your Rustic Italian Crusty Bread by adding herbs like rosemary or thyme, mixing in cheese, or incorporating roasted garlic for extra flavor. The key is to experiment until you find your favorite combination. Storing & Reheating Rustic Italian Crusty Bread Store your Rustic Italian Crusty Bread in a paper bag at room temperature for up to two days. For longer storage, freeze it in an airtight container. Reheat in the oven for that crunchy crust and warm interior. Sharing a loaf of Rustic Italian Crusty Bread with my family turned a simple dinner into a memorable feast. The looks of delight on their faces made the hours of waiting worthwhile, reminding me why I love baking. FAQs About Rustic Italian Crusty Bread What is Rustic Italian Crusty Bread? Rustic Italian Crusty Bread is a beautifully simple bread that features a crisp, golden crust and a chewy, airy interior. It’s the type of bread that transports you straight to a quaint Italian café with its warm aromas and delightful textures. Made primarily with flour, water, salt, and yeast, this bread is perfect for accompanying meals, making sandwiches, or just enjoying with a dab of butter. Its straightforward recipe is forgiving, making it an excellent choice for both novice and seasoned bakers alike. How long does it take to make Rustic Italian Crusty Bread? The total time to make Rustic Italian Crusty Bread is about 165 minutes, which includes 5 minutes for preparation and around 40 minutes of baking time. However, you should allow for
Quick and Easy Healthy Homemade Mayonnaise in 5 Minutes
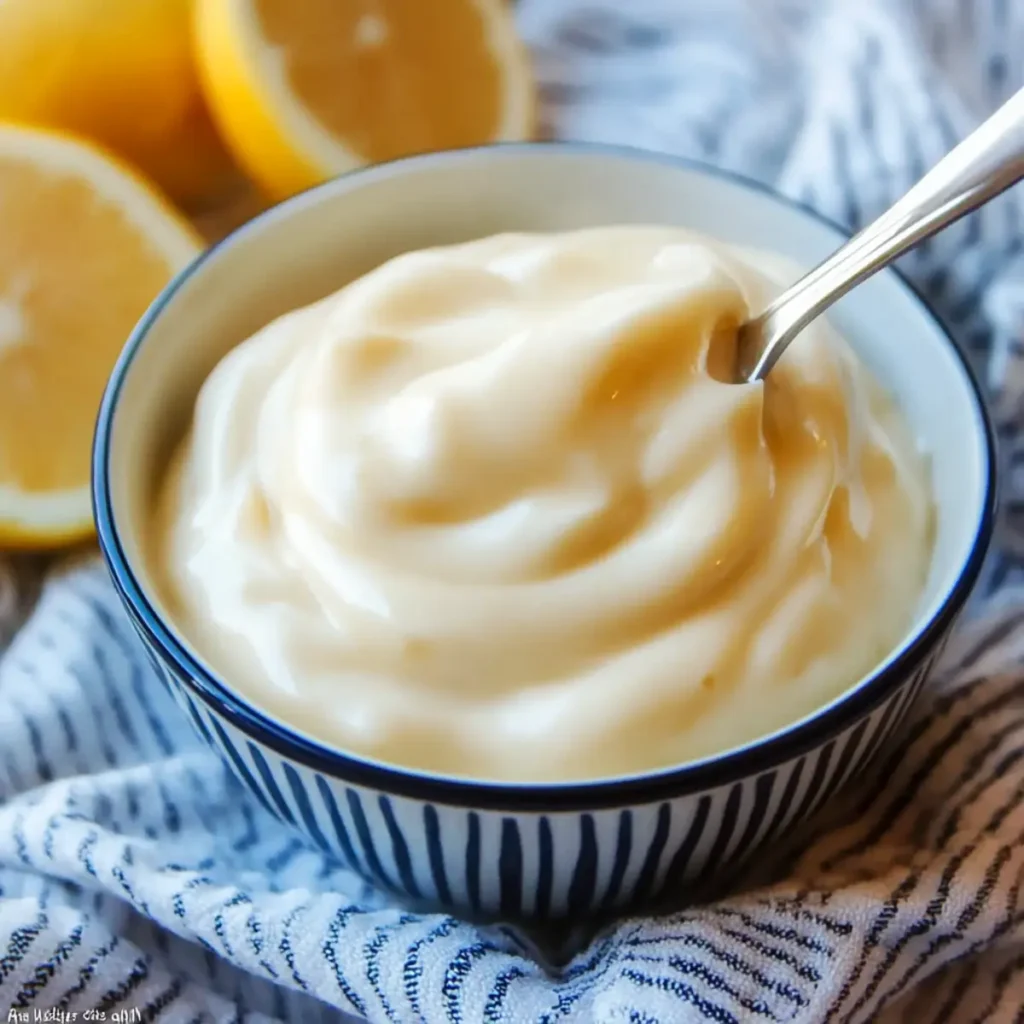
There’s something uniquely satisfying about making your own condiments, and what better way to kickstart your culinary adventures than with a batch of Healthy Homemade Mayonnaise? Picture it: you’re mixing, blending, and then, voila! You’ve got thick, creamy goodness ready to elevate your sandwiches, salads, and snacks. This recipe turns a sometimes boring spread into an exciting addition to your kitchen arsenal. You might have memories of awkward pasta salads at family picnics or burgers slathered in overly processed mayonnaise that made everything taste a bit… off. But imagine, instead, your own homemade version, bursting with fresh flavors and a texture that you can only dream about from that store-bought jar. Perfect for a picnic, a dinner party, or just as a treat for yourself! Get ready to relish in this tangy, delicious delight. Ingredients for Healthy Homemade Mayonnaise Here’s what you’ll need to make this delicious Healthy Homemade Mayonnaise: 1 large egg – The base of your mayonnaise! Use a fresh egg for the best flavor and texture. 1 Tbsp Dijon mustard – Adds a delightful tang and creaminess. Select a smooth variety for easier blending. 1 Tbsp white vinegar – This brings a bright acidity to balance the flavors. 1/2 Tbsp lemon juice – A splash of freshness. Adjust to taste for a zesty kick. ¼-½ tsp fine sea salt – Essential for enhancing flavors. Use less for a low-sodium option. ½ tsp sugar (optional) – Adds a hint of sweetness to balance the acidity if desired. 1 cup extra light olive oil (or other neutral oil) – The star ingredient that creates that luxurious creamy texture. How to Make Healthy Homemade Mayonnaise Follow these simple steps to prepare this delicious Healthy Homemade Mayonnaise: Step 1: Gather Your Tools Start by assembling your tools: a tall container, an immersion blender, and a measuring cup. A narrow container works best for effective blending, ensuring uniform mayonnaise. Step 2: Combine the Ingredients In your tall container, crack the egg and add the Dijon mustard, white vinegar, lemon juice, and salt. Make sure to pour the oil over these ingredients, letting it rest on top for about 15 seconds to allow the emulsion to start. Step 3: Blend Away! Insert your immersion blender straight into the container, touching the bottom. Blend without moving the blender for about 10 seconds until you start to see some emulsification occur. How exciting! Step 4: Incorporate the Oil Slowly lift and tilt the blender while it’s still running, allowing the oil to mix in gradually. Continue blending until your mayonnaise is thick and creamy. Step 5: Taste and Adjust Give your mayonnaise a taste test—add more lemon juice, salt, or sugar if you feel like it needs a little extra magic. This is your creation, after all! Step 6: Store Properly Transfer your luscious Healthy Homemade Mayonnaise to a clean, airtight container. Refrigerate it for up to one week and enjoy that delightful homemade goodness! And there you have it: a quick, easy, and absolutely scrumptious way to elevate your meals with Healthy Homemade Mayonnaise! Perfect for sandwiches, salads, or even just as a dip for veggies. Get ready for creamy goodness that leaves the store-bought stuff in the dust! Perfecting Healthy Homemade Mayonnaise Cooking Process Start by gathering all your ingredients in one spot for efficiency. Blend the egg and mustard first, followed by vinegar and lemon juice. Add the oil gradually for a creamier texture, blending until you achieve that luscious consistency. Add Your Touch to Healthy Homemade Mayonnaise Feel free to experiment with your own flavors! Swap Dijon mustard for a spicy variation, infuse with garlic or herbs, or even a splash of hot sauce for a kick. The sky’s the limit with this creamy canvas. Storing & Reheating Healthy Homemade Mayonnaise Store your homemade mayonnaise in an airtight container in the fridge for up to a week. Avoid freezing it, as that alters the texture. Just take out what you need when you’re ready to enjoy! There’s a special joy in watching my friends’ eyes light up when they taste my Healthy Homemade Mayonnaise for the first time; it was a huge hit at my last barbecue! FAQs About Healthy Homemade Mayonnaise What is Healthy Homemade Mayonnaise? Healthy Homemade Mayonnaise is a creamy and flavorful condiment made with simple ingredients like eggs, mustard, and oil. Unlike store-bought versions, it contains no preservatives or artificial flavors, making it a healthier option. The process of making it is straightforward and quick, requiring just a few minutes with an immersion blender or whisk. You can also customize it by adding spices, herbs, or other flavorings to suit your taste, ensuring it’s as unique as you are. How long can you store Healthy Homemade Mayonnaise? You can store Healthy Homemade Mayonnaise in an airtight container in the refrigerator for up to one week. Although its deliciousness might entice you to use it quickly, it’s essential to keep it chilled to maintain freshness. Just remember to give it a stir before using, as it may separate slightly over time. Always check for any off smells or changes in color before each use as a precaution. Can I use different oils for Healthy Homemade Mayonnaise? Absolutely! While the recipe calls for extra light olive oil, you can experiment with various neutral oils. Options like avocado oil, canola oil, or grapeseed oil work wonderfully too. Each oil brings its unique flavor profile, so you might discover a new favorite. Just keep in mind that some oils may have a stronger taste, which could alter the overall flavor of your homemade mayonnaise. How can I make Healthy Homemade Mayonnaise spicy? If you’re a fan of a kick, there are several ways to spice up your Healthy Homemade Mayonnaise. You can add a teaspoon of sriracha, hot sauce, or spice blends like cayenne pepper or smoked paprika during the blending process. For an aromatic twist, infuse it with garlic or ginger. Just have fun with it and adjust the
Super Bowl Broccoli Wings Recipe – Healthy Game Day Snack Idea
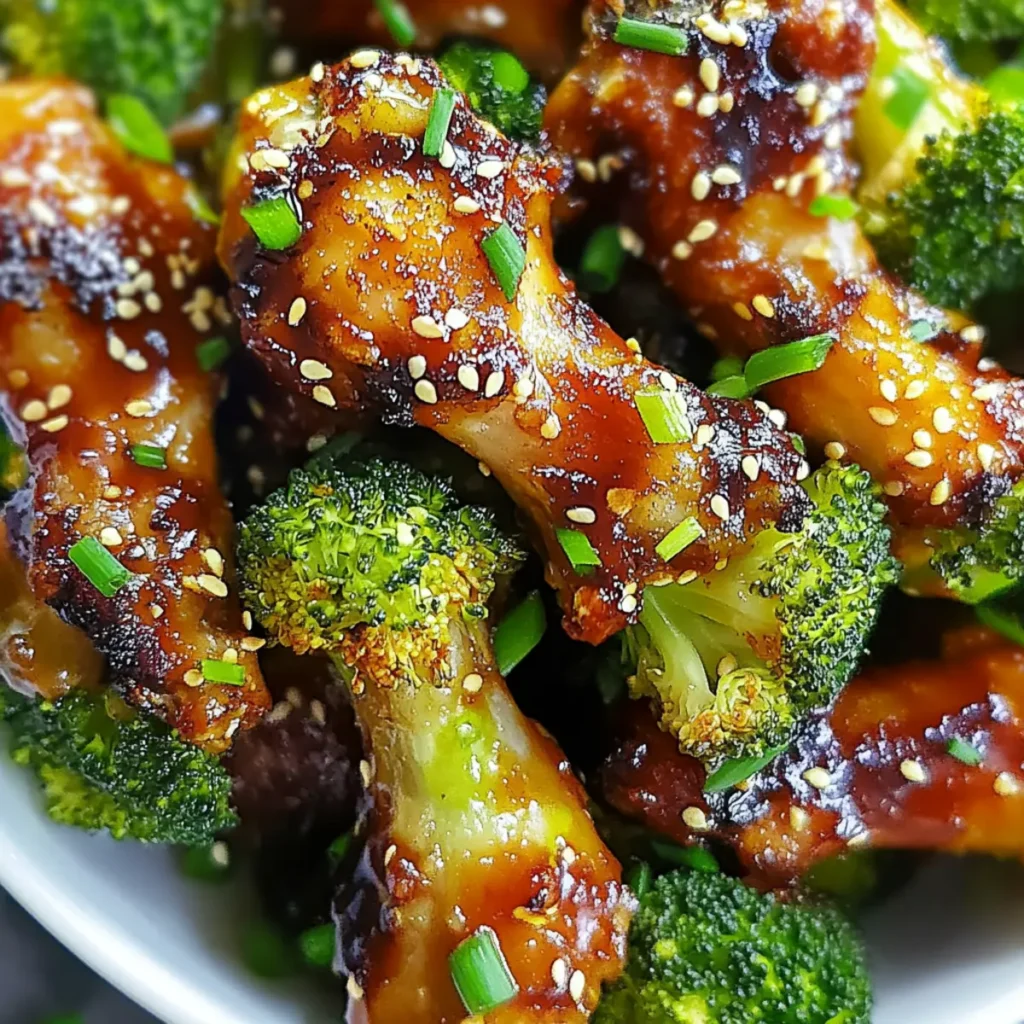
There’s something about the excitement of game day that makes cravings hit harder than a football tackle. And if you’re searching for a healthier alternative to those traditional greasy snacks, look no further than these SUPER BOWL Broccoli Wings! Picture this: crispy, tender, and oh-so-flavorful broccoli drizzled with a tangy buffalo sauce that packs a punch. You won’t believe how delicious they are until you try them, and trust me, they’ll disappear faster than a football during a Hail Mary pass. Imagine serving these at your game day party, watching the tension build on the screen while your friends munch on what they think is a guilty indulgence. But here’s the secret—they’re not only tasty; they’re guilt-free too! As you dive into these SUPER BOWL Broccoli Wings, you’ll taste the burst of flavor complemented by the delightful crunchiness, making each bite a celebration of health and deliciousness. Ingredients for SUPER BOWL Broccoli Wings (Healthy Game Day Snack) Here’s what you’ll need to make this delicious SUPER BOWL Broccoli Wings (Healthy Game Day Snack): 2 cups fresh broccoli florets – Look for vibrant green florets that are firm and fresh. This will ensure an excellent texture when roasted. 2 tablespoons olive oil – A high-quality extra virgin olive oil enhances flavor and gives the broccoli a beautiful roasted finish. 1 teaspoon garlic powder – Adds a punch of garlic flavor. If you prefer fresh garlic, feel free to substitute a clove or two. 1/2 cup buffalo sauce – Choose your favorite brand or make your own! The heat level will define how spicy your wings turn out. 1 tablespoon sesame seeds – These add a delightful crunch and a nutty flavor, making your wings look even more appetizing. 2 tablespoons chopped green onions – Fresh green onions impart a refreshing bite, balancing the heat of the buffalo sauce beautifully. How to Make SUPER BOWL Broccoli Wings (Healthy Game Day Snack) Follow these simple steps to prepare this delicious SUPER BOWL Broccoli Wings (Healthy Game Day Snack): Step 1: Preheat the Oven Preheat your oven to 425°F (220°C) while you gather and prepare your ingredients. This is going to be an essential step for getting those broccoli florets perfectly crispy! Step 2: Season the Broccoli In a large bowl, toss the broccoli florets with olive oil, garlic powder, salt, and pepper until they are evenly coated. Feel free to get your hands in there and really mix it up; this is where flavor begins! Step 3: Roast the Broccoli Spread the broccoli evenly on a parchment-lined baking sheet—this will prevent sticking and make cleanup a breeze. Roast in your preheated oven for about 20-25 minutes or until they turn a lovely golden brown and are crisp-tender. Step 4: Toss with Buffalo Sauce Once out of the oven, it’s time to let that buffalo sauce fly! Toss the roasted broccoli with the buffalo sauce until they are nicely coated. Make sure every piece is glistening with that delicious spicy goodness. Step 5: Add Toppings and Final Roast Return the sauced broccoli to the baking sheet, then sprinkle with sesame seeds and chopped green onions. Pop them back into the oven for an additional 5 minutes to let those flavors marry and the toppings toast slightly. Step 6: Serve and Enjoy! Lastly, after removing them from the oven, serve your SUPER BOWL Broccoli Wings hot! Pair them with some adorable dipping sauces like ranch or blue cheese for an extra layer of flavor. These SUPER BOWL Broccoli Wings are not just a healthy game day snack; they’re a flavorful twist on traditional wings that everyone will love. Enjoy every moment of preparing and sharing these gems, and watch for yourself as they steal the show at your next event! Perfecting SUPER BOWL Broccoli Wings (Healthy Game Day Snack) Cooking Process To make your SUPER BOWL Broccoli Wings (Healthy Game Day Snack) shine, start by roasting the broccoli to achieve that golden crispiness. While it roasts, prepare the sauce and toppings to streamline the cooking sequence. Add Your Touch to SUPER BOWL Broccoli Wings (Healthy Game Day Snack) Get creative with your SUPER BOWL Broccoli Wings (Healthy Game Day Snack) by adding a sprinkle of cheese, swapping buffalo sauce for teriyaki, or mixing in roasted nuts for crunch. The possibilities are endless! Storing & Reheating SUPER BOWL Broccoli Wings (Healthy Game Day Snack) To store your SUPER BOWL Broccoli Wings (Healthy Game Day Snack), keep them in an airtight container in the refrigerator for up to three days. Reheat in the oven to restore their crispiness, ensuring they taste as fresh as when made. It was my cousin’s game night when I first served these SUPER BOWL Broccoli Wings (Healthy Game Day Snack). As they devoured the last ones, I realized I had converted even the most committed meat lovers into broccoli enthusiasts. The laughter and cheers were the best reward! FAQs About SUPER BOWL Broccoli Wings (Healthy Game Day Snack) What is SUPER BOWL Broccoli Wings (Healthy Game Day Snack)? SUPER BOWL Broccoli Wings (Healthy Game Day Snack) are a scrumptious plant-based alternative to traditional chicken wings. Made primarily from fresh broccoli florets, this dish is flavored with garlic, tossed in spicy buffalo sauce, and roasted to crispy perfection. Not only are these wings delicious, but they also offer a healthy option for game day snacking, packed with nutrition while satisfying even the most dedicated wing enthusiasts. Serve them with your favorite dipping sauces for an impressive appetizer that everyone will love! How do I make sure my SUPER BOWL Broccoli Wings are crispy? To achieve that perfect crispiness for your SUPER BOWL Broccoli Wings, start by roasting the florets at a high temperature, which helps lock in flavor and moisture while creating a golden exterior. Ensure the broccoli is evenly coated with olive oil and seasoning to promote browning. Consider using a parchment-lined baking sheet, which aids in preventing sticking and contributes to the crispy texture. Roasting for the recommended time will
Ultimate Game Day Super Bowl Sticky BBQ Chicken Wings Recipe
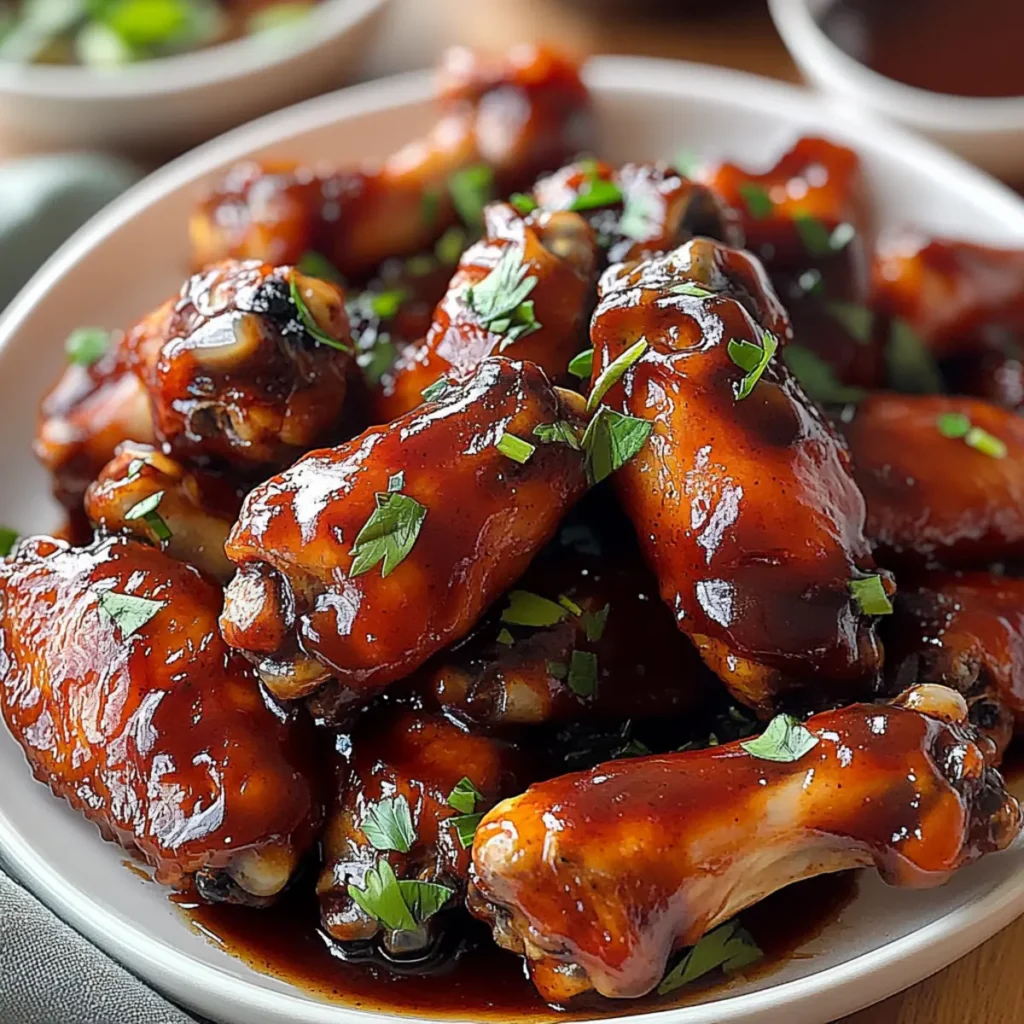
When it comes to drool-worthy snacks for game day, nothing beats SUPER BOWL Sticky BBQ Chicken Wings. Imagine crispy, golden wings smothered in a luscious layers of sweet and tangy BBQ sauce that stick to your fingers with delicious abandon. It’s the kind of dish that has you reaching for a second (or third) helping, while your friends and family cheer on their favorite team. Wings like these are synonymous with vibrant gatherings and heartfelt cheers, instantly transforming any game day into a top-tier culinary experience. Whether you’re hosting a group of die-hard fans or simply indulging in some me-time with a binge-worthy show, these wings will elevate any occasion, flooding your senses with flavor and scent. Ingredients for SUPER BOWL Sticky BBQ Chicken Wings (Ultimate Game Day Wings) Here’s what you’ll need to make this delicious SUPER BOWL Sticky BBQ Chicken Wings (Ultimate Game Day Wings): 2 lbs chicken wings – Fresh or frozen, make sure they are thawed if using frozen for even cooking. 1 cup BBQ sauce – Choose your favorite brand or homemade for a personal touch; the sauce is the star of the flavor show. 2 tbsp honey – This adds a delightful sweetness that balances the tanginess of the BBQ sauce beautifully. 2 tsp garlic powder – Essential for that savory kick that makes every bite irresistible. 1/2 tsp cayenne pepper – Adjust to your taste if you prefer more or less heat; it gives the wings a delightful kick. Salt and pepper to taste – Don’t forget these basics to enhance all flavors in your dish. How to Make SUPER BOWL Sticky BBQ Chicken Wings (Ultimate Game Day Wings) Follow these simple steps to prepare this delicious SUPER BOWL Sticky BBQ Chicken Wings (Ultimate Game Day Wings): Step 1: Preheat and Prepare Preheat your oven to 400°F (200°C). Line a baking sheet with foil for easy cleanup, and place an oven-safe rack on top to allow air circulation around the wings for that perfect crisp. Step 2: Season the Wings In a large mixing bowl, toss the chicken wings with garlic powder, cayenne pepper, salt, and pepper until they are evenly coated. The spices will create a party of flavors under that sticky BBQ glaze. Step 3: Bake to Crispy Perfection Arrange the wings in a single layer on the rack. Bake for 40-45 minutes until they are golden brown and crispy. Remember to flip them halfway through to ensure even cooking. Your kitchen will start to smell absolutely heavenly! Step 4: Prepare the BBQ Coating While those wings are baking, combine the BBQ sauce and honey in a saucepan over medium heat. Warm it up gently, stirring occasionally until it’s well mixed and heated through. Your taste buds will thank you! Step 5: Toss and Coat Once your wings are perfectly crisp, remove them from the oven and toss them in the warm BBQ mixture until they are beautifully coated. You want them glistening with that sticky goodness! Step 6: Serve with Flair Transfer the wings to a platter and garnish with chopped green onions or sesame seeds if desired. These wings are perfect for sharing, but we won’t judge if you choose to keep them all to yourself. ? Serve your SUPER BOWL Sticky BBQ Chicken Wings hot, and get ready for compliments to roll in like a hail of touchdowns! With game day snacks that taste this good, every football moment becomes a gourmet treat. So gather your friends, crank up the game, and let the sticky goodness bring everyone together for an unforgettable culinary experience. Enjoy! Perfecting SUPER BOWL Sticky BBQ Chicken Wings (Ultimate Game Day Wings) Cooking Process Begin by preheating your oven and preparing a baking sheet with a rack to ensure even cooking. Season the wings well, then bake until crispy. This method guarantees perfectly cooked, juicy wings without the mess of frying. Add Your Touch to SUPER BOWL Sticky BBQ Chicken Wings (Ultimate Game Day Wings) Feel free to swap out BBQ sauce for your favorite hot sauce or teriyaki for an Asian twist. You can also sprinkle some extra spices like smoked paprika or even BBQ seasoning for added flavor and depth. Storing & Reheating SUPER BOWL Sticky BBQ Chicken Wings (Ultimate Game Day Wings) Store any leftover wings in an airtight container in the fridge for up to three days. To reheat, place them in the oven at 350°F (175°C) for about 10 minutes to restore their crispy goodness. There was that one time I brought these SUPER BOWL Sticky BBQ Chicken Wings to a friend’s party. Everyone raved about them, and I even had folks arguing over who would take home the leftovers! It’s moments like these that remind me why I love cooking. FAQs About SUPER BOWL Sticky BBQ Chicken Wings (Ultimate Game Day Wings) What is SUPER BOWL Sticky BBQ Chicken Wings (Ultimate Game Day Wings)? SUPER BOWL Sticky BBQ Chicken Wings (Ultimate Game Day Wings) are scrumptious, flavorful chicken wings that are perfect for game day festivities! This recipe features juicy chicken wings coated in a sticky, sweet, and tangy BBQ sauce with a hint of honey. It’s a crowd-pleasing dish that balances crispy skin with a moist interior, making it a must-have for any sporting event or casual gathering. Effortlessly prepared in the oven, these wings bring restaurant-quality taste right to your home. How can I make my SUPER BOWL Sticky BBQ Chicken Wings extra crispy? To achieve an extra crispy skin on your SUPER BOWL Sticky BBQ Chicken Wings, ensure that you dry the wings thoroughly with paper towels before seasoning. A preheated oven along with a wire rack placed above the baking sheet allows hot air to circulate around the wings, enhancing crispness. Flipping the wings halfway through the cooking process also promotes even browning, making each bite irresistibly crunchy without the hassle of frying. Can I use a different sauce for my SUPER BOWL Sticky BBQ Chicken Wings? Absolutely! Although the recipe calls for
Super Bowl Cheater’s Aioli: 5-Minute Party Sauce Recipe
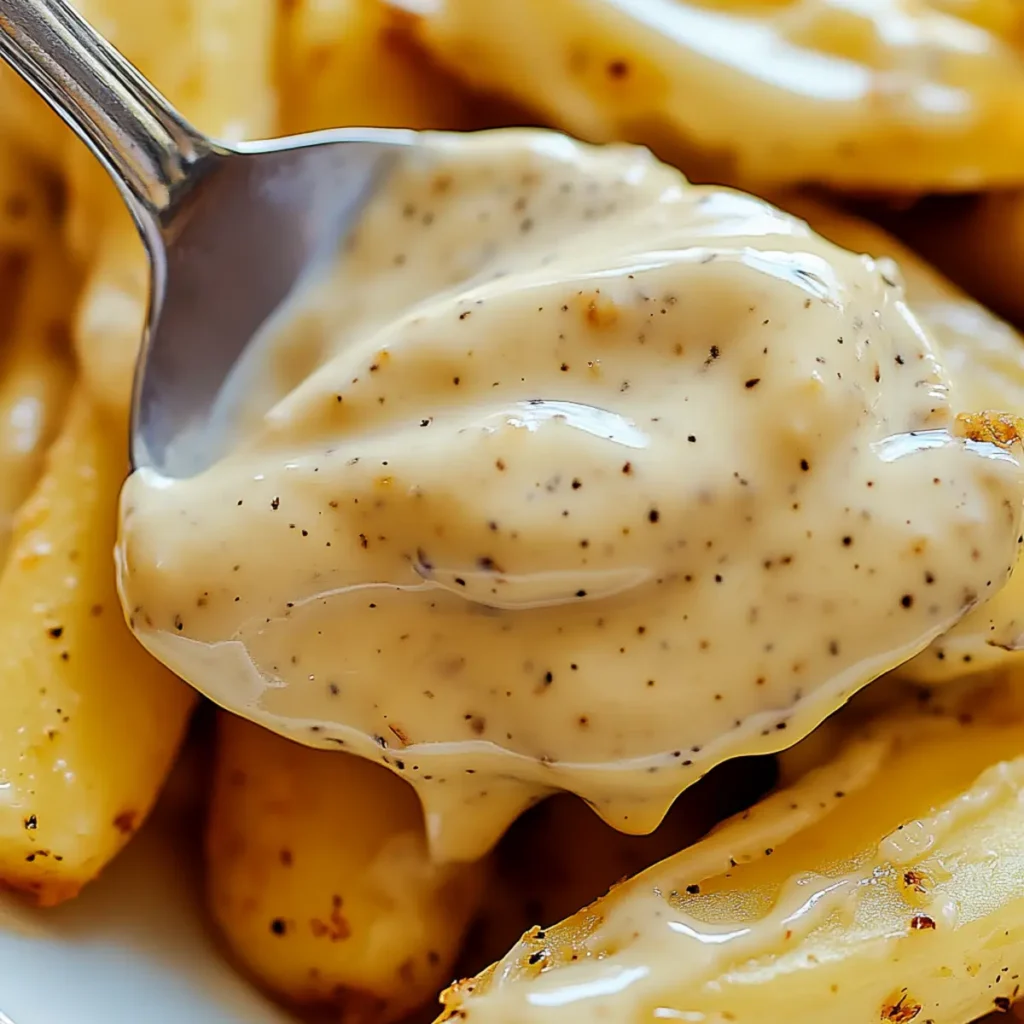
Imagine a creamy, garlicky delight that comes together in just five minutes, turning your kitchen into a gourmet haven. This SUPER BOWL Cheater’s Aioli (5-Minute Party Sauce) is not just a dip; it’s the life of the party, ready to elevate anything from crispy fries to vibrant veggies with its zingy flavor and silky texture. Whether you’re huddled on the couch with your friends during the big game or hosting a spontaneous gathering, you’ll want this dip within arm’s reach. Think about the last time you served a dip that had your guests singing your praises. You know, the kind that makes you look like a culinary rockstar with minimal effort. This SUPER BOWL Cheater’s Aioli isn’t just here to impress; it’s the epitome of straightforward yet stunning cuisine. With just a few staple ingredients, you’ll be left with a mouthwatering sauce that complements countless snacks, transforms humble bites into spectacular dishes, and leaves everyone wanting more. Are you ready to dive into this quick and quirky culinary creation? Ingredients for SUPER BOWL Cheater’s Aioli (5-Minute Party Sauce) Here’s what you’ll need to make this delicious SUPER BOWL Cheater’s Aioli (5-Minute Party Sauce): 1 cup mayonnaise – Choose a high-quality mayonnaise for the creamiest texture. You can also use low-fat versions if desired. 2 cloves garlic, minced – Fresh garlic will give you the best flavor. Adjust the amount to suit your taste. 2 tbsp fresh lemon juice – Freshly squeezed lemon juice adds brightness. Bottled juice works in a pinch but is less vibrant. 1 tsp Dijon mustard – This adds a lovely hint of tang and depth. Opt for whole-grain mustard for extra texture. 1 tbsp olive oil – A drizzle of good olive oil enhances the overall creaminess and gives it a luxurious feel. How to Make SUPER BOWL Cheater’s Aioli (5-Minute Party Sauce) Follow these simple steps to prepare this delicious SUPER BOWL Cheater’s Aioli (5-Minute Party Sauce): Step 1: Gather Your Ingredients Before you embark on this culinary journey, ensure you have all your ingredients in one place. It makes the whole process flow smoothly and quickly. Step 2: Prep the Garlic Finely mince the garlic cloves until you have tiny, fragrant pieces. If your garlic shows any sign of being lazy, wield your trusty garlic press for maximum flavor extraction. Step 3: Mix the Ingredients In a medium bowl, combine the mayonnaise, minced garlic, fresh lemon juice, Dijon mustard, and olive oil. Using a whisk, blend them together until you achieve a silky, smooth mixture that looks like it belongs on a restaurant menu. Step 4: Season Your Aioli Add a pinch of salt and pepper—this is where you personalize your dip. Taste and adjust according to your preference; you’ve earned this part! Step 5: Chill and Enhance Flavor To allow the flavors to meld beautifully, cover your bowl and chill the aioli in the refrigerator for at least 30 minutes, if you can resist sneaking a taste beforehand. Step 6: Serve and Enjoy When you’re ready to wow your guests, ladle your stunning SUPER BOWL Cheater’s Aioli into a serving bowl. Pair it with your favorite snacks, like crispy fries, fresh vegetables, or even slather it on sandwiches for an extra flavor boost. There you have it! With just a handful of ingredients and a few simple steps, you’re on your way to mastering this 5-minute party sauce that everyone will be raving about. Perfect for game days, potlucks, or any gathering where good food and laughter reign supreme, this aioli will become your new go-to kitchen companion. So, what are you waiting for? Roll up those sleeves and get ready to impress! Perfecting SUPER BOWL Cheater’s Aioli (5-Minute Party Sauce) Cooking Process To achieve peak aioli perfection, start by mincing your garlic to release its flavors. Next, mix your mayonnaise, garlic, lemon juice, Dijon mustard, and olive oil in a bowl. Give it a good whisk for that creamy, unified texture. Add Your Touch to SUPER BOWL Cheater’s Aioli (5-Minute Party Sauce) Feel free to get creative! Swap out mayonnaise for Greek yogurt for a lighter version, or add herbs like dill or parsley for an extra flavor kick. Spice it up with a dash of cayenne pepper or smoked paprika to cater to your taste. Storing & Reheating SUPER BOWL Cheater’s Aioli (5-Minute Party Sauce) Store any leftovers in an airtight container in the fridge for up to a week. The flavor will even improve as it chills! Reheat it gently if desired, but it’s best served cold or at room temperature. Knowing how my friends’ eyes sparkle when they taste this aioli brings me joy. One evening, I made it for a game night, and it disappeared faster than the chips—it was the star of the show! FAQs About SUPER BOWL Cheater’s Aioli (5-Minute Party Sauce) What is SUPER BOWL Cheater’s Aioli (5-Minute Party Sauce)? SUPER BOWL Cheater’s Aioli (5-Minute Party Sauce) is a quick and delicious dip that transforms everyday ingredients into a gourmet experience. This creamy concoction blends mayonnaise, fresh garlic, lemon juice, Dijon mustard, and a touch of olive oil, delivering a flavorful punch perfect for any gathering. It’s an ideal companion for snacks like fries, roasted vegetables, or even as a spread on sandwiches. With the versatility and vibrant taste, this aioli will certainly elevate your game day festivities. How can I customize my SUPER BOWL Cheater’s Aioli (5-Minute Party Sauce)? One of the great things about the SUPER BOWL Cheater’s Aioli (5-Minute Party Sauce) is its adaptability. You can easily swap mayonnaise for Greek yogurt for a healthier option or mix in herbs such as dill or parsley for added flavor. If you crave a spicy kick, try incorporating cayenne pepper or smoked paprika. Experimenting with different flavor profiles can make your aioli uniquely tailored to your taste and the theme of your gathering. Can I prepare SUPER BOWL Cheater’s Aioli (5-Minute Party Sauce) in advance? Absolutely! In fact, making SUPER BOWL Cheater’s Aioli
Delicious Chicken Charcuterie Board Recipe for Any Gathering
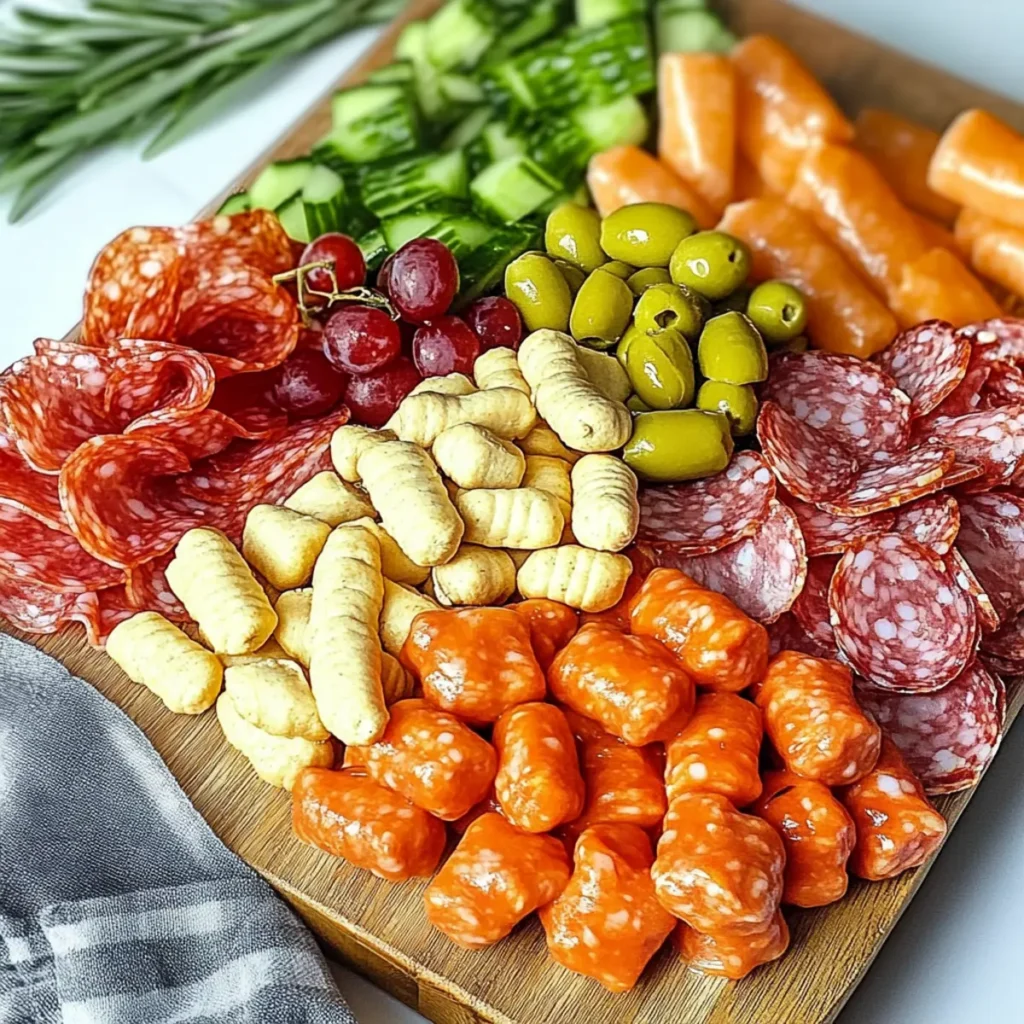
The aroma of roasted chicken filling the air combined with a colorful array of cheeses, crunchy veggies, and rich nuts creates a feast for the senses. This delightful Chicken Charcuterie Board takes the classic charcuterie experience and elevates it to a new level of deliciousness. Whether you’re hosting a gathering or simply looking for an impressive way to showcase your culinary skills, this dish will undoubtedly leave your guests raving. Picture this: A sunny afternoon, laughter ringing through the air, and a vibrant Chicken Charcuterie Board at the center of it all, beckoning everyone to dig in. With each piece of tender chicken, luscious cheese, and fresh produce, you’ll create moments that linger long after the last bite. Perfect for any occasion, this board brings friends and family together, ensuring laughter and full stomachs. Ingredients for Chicken Charcuterie Board Here’s what you’ll need to make this delicious Chicken Charcuterie Board: 3 boneless, skinless chicken breasts (about 1.5 lbs) – Use fresh chicken for the best flavor, and feel free to substitute with grilled tofu for a vegetarian option. 2 tbsp olive oil – A good-quality extra virgin olive oil adds richness and helps to roast the chicken beautifully. 1 tsp salt – Essential for bringing out the natural flavors of the chicken and the vegetables. 1/2 tsp black pepper – Freshly ground pepper elevates the seasoning without overpowering the other flavors. 2 tbsp fresh herbs (rosemary or thyme) – Fresh herbs add an aromatic touch, making your chicken more vibrant. 1 cup assorted cheeses (e.g., brie, cheddar, gouda) – Select a range of textures and flavors for a harmonious cheese experience that pleases everyone at the table. 2 cups fresh veggies (cherry tomatoes, cucumbers, bell peppers) – Chopped into bite-sized pieces, they provide crunch and freshness to balance the meal. 1 cup nuts (walnuts or almonds) – Nuts add texture and healthy fats, enhancing the board’s overall flavor and visual appeal. How to Make Chicken Charcuterie Board Follow these simple steps to prepare this delicious Chicken Charcuterie Board: Step 1: Preheat the oven Preheat your oven to 400°F (200°C). While it warms up, grab a baking sheet and line it with parchment paper for easy cleanup. Step 2: Prepare the chicken Season the chicken breasts with salt, pepper, and olive oil. Rub it in with your hands to ensure an even coating. This will not only provide flavor but also help achieve a lovely golden brown color during roasting. Step 3: Bake the chicken Place the seasoned chicken on the prepared baking sheet and bake in the oven for 20-25 minutes until cooked through and golden brown. Your kitchen will start to smell heavenly, but try to be patient—deliciousness is on the way! Step 4: Rest and slice the chicken Once the chicken is cooked, allow it to rest for 5 minutes. This step is crucial as it keeps the juices locked inside for a moist and flavorful bite. After resting, slice the chicken into bite-sized pieces that are perfect for grabbing. Step 5: Assemble the board On a large wooden board or platter, artistically arrange the sliced chicken alongside the assorted cheese, vibrant veggies, and nuts. Feel free to get creative with your design! Arrange everything in a way that is visually pleasing, mixing colors and textures for maximum impact. Step 6: Serve and enjoy Gather around the board with friends and family or serve at your next gathering. Encourage everyone to mix and match the flavors for a delightful experience that will leave them craving more. This Chicken Charcuterie Board is not only visually stunning but also incredibly tasty, combining juicy chicken with creamy cheeses and crunchy veggies that dance on your palate. It’s an irresistible invitation to revel in good food and joyful company, making any occasion truly special. Enjoy this culinary adventure and watch your loved ones rave about your impressive spread. Happy gathering! This showstopping Chicken Charcuterie Board delivers restaurant-quality results using simple ingredients you probably already have at home. The perfect balance of textures and flavors creates an unforgettable dining experience that will have everyone asking for seconds. Picture-perfect presentation with vibrant colors makes this dish absolutely Instagram-worthy and guaranteed to impress any dinner guest. Incredibly versatile recipe that works beautifully for weeknight dinners, meal prep, special occasions, or even outdoor entertaining sessions. Perfecting Chicken Charcuterie Board Cooking Process The key to a successful Chicken Charcuterie Board is to cook the chicken first while prepping your veggies and cheese. This way, everything is ready simultaneously, and the chicken can rest as you finalize the board. Add Your Touch to Chicken Charcuterie Board Feel free to swap out chicken for turkey or add some grilled shrimp for variety. Experiment with different cheeses or pile on seasonal veggies to personalize your Chicken Charcuterie Board and delight your taste buds. Storing & Reheating Chicken Charcuterie Board Store leftovers in an airtight container in the fridge for up to three days. To reheat, warm the chicken in the oven at a low temperature until heated through, keeping the cheeses and veggies cool for another refreshing serving. I remember the first time I made a Chicken Charcuterie Board for a gathering. My friends raved about how colorful and fresh it looked, and I swore I heard someone say it was the best thing they’d ever eaten. It certainly made my day! FAQs About Chicken Charcuterie Board What is Chicken Charcuterie Board? A Chicken Charcuterie Board is a delightful spread that combines baked chicken pieces with a variety of cheeses, fresh veggies, and nuts, creating a visually stunning and delicious dish. This assembly allows you to enjoy different flavors and textures in one bite. Perfect for gatherings, this board can elevate your entertaining game. The best part is that it is customizable, so you can swap ingredients based on what you have on hand or personal preferences. Whether served as a centerpiece or enjoyed casually, a Chicken Charcuterie Board is sure to impress. How do you prepare a Chicken