
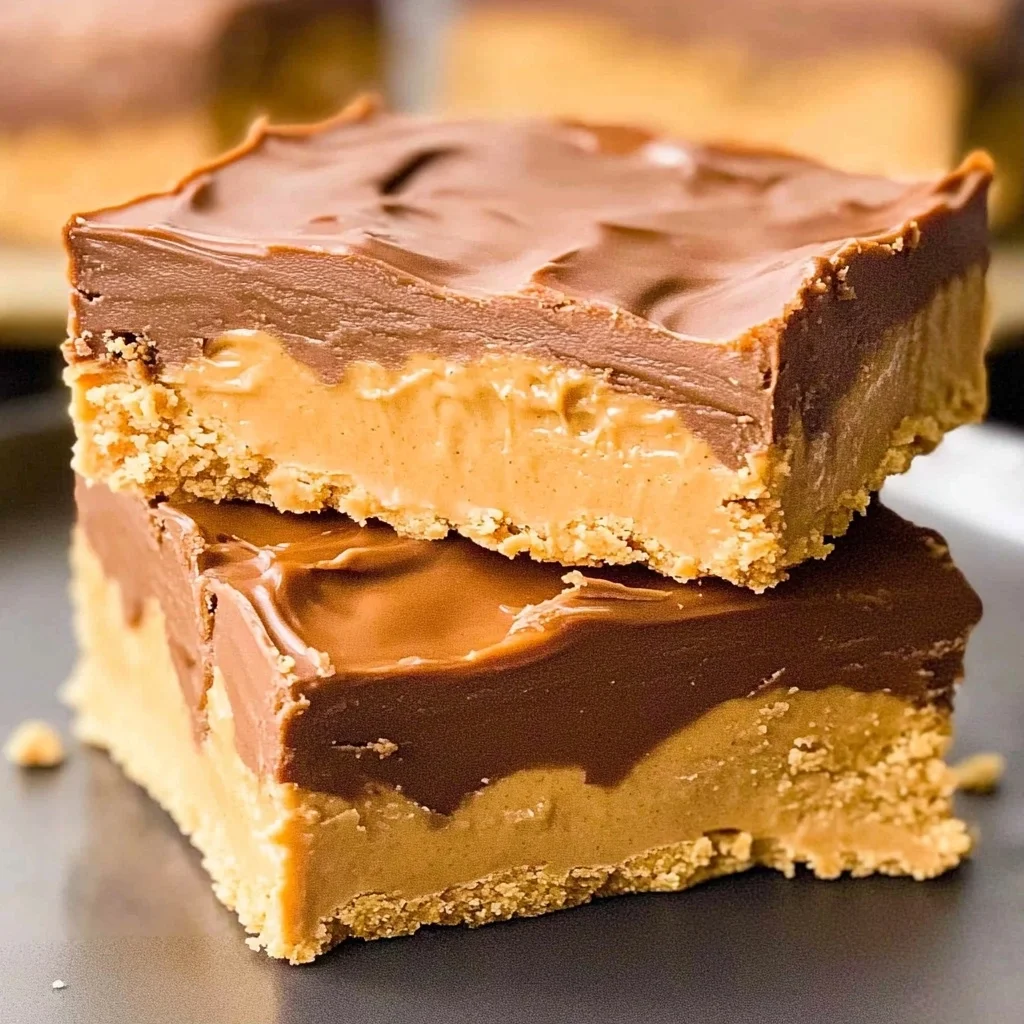
Imagine biting into a warm, chewy lunch lady peanut butter bar, where the sweet aroma of caramelized sugar mingles with the nutty essence of creamy peanut butter—pure nostalgia packed into every luscious square. Each bite delivers a delightful crunch on the outside while revealing a soft, gooey center that brings back memories of carefree school days and lunchtime delights.
These bars are not just a treat; they are an experience that transforms any gathering into a nostalgic celebration. Whether you’re reminiscing with friends or delighting your kids with a taste of your childhood, these lunch lady peanut butter bars promise to satisfy sweet cravings and spark joyful stories around the table. Get ready for a flavor adventure that’s as rich in taste as it is in cherished memories!
Why Does Everyone Love lunch lady peanut butter bars?
Rich and chewy in every bite, these bars bring back nostalgic memories of school lunches. Easy to make, with just 15 minutes of prep time, you can whip up a batch quickly for any occasion. Peanut butter lovers will rejoice at the creamy goodness, enhanced by the optional chocolate topping for an extra treat. Versatile and crowd-pleasing, they are perfect for lunchboxes or as a sweet snack at home. Enjoy this delightful blast from the past that everyone will adore!
lunch lady peanut butter bars Ingredients
- For the Batter
- 1 cup unsalted butter (softened) – This creamy base adds richness and depth to your bars.
- 1 cup granulated sugar – Sweetens the mixture, creating that delightful chewy texture we all love.
- 1 cup brown sugar (packed) – Adds moisture and a hint of caramel flavor, making these bars irresistibly rich.
- 1 cup creamy peanut butter – The star ingredient that gives these bars their nostalgic flavor reminiscent of school lunches.
- 2 large eggs – Binds the ingredients together for a perfectly chewy consistency.
- 2 cups all-purpose flour – Provides structure and stability to the bars, ensuring they hold together well.
- 1 teaspoon baking soda – Helps the bars rise slightly for a lighter texture while baking.
- 1 teaspoon vanilla extract – Enhances the overall flavor profile with a warm, sweet aroma.
- 1 teaspoon salt – Balances the sweetness and enhances the peanut butter flavor beautifully.
- For the Topping
- 1 cup chocolate chips (optional) – Sprinkle on top for an extra layer of sweetness and decadence if desired.
How to Make lunch lady peanut butter bars
1. Preheat the oven to 350°F (175°C) and grease a 9×13 inch baking pan. This step ensures your deliciously rich bars don’t stick, making for easy removal and serving.
2. Cream together 1 cup of softened unsalted butter, 1 cup of granulated sugar, 1 cup of packed brown sugar, and 1 cup of creamy peanut butter in a mixing bowl until smooth. This mixture should be light and fluffy, a perfect base for your bars.
3. Beat in the 2 large eggs one at a time, then stir in 1 teaspoon of vanilla extract. This adds that warm, familiar flavor that brings back memories of school lunches.
4. Whisk together 2 cups of all-purpose flour, 1 teaspoon of baking soda, and 1 teaspoon of salt in a separate bowl. Mixing these dry ingredients helps ensure even distribution before combining.
5. Gradually add the dry mixture to the wet ingredients, mixing until just combined. Be careful not to overmix; you want your bars to remain chewy and delightful.
6. Spread the batter evenly into the prepared baking pan using a spatula. Aim for an even layer to ensure consistent baking across all your lunch lady peanut butter bars.
7. Bake in the preheated oven for 25 minutes or until the edges are golden brown and a toothpick comes out clean from the center. The aroma will transport you back to those cherished lunchroom moments!
8. Sprinkle chocolate chips on top while the bars are still warm if desired, allowing them to melt slightly into the warm batter for an extra touch of sweetness.
9. Cool in the pan before cutting into squares. Give them at least 10-15 minutes to set; this makes slicing much easier without crumbling.
Optional: Drizzle with melted chocolate for an extra layer of indulgence!
Exact quantities are listed in the recipe card below.
Tips for the Best lunch lady peanut butter bars
- Butter Temperature: Use softened butter, not melted. This helps achieve that rich, chewy texture reminiscent of your favorite school lunch treats.
- Sugar Measurement: Ensure you pack the brown sugar tightly in the measuring cup. This will add moisture and flavor, making your bars irresistibly delicious.
- Egg Incorporation: Beat in the eggs one at a time thoroughly. This method helps to create a smooth batter without overmixing, crucial for perfect lunch lady peanut butter bars.
- Don’t Overbake: Check for doneness at 25 minutes. The edges should be golden brown while the center remains soft; overbaking leads to dry bars.
- Chocolate Chip Timing: If using chocolate chips, sprinkle them on immediately after removing from the oven. They’ll melt beautifully and create a delightful topping!
- Cooling Time: Allow the bars to cool completely in the pan before cutting. Patience here ensures clean squares that won’t crumble apart.
How to Store and Freeze lunch lady peanut butter bars

- Room Temperature: Keep your lunch lady peanut butter bars in an airtight container for up to 3 days. They’ll stay chewy and delightful, just like back in the school cafeteria!
- Fridge: If you want them to last longer, store the bars in the fridge for up to a week. Just be sure they’re well-wrapped to prevent drying out.
- Freezer: For extended storage, freeze the bars wrapped tightly in plastic wrap, then in foil or a freezer bag, for up to 3 months. Thaw at room temperature before enjoying.
- Reheating: To bring back that fresh-baked taste, warm individual bars in the microwave for about 10-15 seconds. Enjoy the nostalgia!
lunch lady peanut butter bars Your Way
Feel free to add your personal touch to these nostalgic treats for a truly delightful experience!
- Crunchy Twist: Replace creamy peanut butter with crunchy for added texture and a nutty bite. The extra crunch elevates the classic bar, making each bite more exciting and satisfying.
- Nut-Free: Substitute peanut butter with sunflower seed butter for a delicious allergy-friendly option. These bars will still be rich and chewy while accommodating those with nut allergies.
- Chocolate Lovers: Mix in 1 cup of mini chocolate chips directly into the batter for an indulgent chocolate experience. The melted chips will create pockets of gooey goodness that everyone will adore.
- Oatmeal Delight: Add 1 cup of rolled oats to the batter for a heartier texture and a hint of chewiness. This variation brings a wholesome element while still keeping the bars wonderfully sweet.
- Spicy Kick: Incorporate ½ teaspoon of cayenne pepper into the batter for a surprising spicy twist. This unexpected heat pairs beautifully with the sweetness, creating an exciting flavor profile.
- Coconut Bliss: Fold in 1 cup of shredded coconut for a tropical flair that complements the peanut butter. The coconut adds both flavor and texture, transporting you to summer with every bite.
- Maple Infusion: Swap half of the granulated sugar for pure maple syrup to infuse natural sweetness. This twist not only enhances the flavor but also provides a subtle richness that’s utterly divine.
Make Ahead Options
These lunch lady peanut butter bars are perfect for meal prep, allowing you to savor those nostalgic flavors without the last-minute rush. You can prepare many components in advance, starting with the base: simply cream together 1 cup of softened unsalted butter, 1 cup of granulated sugar, 1 cup of packed brown sugar, and 1 cup of creamy peanut butter up to 24 hours ahead. Once ready to bake, just mix in the eggs, vanilla extract, and your dry ingredients – 2 cups of all-purpose flour, 1 teaspoon each of baking soda and salt. After baking for about 25 minutes, let them cool before cutting into squares. For optimal flavor and texture, store them at room temperature for up to 3 days or freeze for up to a month; just remember to let them thaw completely before serving. With these easy make-ahead steps, your lunch lady peanut butter bars will be fresh and delightful whenever you’re ready to indulge!
lunch lady peanut butter bars Recipe FAQs
What type of peanut butter should I use for these bars?
For the best results, use creamy peanut butter. It blends seamlessly into the batter, providing that signature rich flavor and smooth texture. If you prefer a bit of crunch, you can opt for crunchy peanut butter, but be aware that it will change the texture slightly.
How should I store leftover peanut butter bars?
To keep your delicious lunch lady peanut butter bars fresh, store them in an airtight container at room temperature for up to 5 days. If you live in a warm climate, consider refrigerating them to maintain their chewy texture and prevent any melting!
Can I freeze these bars for later?
Absolutely! You can freeze the baked bars by wrapping them tightly in plastic wrap or aluminum foil and placing them in a freezer-safe container. They’ll stay fresh for up to 3 months. When you’re ready to enjoy them, simply thaw at room temperature or pop them in the microwave for a few seconds to warm them up.
I’m not sure if my bars are done baking; how do I check?
After 25 minutes of baking at 350°F (175°C), look for golden-brown edges as a visual cue that they’re ready. You can also insert a toothpick into the center; if it comes out with just a few moist crumbs (not wet batter), your bars are perfect!
What’s the serving size for this recipe?
This recipe yields about 16 delicious squares, making it perfect for sharing with family or friends! Each serving is approximately 300 calories, so you can indulge without too much guilt—just like those beloved school lunches!
Can I add more toppings to my peanut butter bars?
Definitely! While chocolate chips are a classic topping that complements the rich flavor of peanut butter beautifully, feel free to get creative. Chopped nuts, shredded coconut, or even drizzling with caramel sauce can elevate your lunch lady peanut butter bars even further!
Lunch Lady Peanut Butter Bars
Ingredients
Method
- Preheat the oven to 350°F (175°C). Grease a 9x13 inch baking pan.
- In a mixing bowl, cream together the softened butter, granulated sugar, brown sugar, and peanut butter until smooth.
- Beat in the eggs one at a time, then stir in the vanilla extract.
- In a separate bowl, whisk together the flour, baking soda, and salt.
- Gradually add the dry ingredients to the wet mixture, mixing until just combined.
- Spread the batter evenly into the prepared baking pan.
- Bake in the preheated oven for 25 minutes, or until the edges are golden brown.
- If using, sprinkle chocolate chips on top while the bars are still warm, allowing them to melt slightly.
- Let the bars cool in the pan before cutting into squares.